
「3Dでキレイな部屋をつくってみたい」
「無料の3Dソフトで漫画用の背景をつくってみたい」
「3Dのモデリングがおもしろそう」
・・・でも
「ムズかしそう」
「何から始めればいいか、わからない」
と悩んでいませんか?
このページでは、だれでも、できる方法で、3Dの景観・建築のつくり方を紹介しています
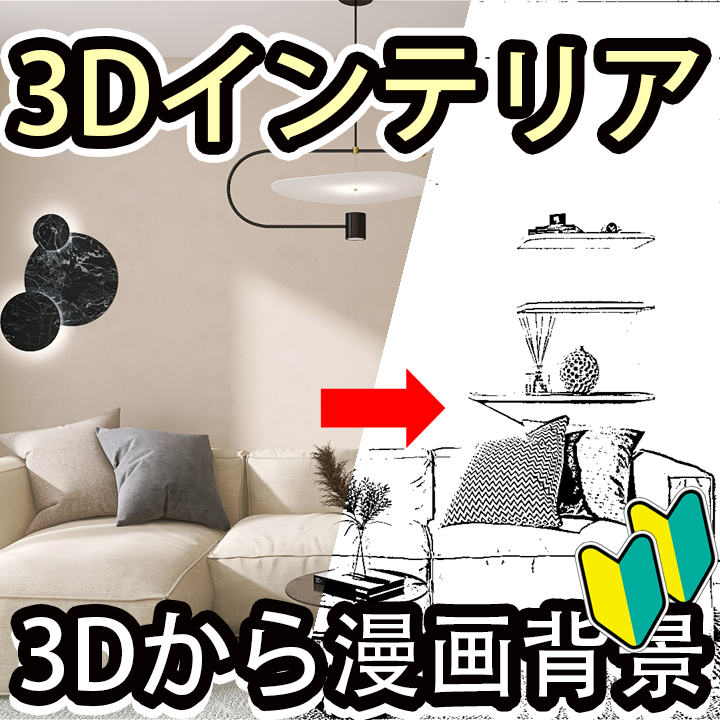
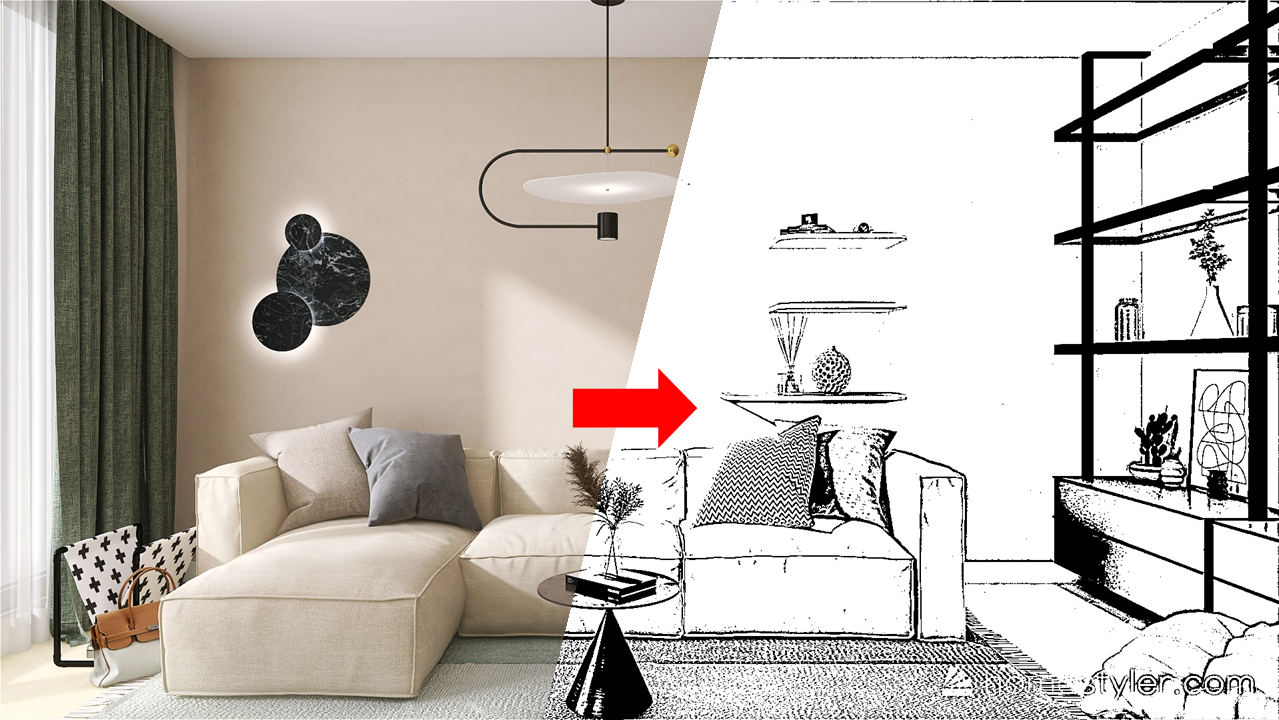
今回は無料ソフト「Homestyler」と「Gimp」を使って、3D建物と漫画用背景のつくり方を紹介します
ぜひ、チャレンジしてください
つぎの目次の流れにそって進めます
Youtubeでさらにくわしく、絵と映像のつくり方を紹介しています
>> イラスト55 @ クリエイティブ情報を紹介
・「Homestyler」で何ができるの?
Homestylerは3Dソフト大手のAutoDesk社が初めは開発していたソフトです
このため、とてもキレイな絵が無料でつくれます
Homestylerはオンラインで3Dの部屋のインテリアデザインや建築がつくれるソフトです
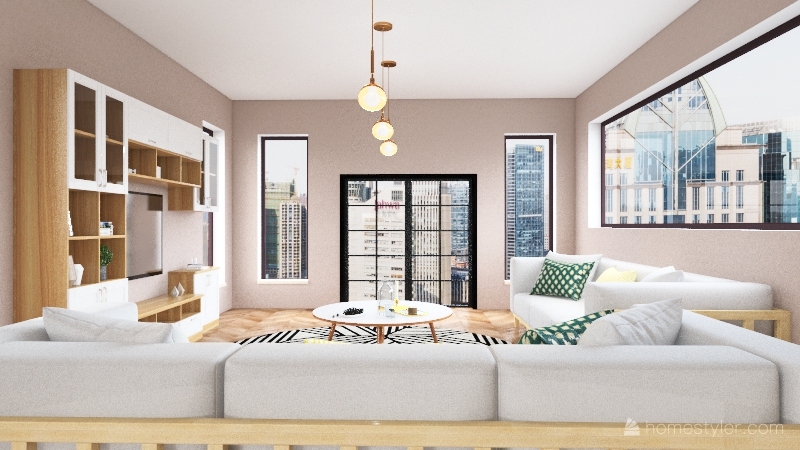
無料で下のようなキレイな画像をブラウザソフトで作ることができます
このため、インターネットを見れるPCであれば、キレイな3Dを作ることができます
・「Homestyler」の始め方 & 3Dインテリアの作り方
・今回紹介する絵の作り方

今回紹介する絵のつくり方です
3Dのキレイな絵から漫画用の背景をつくります
・Homestylerをはじめよう
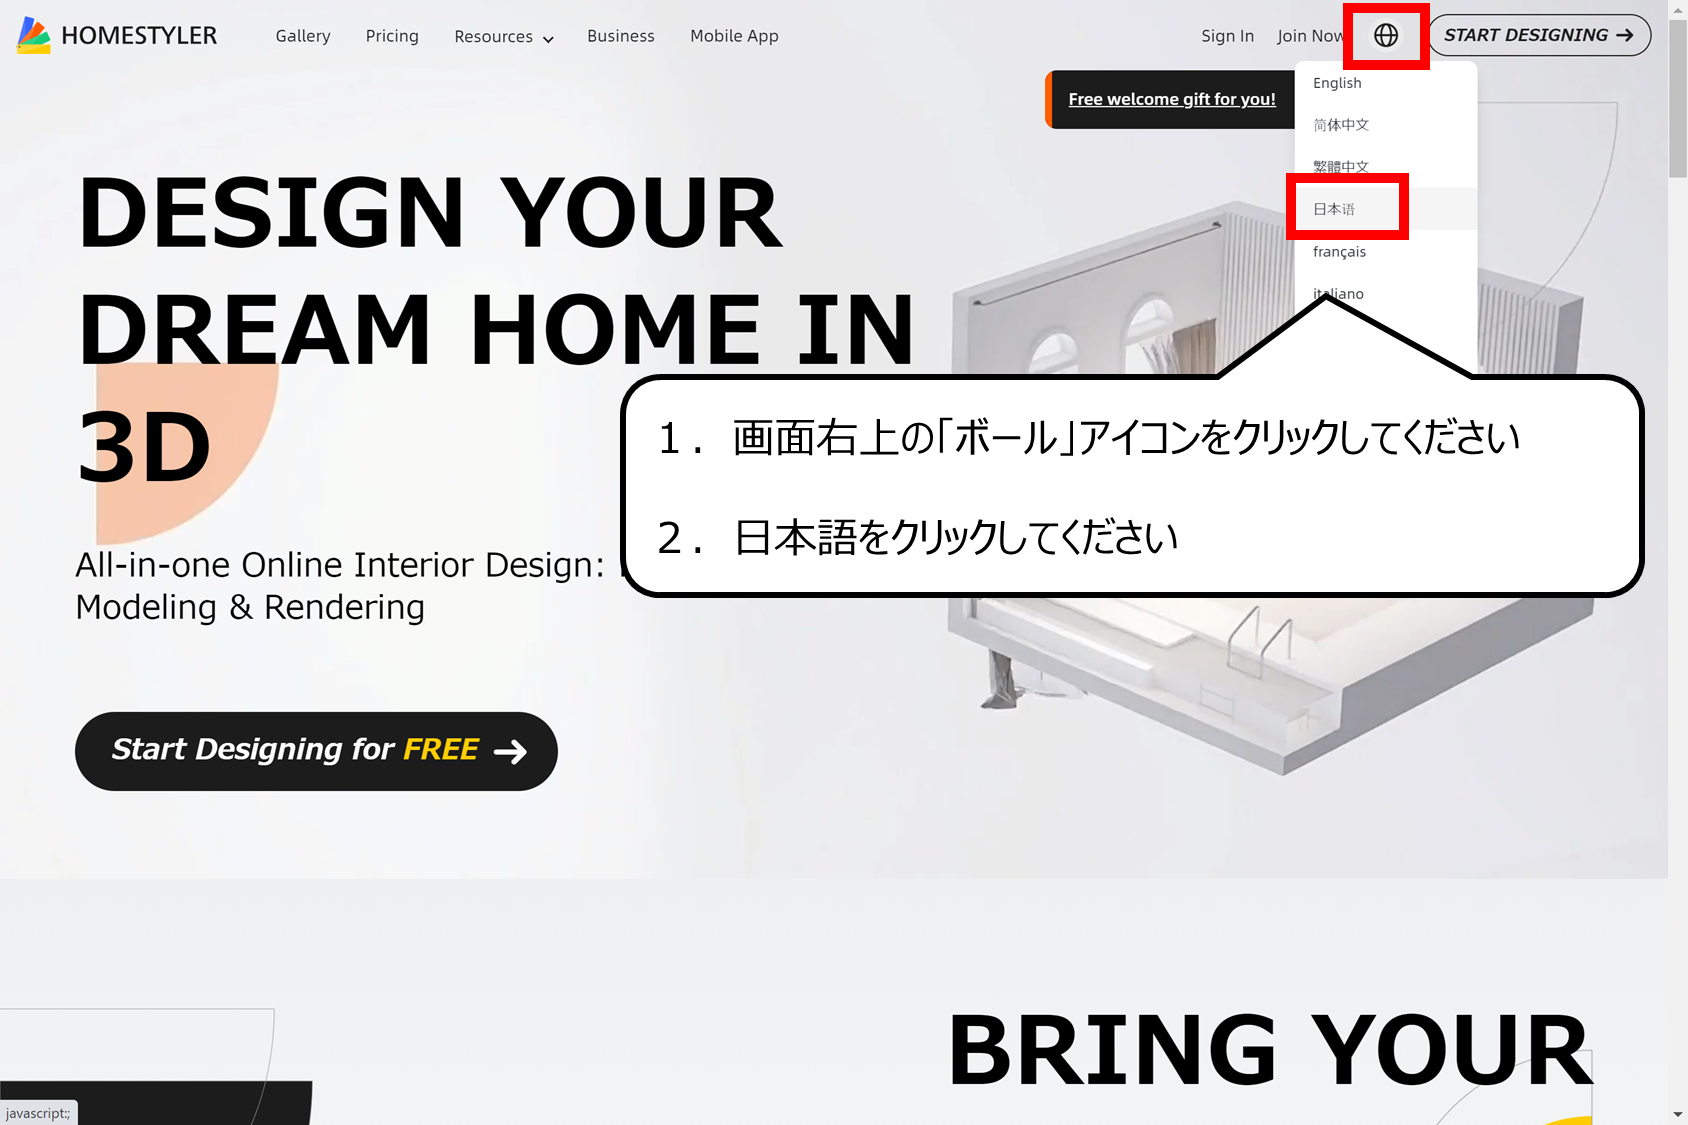
英語を日本語に変えることができます
1.「Homestyler」の公式サイトにアクセスしてください
< Homestyler公式サイト >
https://www.homestyler.com/?lang=ja_JP
1.画面右上の「ボール」アイコンをクリックしてください
2.日本語をクリックしてください
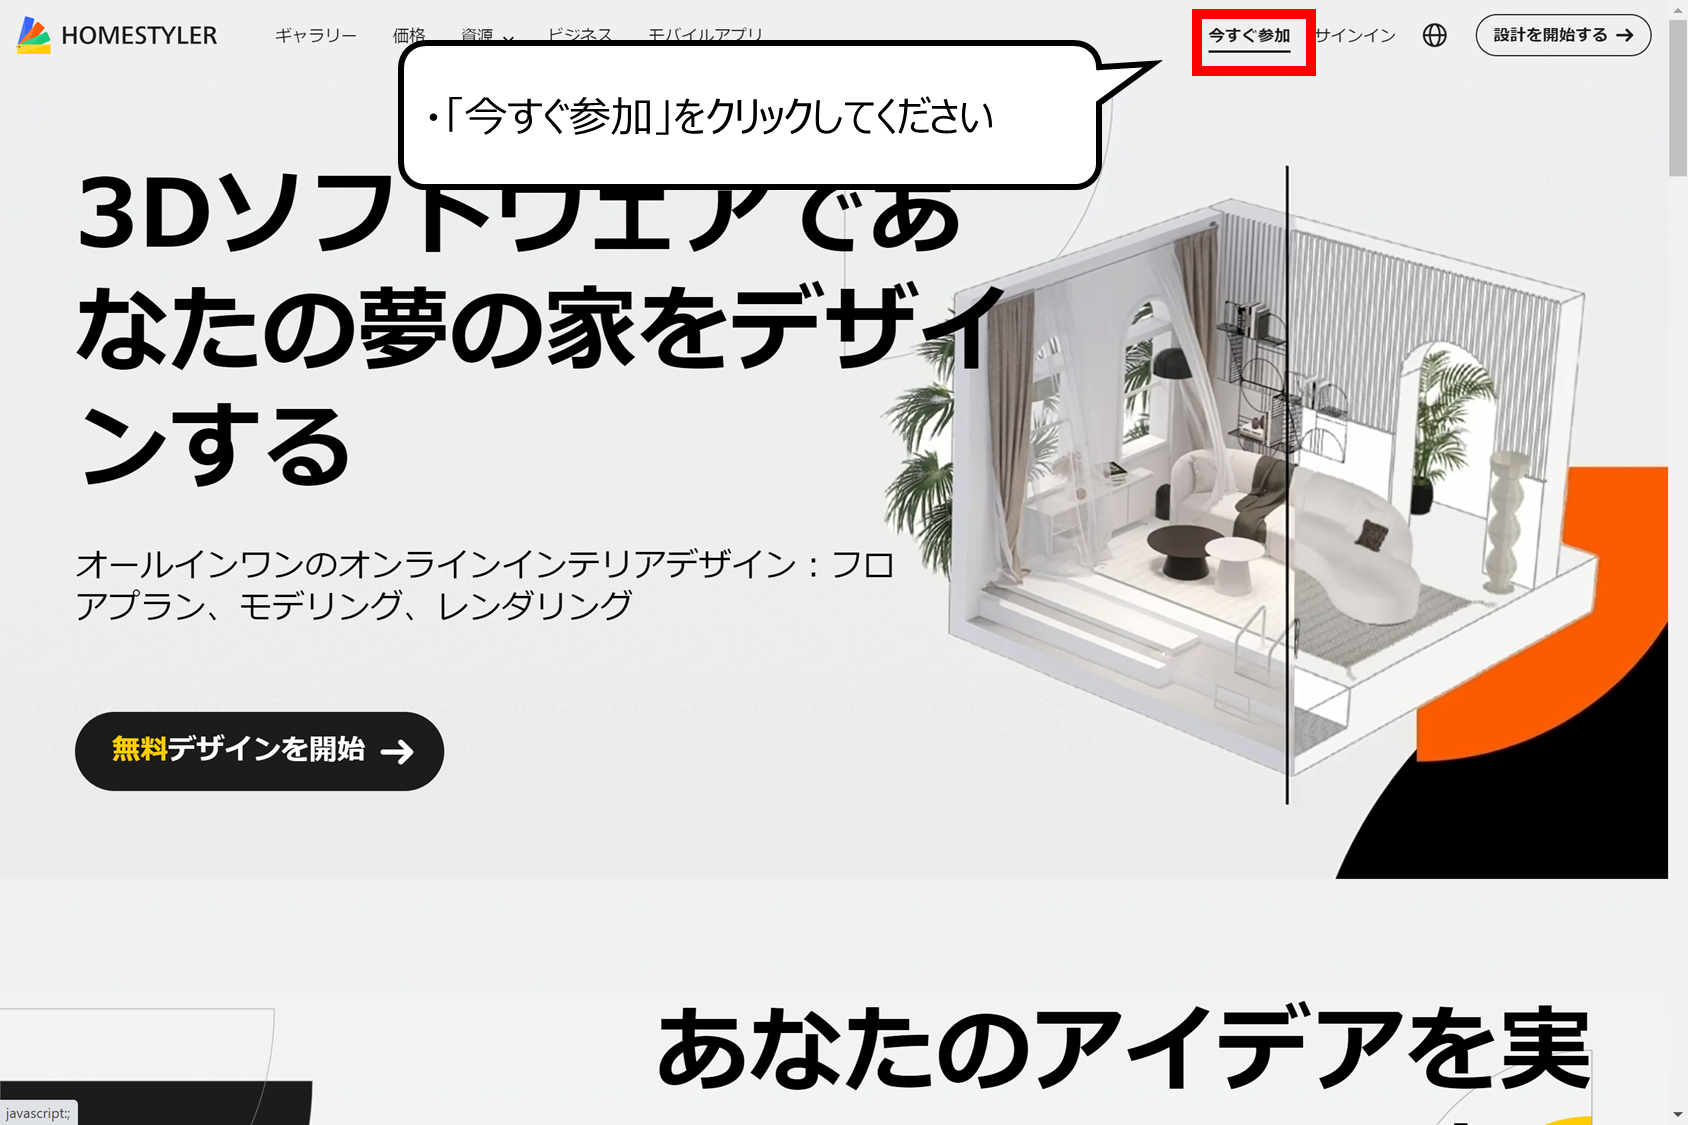
アカウントをつくります
・「今すぐ参加」をクリックしてください
SNSのアカウントでもつくれます
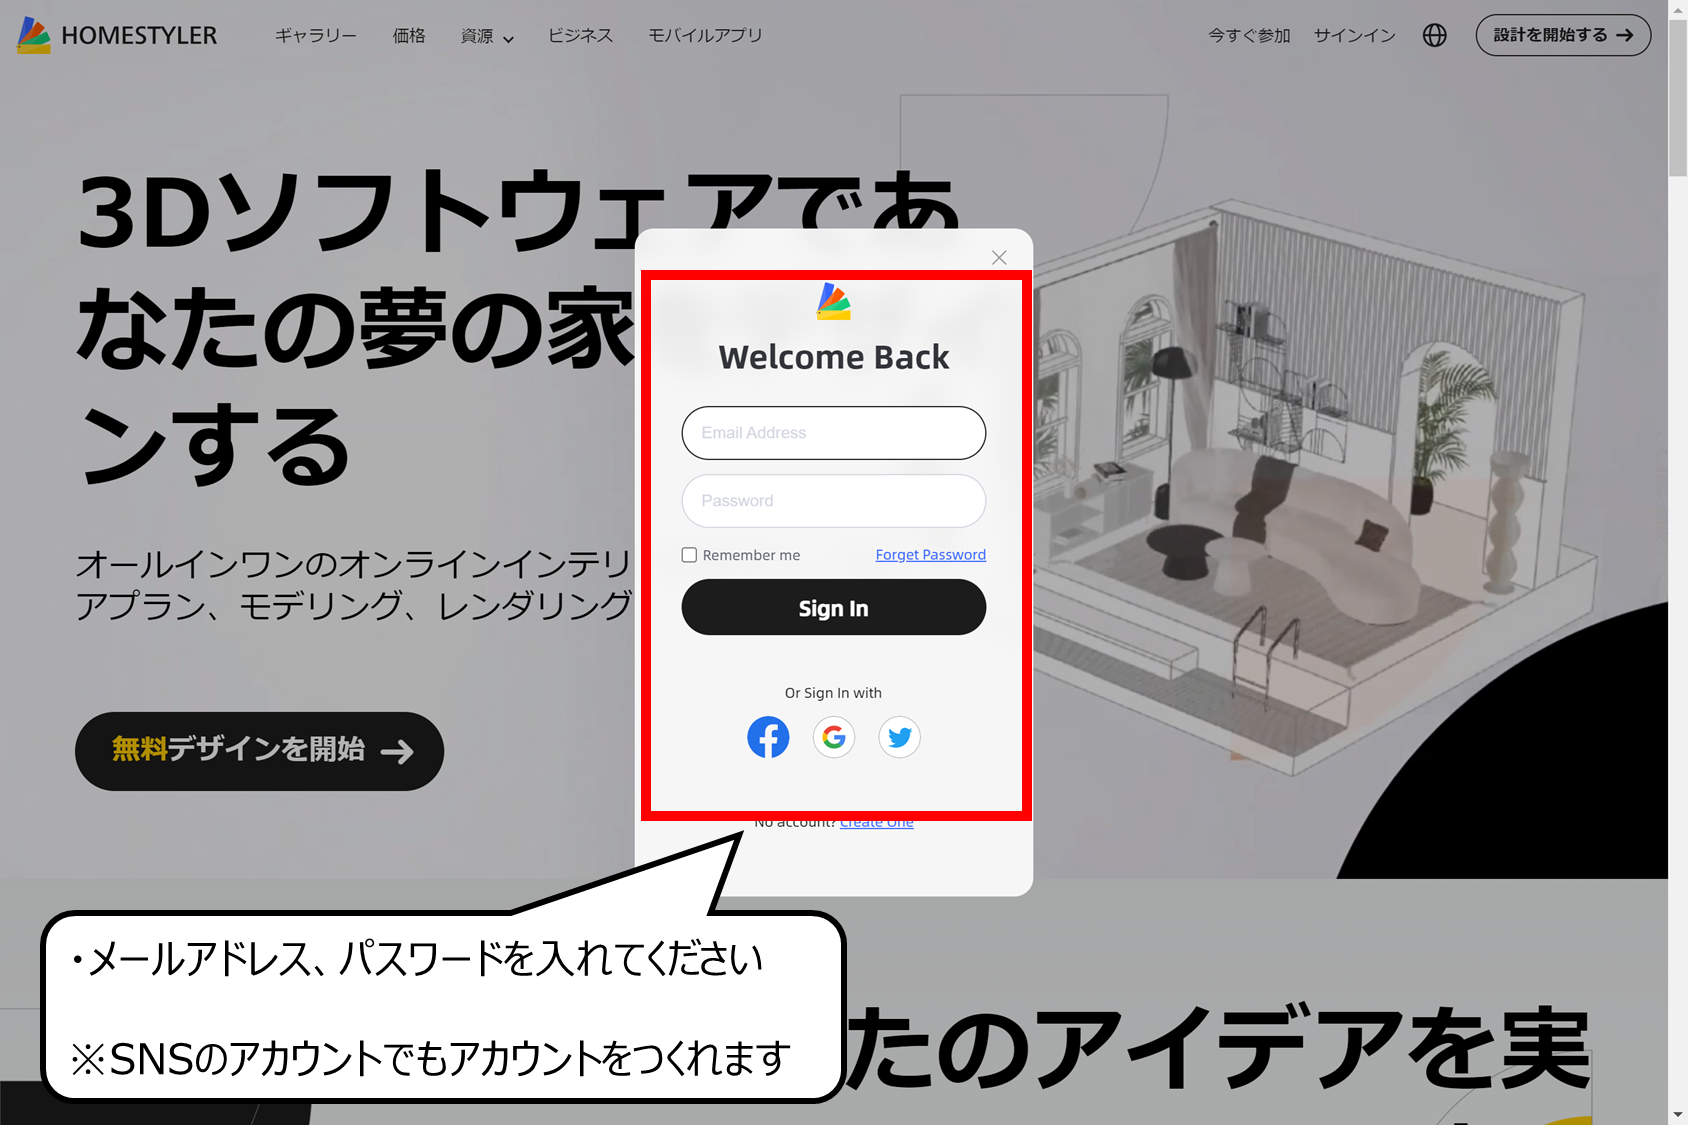
・メールアドレス、パスワードを入れてください
※SNSのアカウントでもアカウントをつくれます
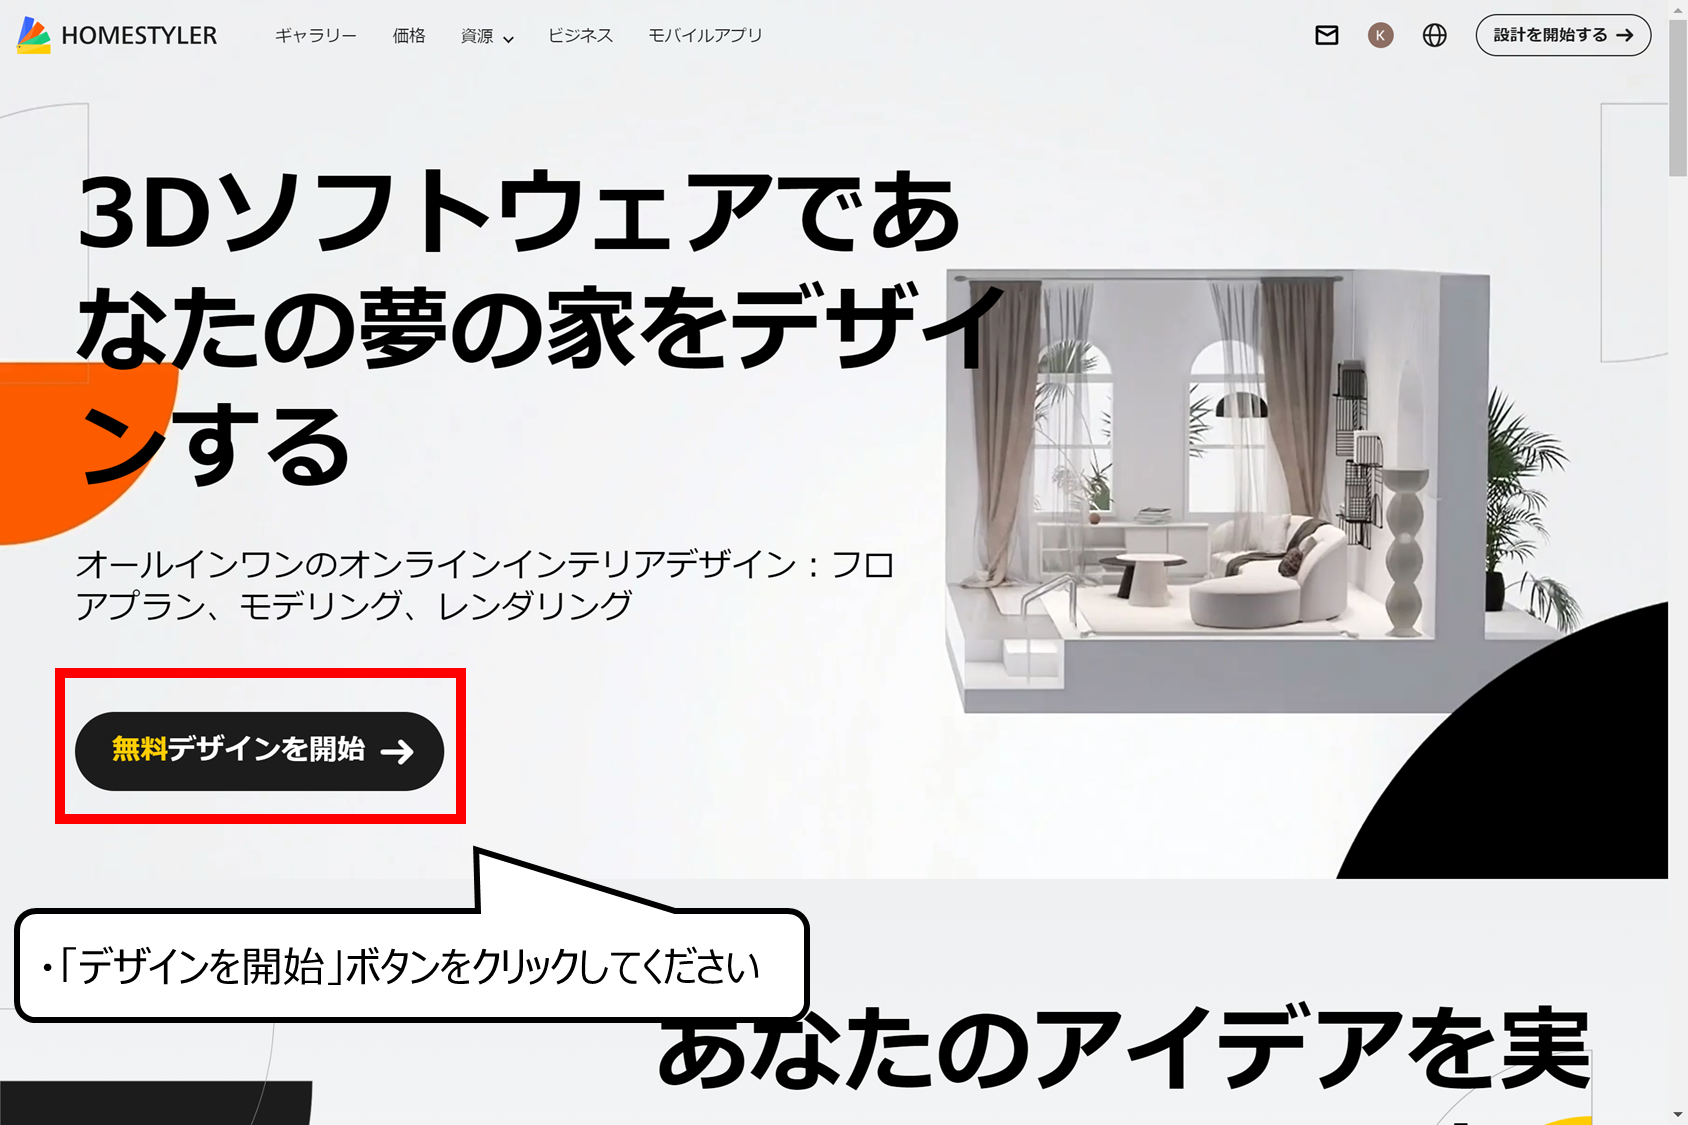
「デザインを開始」ボタンをクリックして始めることができます
・「デザインを開始」ボタンをクリックしてください
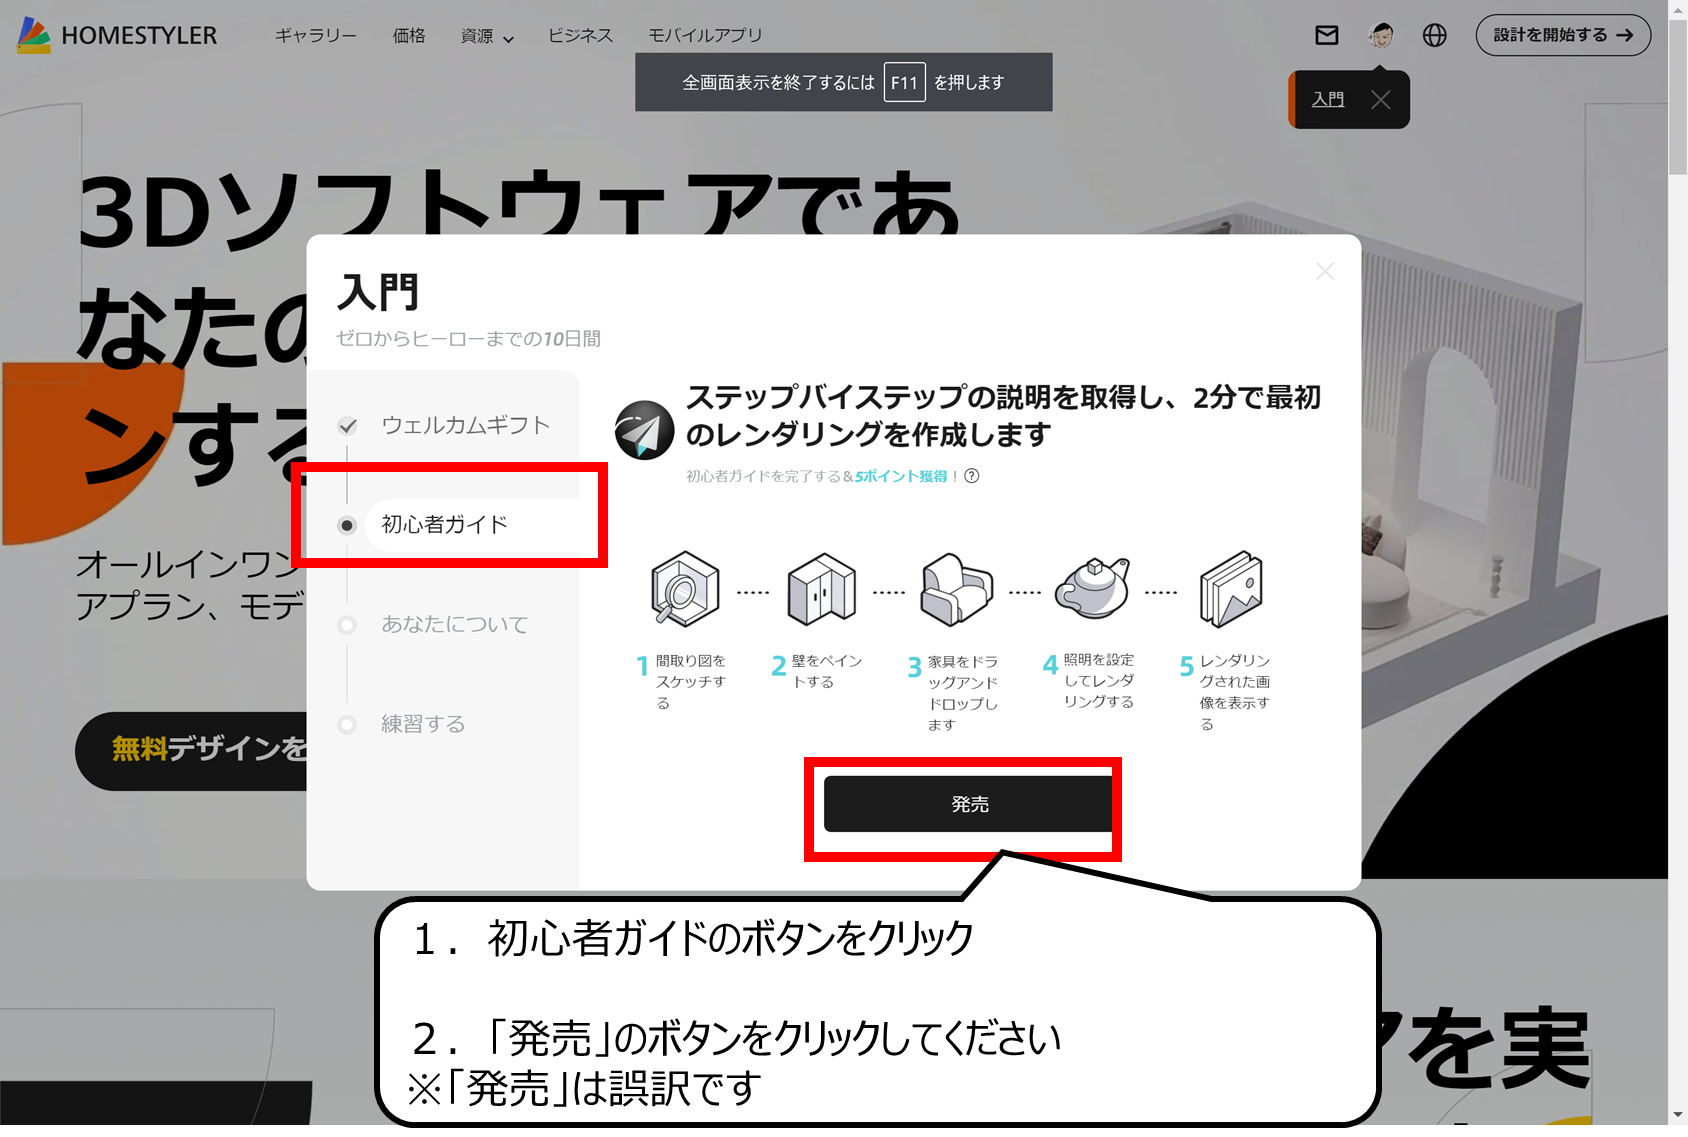
初心者ガイドがあらわれます
1.初心者ガイドのボタンをクリック
2.「発売」のボタンをクリックしてください
※「発売」は誤訳です
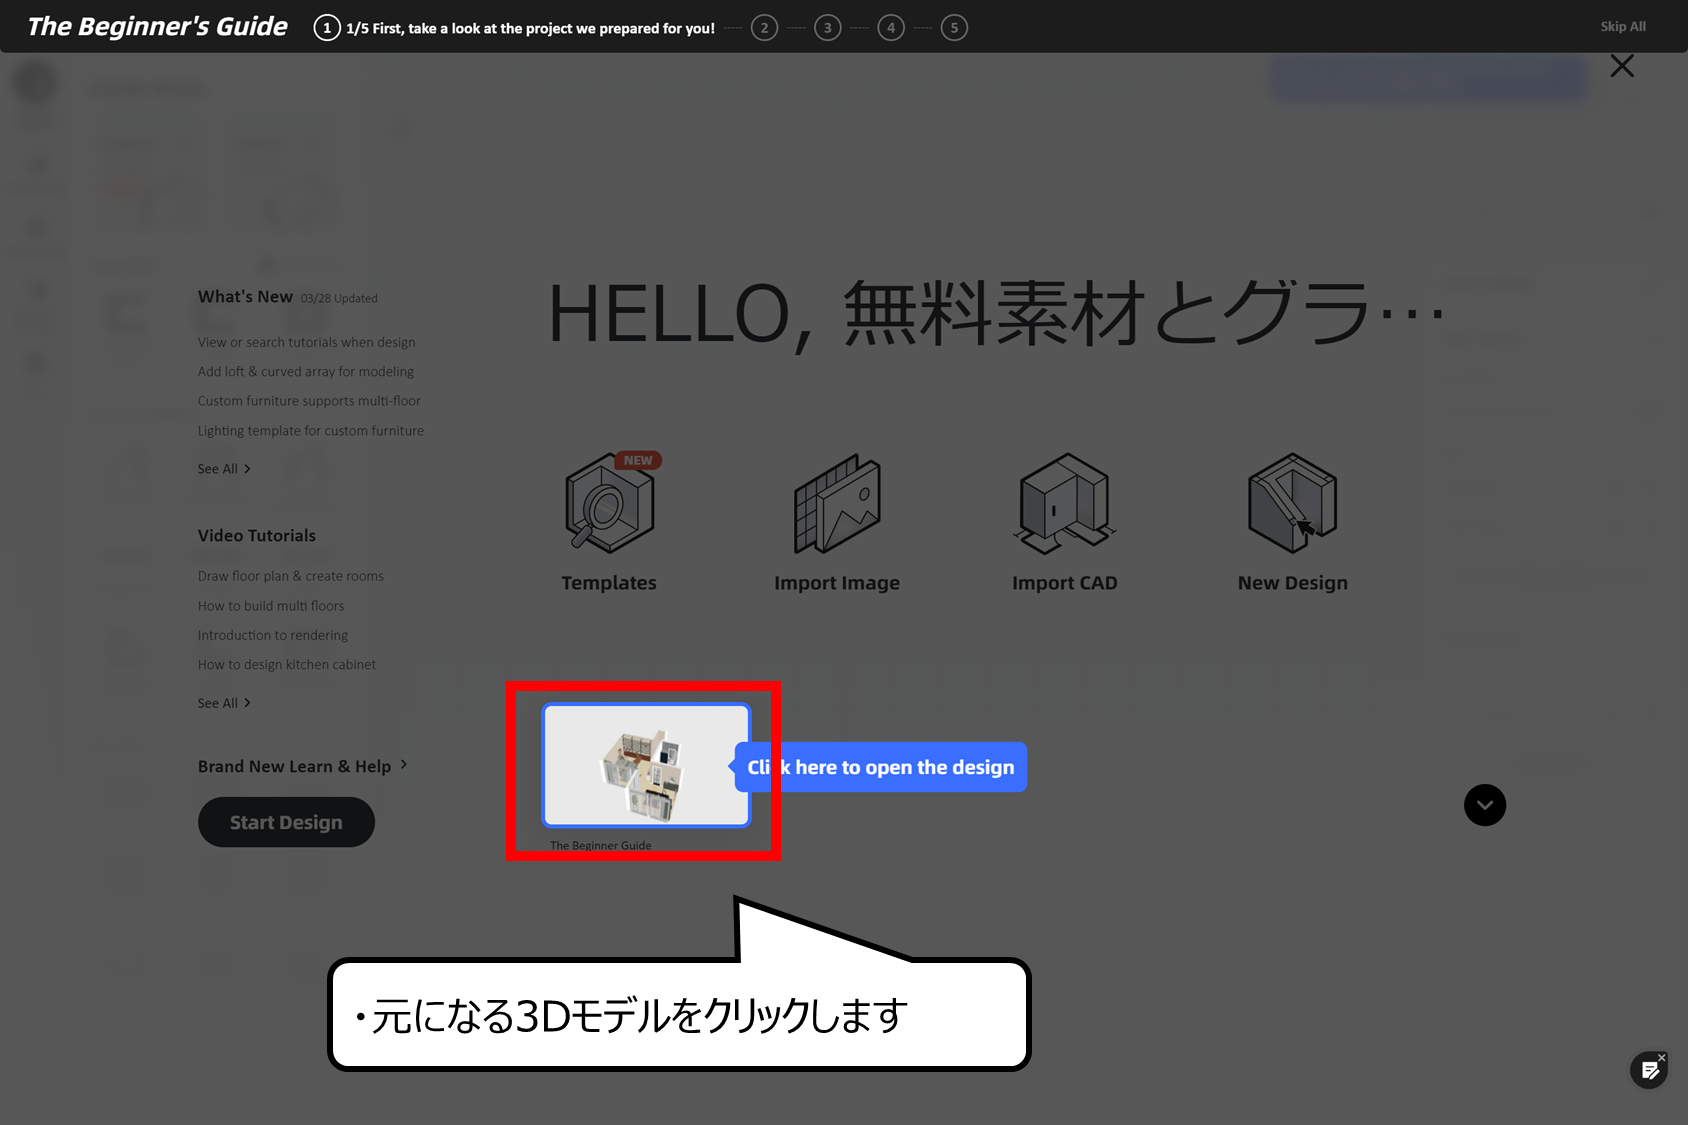
元になる3Dモデルをクリックします
・元になる3Dモデルをクリックします
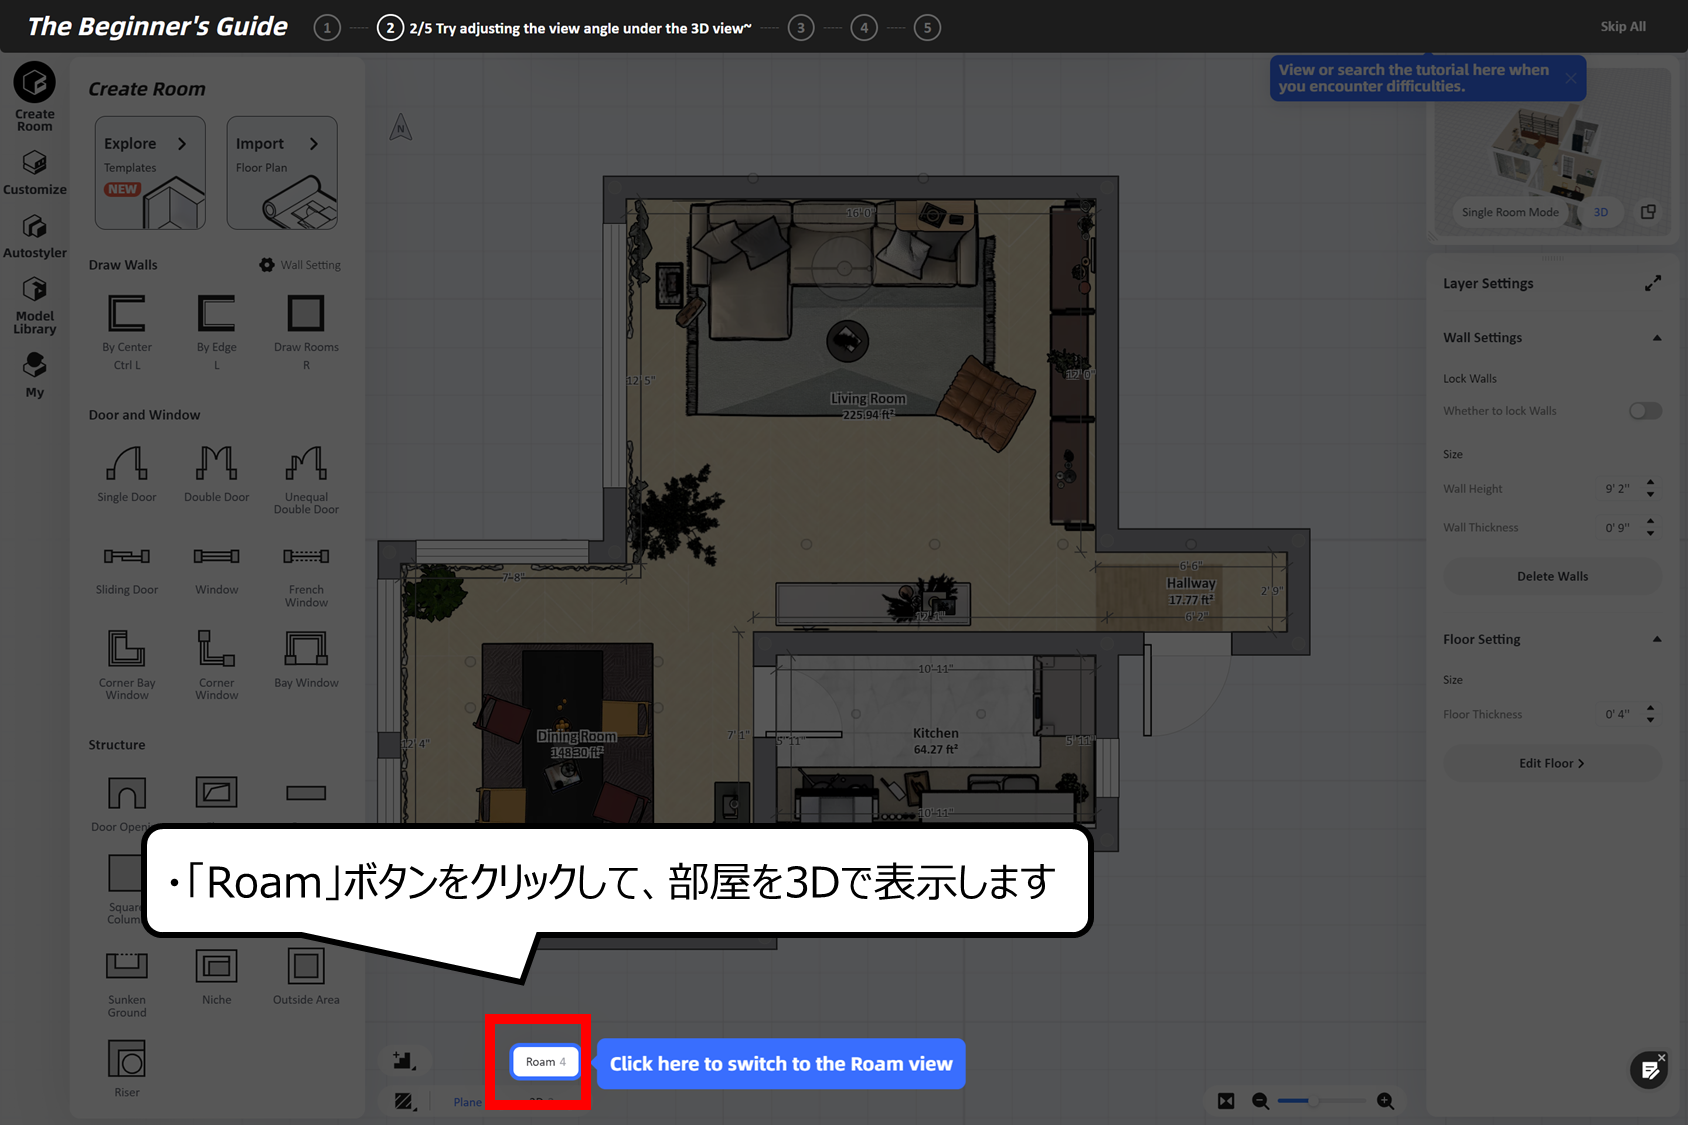
部屋を3Dで表示することができます
・「Roam」ボタンをクリックして、部屋を3Dで表示します
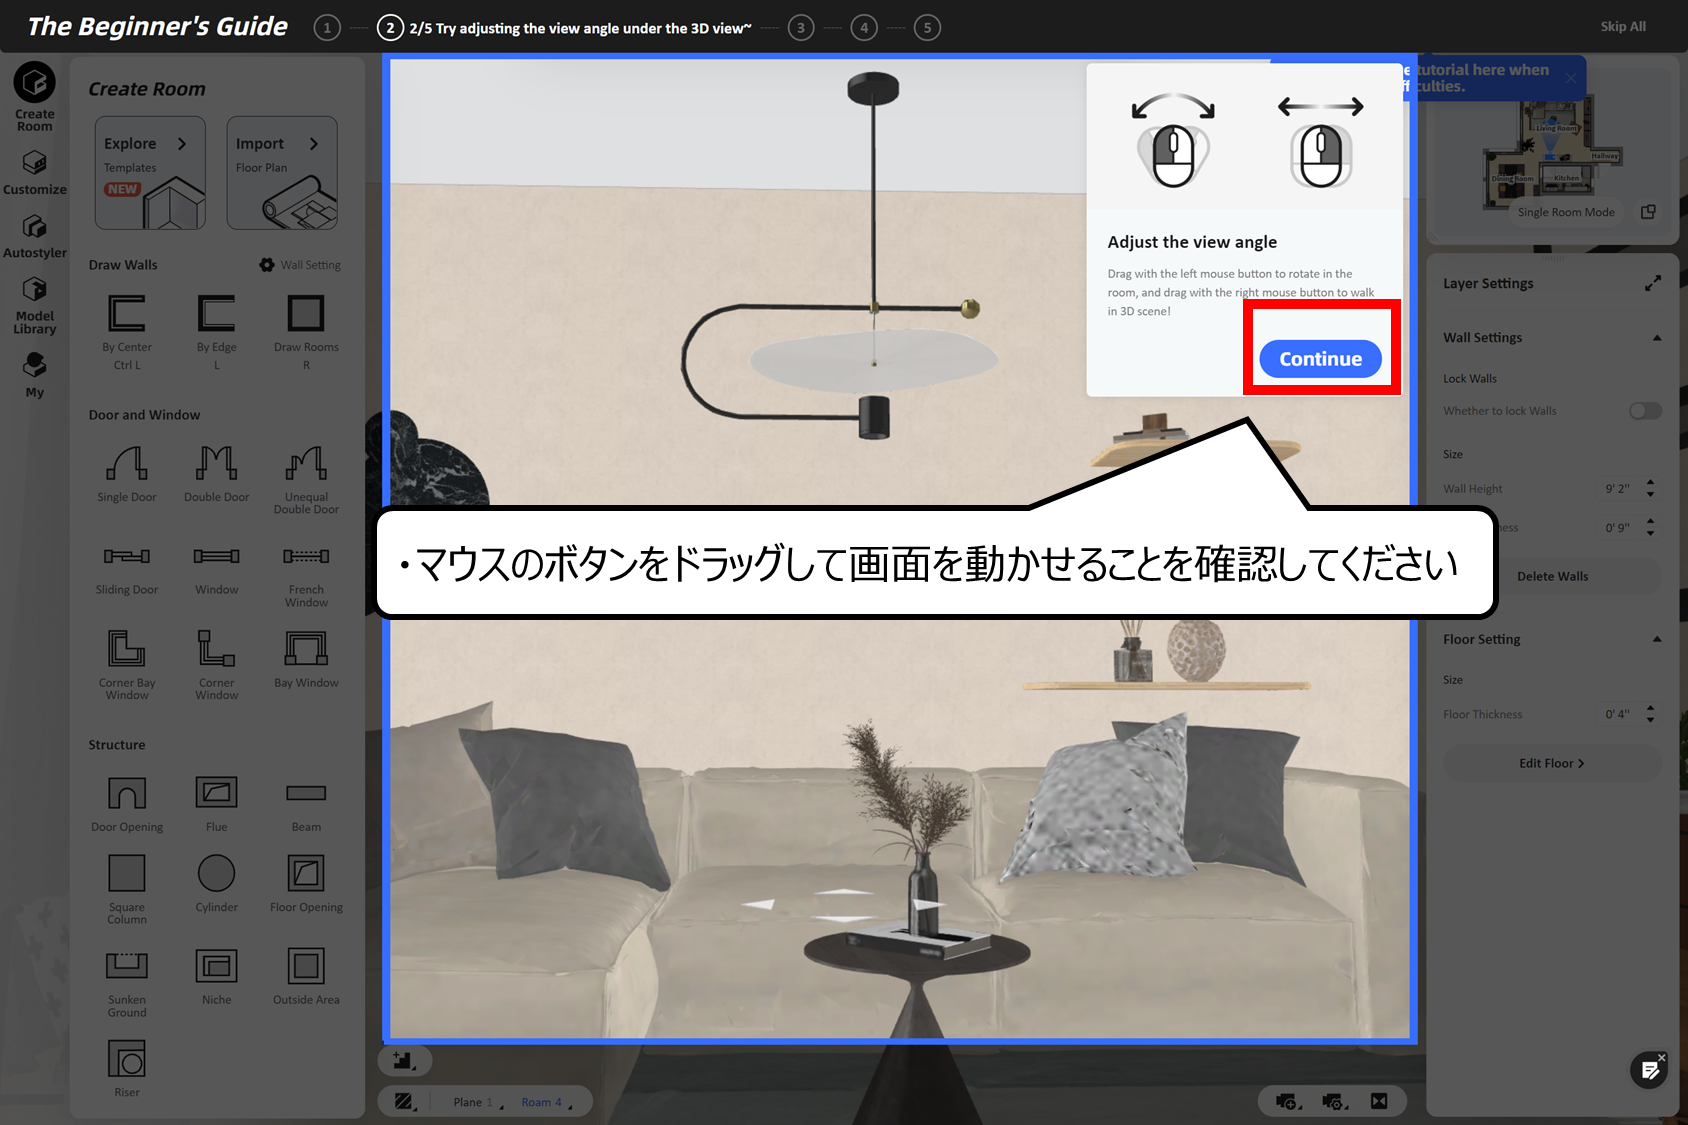
マウスで画面を動かすことができます
・マウスのボタンをドラッグして画面を動かせることを確認してください
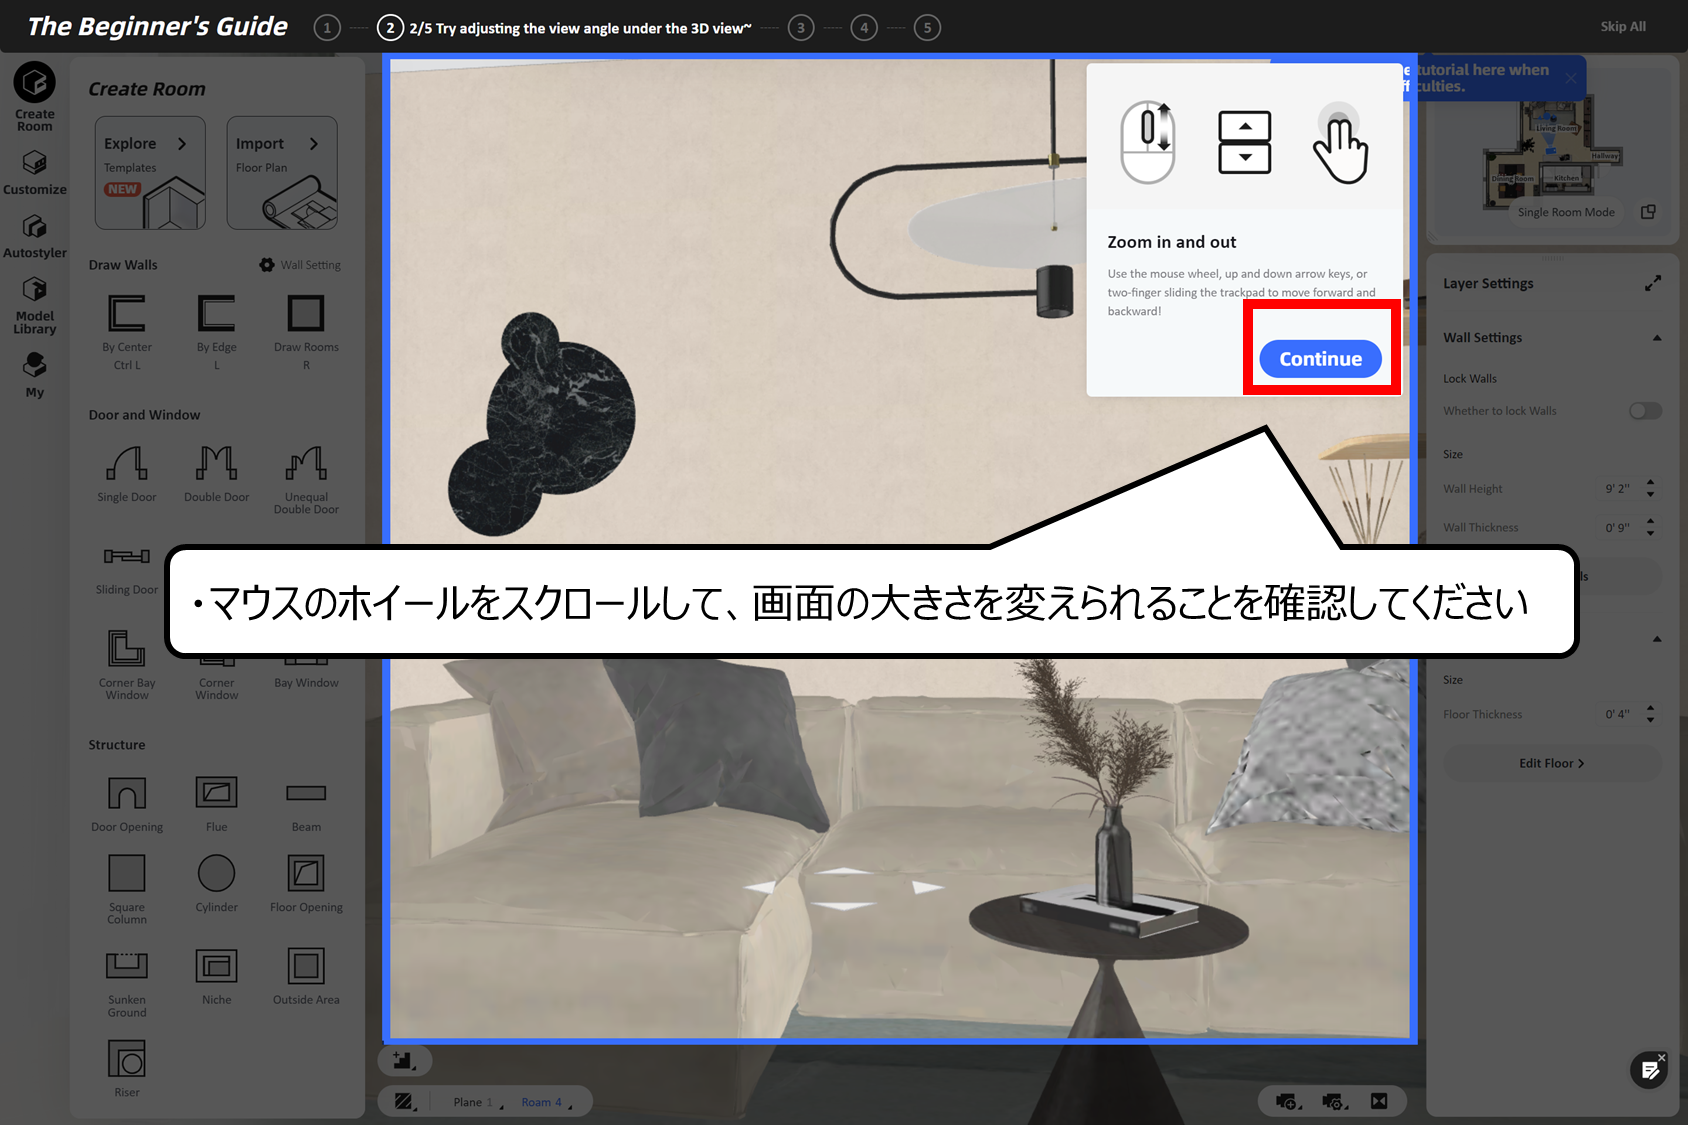
マウスホイールで画面の大きさを変えることができます
・マウスのホイールをスクロールして、画面の大きさを変えられることを確認してください
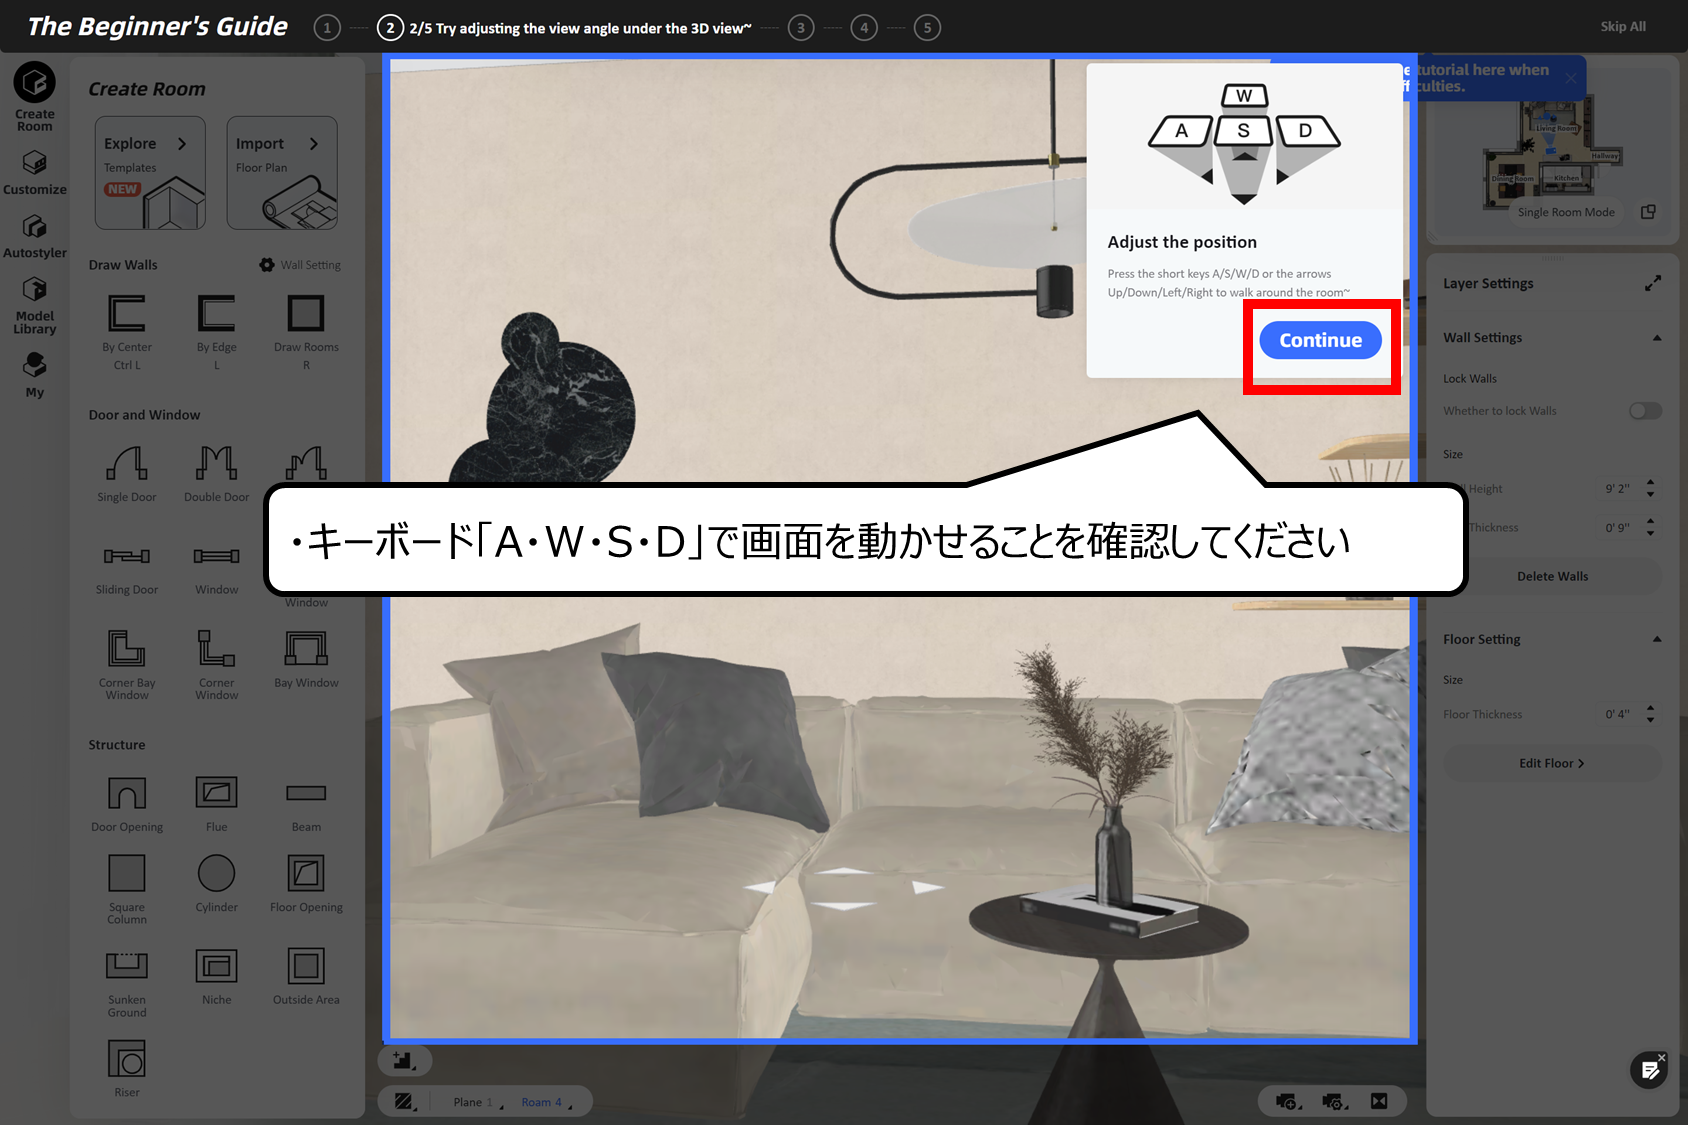
キーボードで画面を動かすことができます
・キーボード「A・W・S・D」で画面を動かせることを確認してください
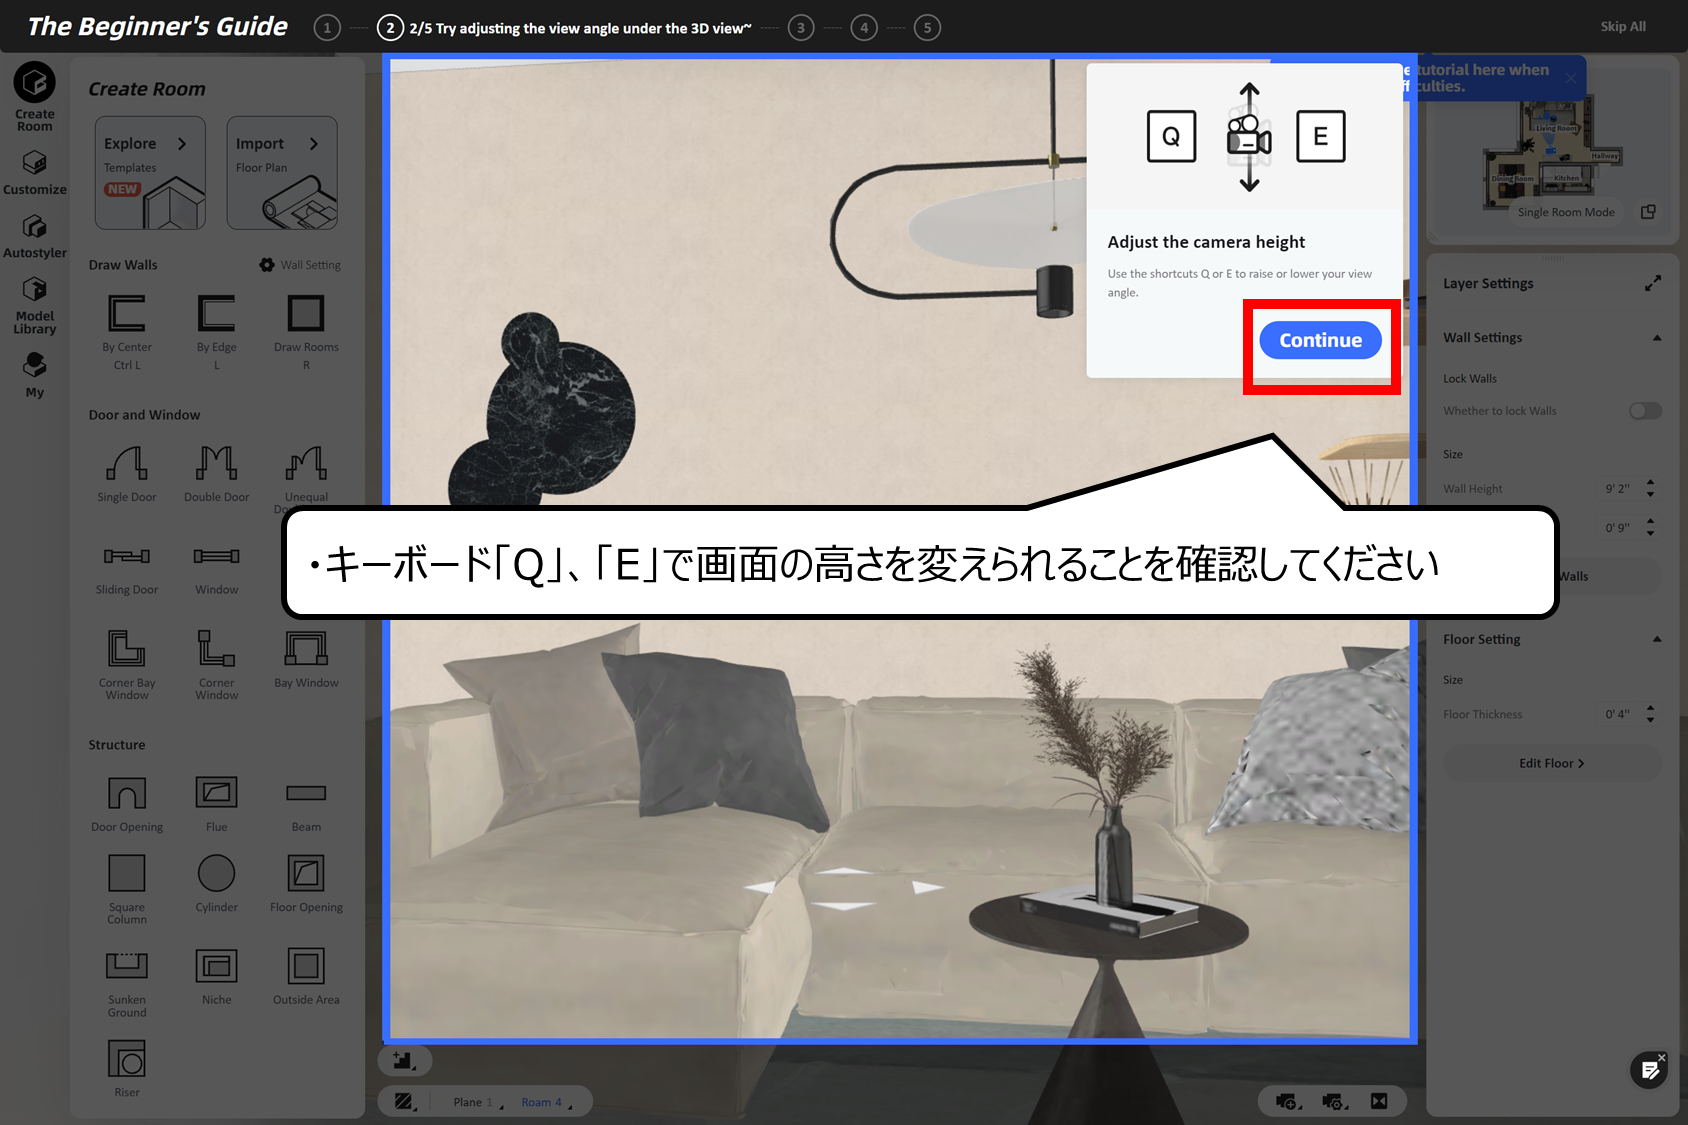
「Q・E」で画面の高さを変えられます
・キーボード「Q」、「E」で画面の高さを変えられることを確認してください
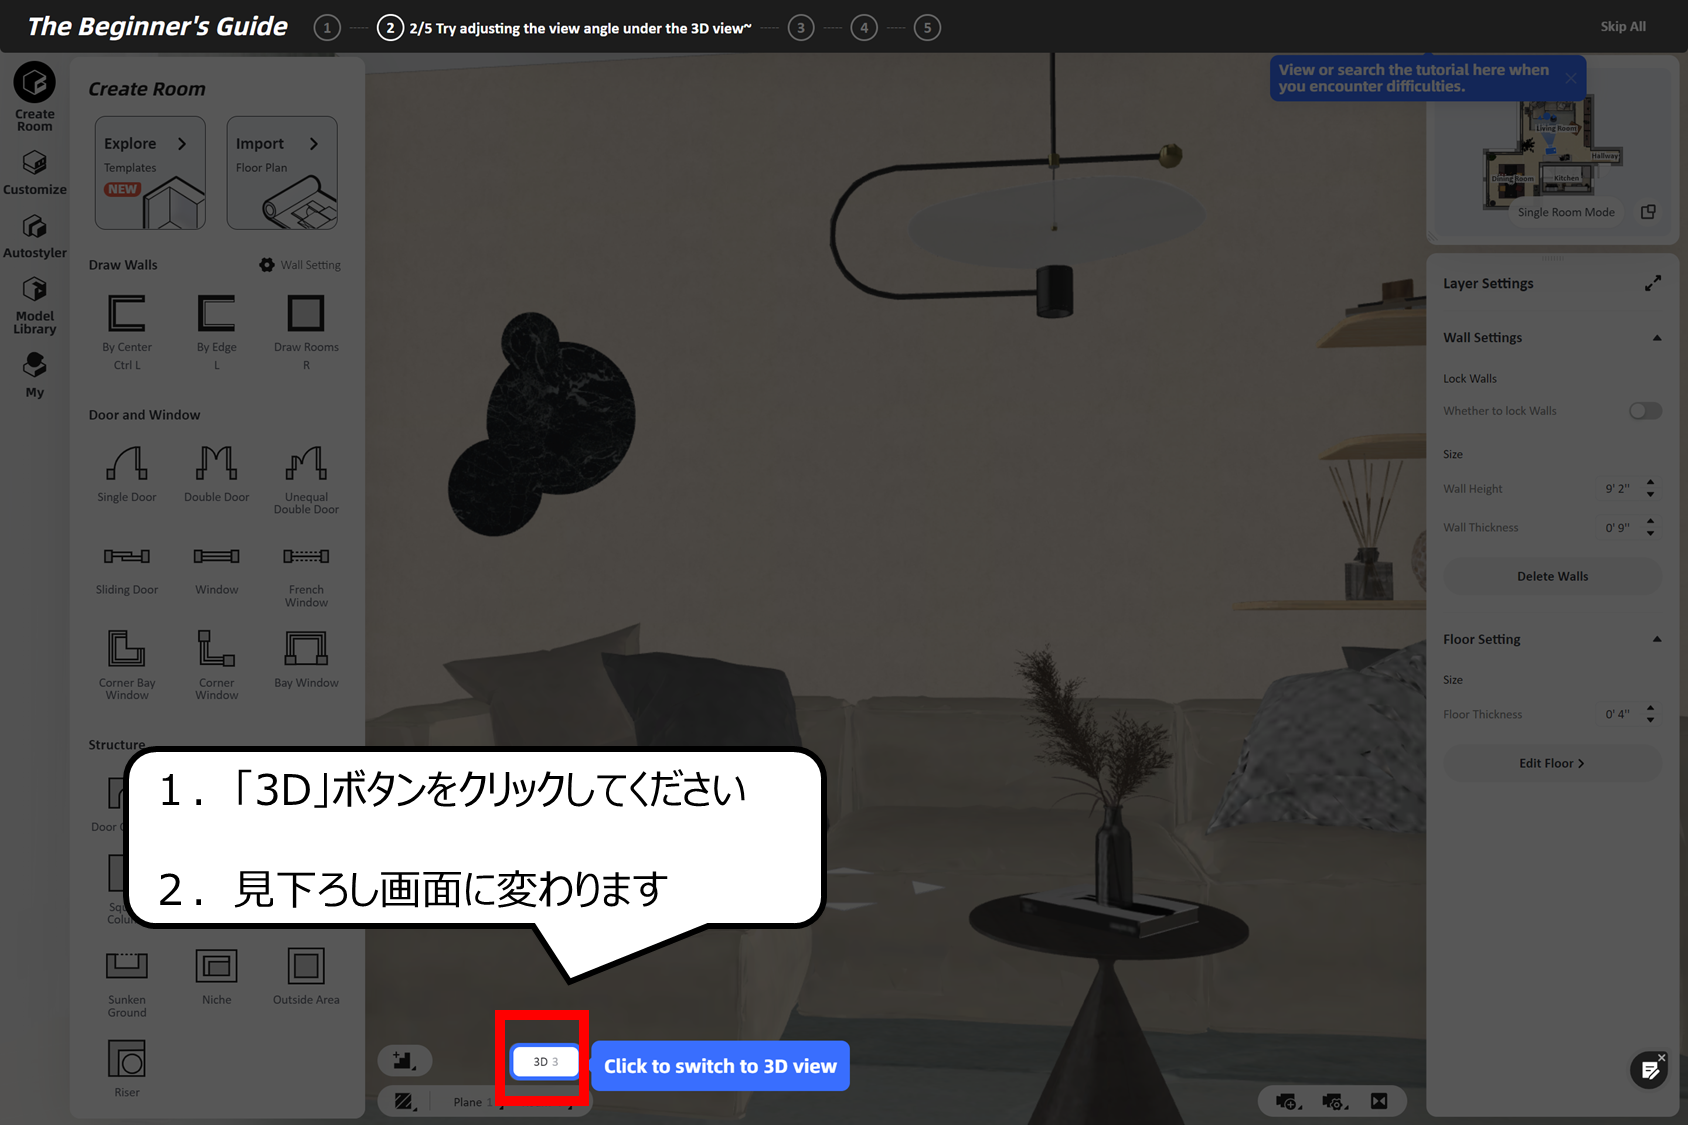
3Dボタンをクリックすると見おろし視点になります
1.「3D」ボタンをクリックしてください
2.見下ろし画面に変わります
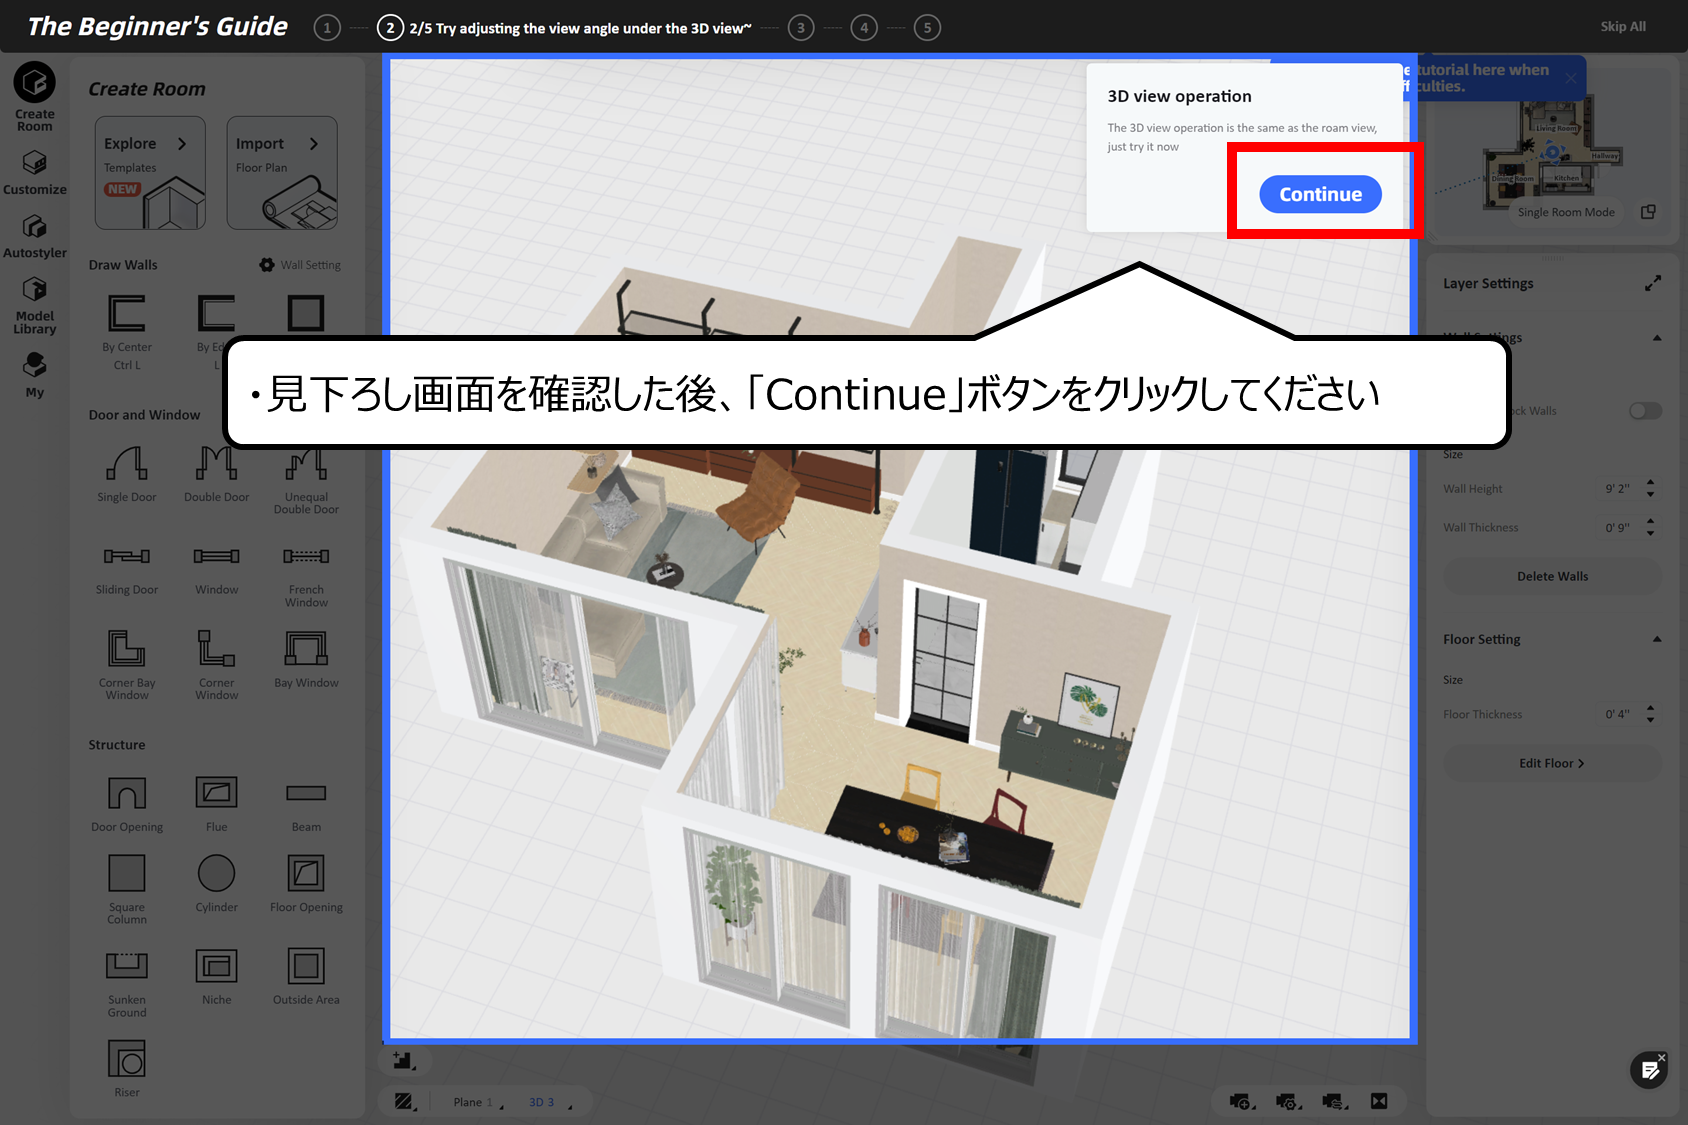
見下ろし画面でも向きや大きさを変えられれます
・見下ろし画面を確認した後、「Continue」ボタンをクリックしてください
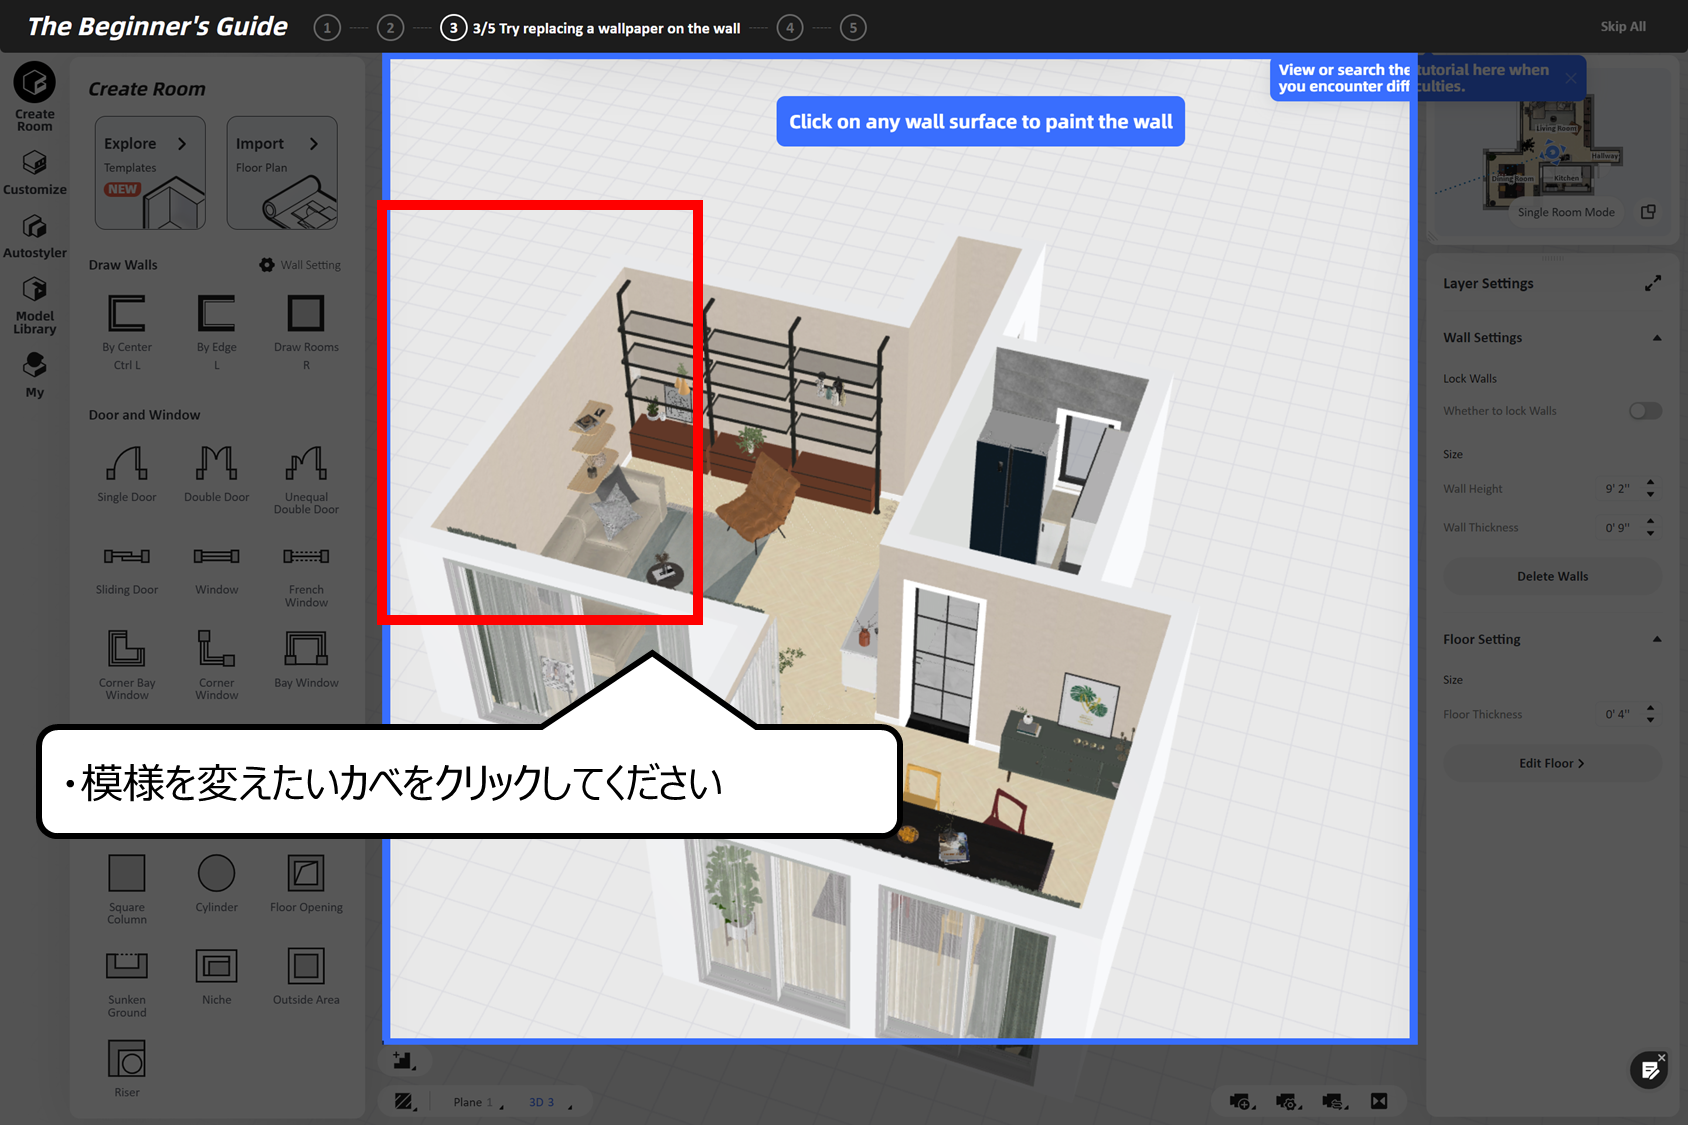
カベの模様を変えることができます
・模様を変えたいカベをクリックしてください
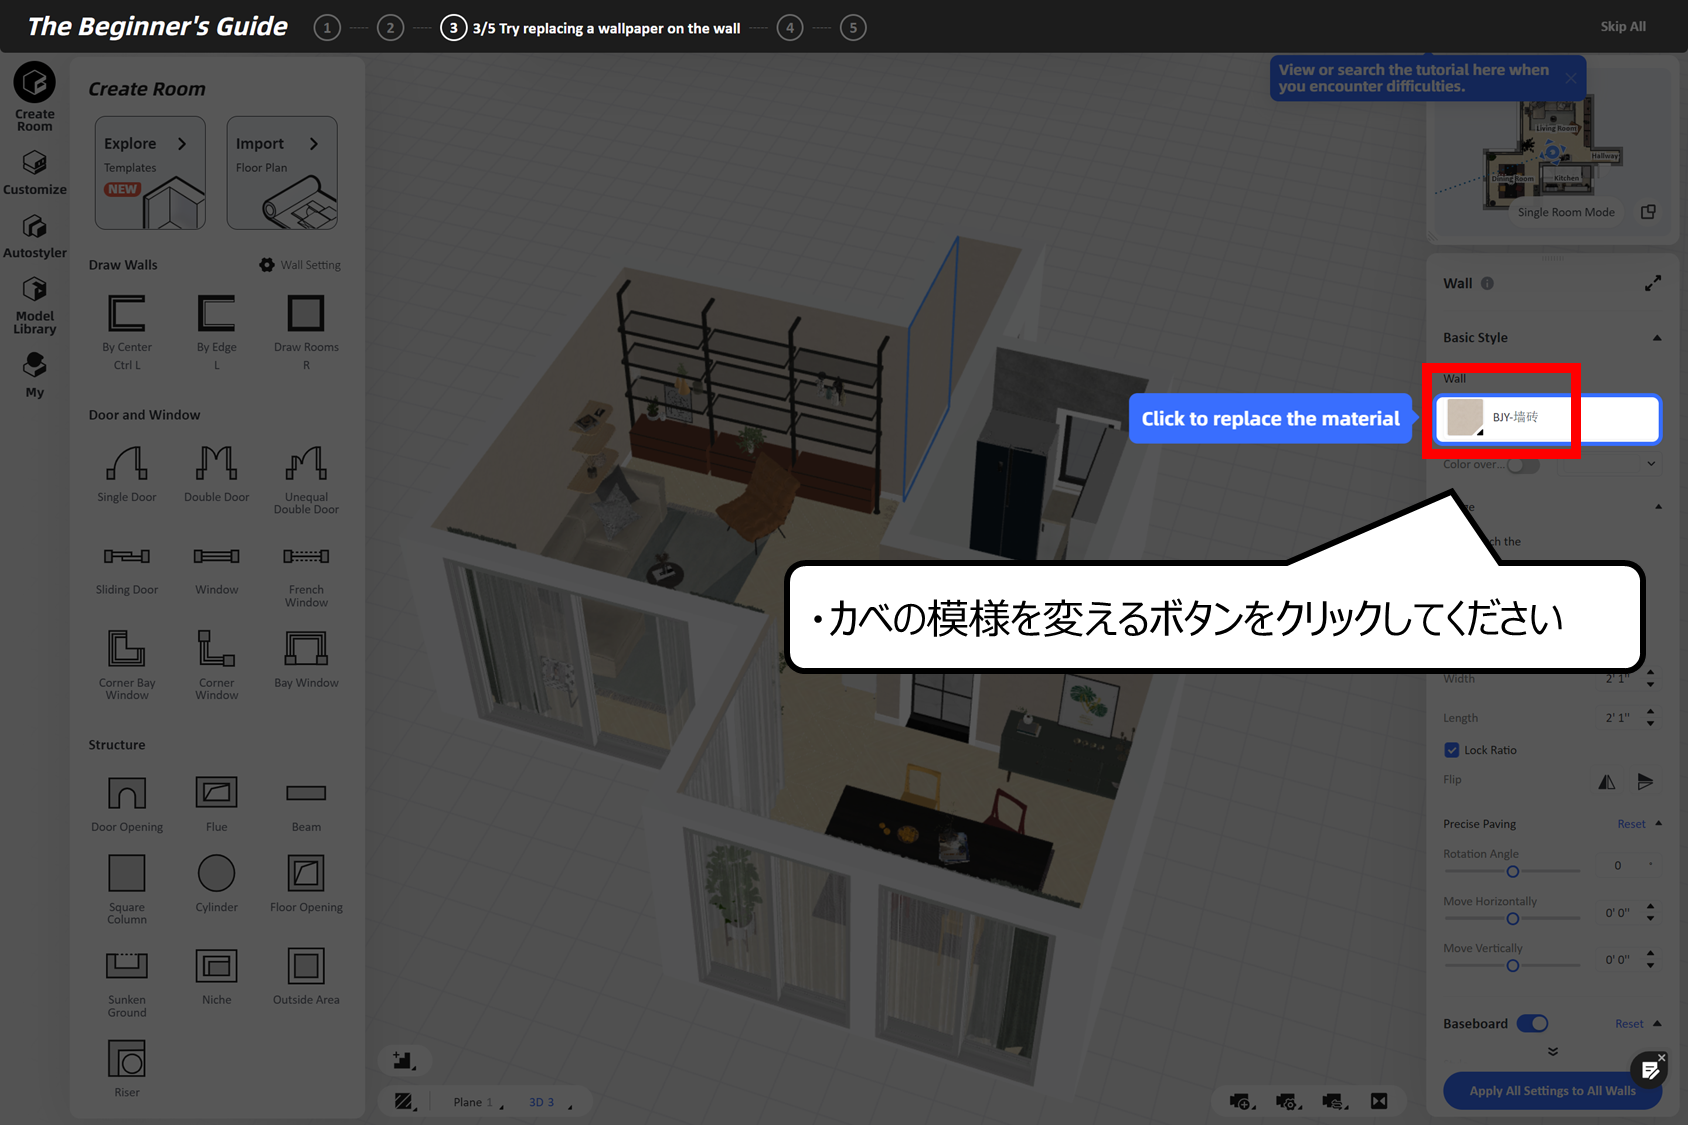
右のアイコンをクリックしてカベの模様を変えることができます
・カベの模様を変えるボタンをクリックしてください
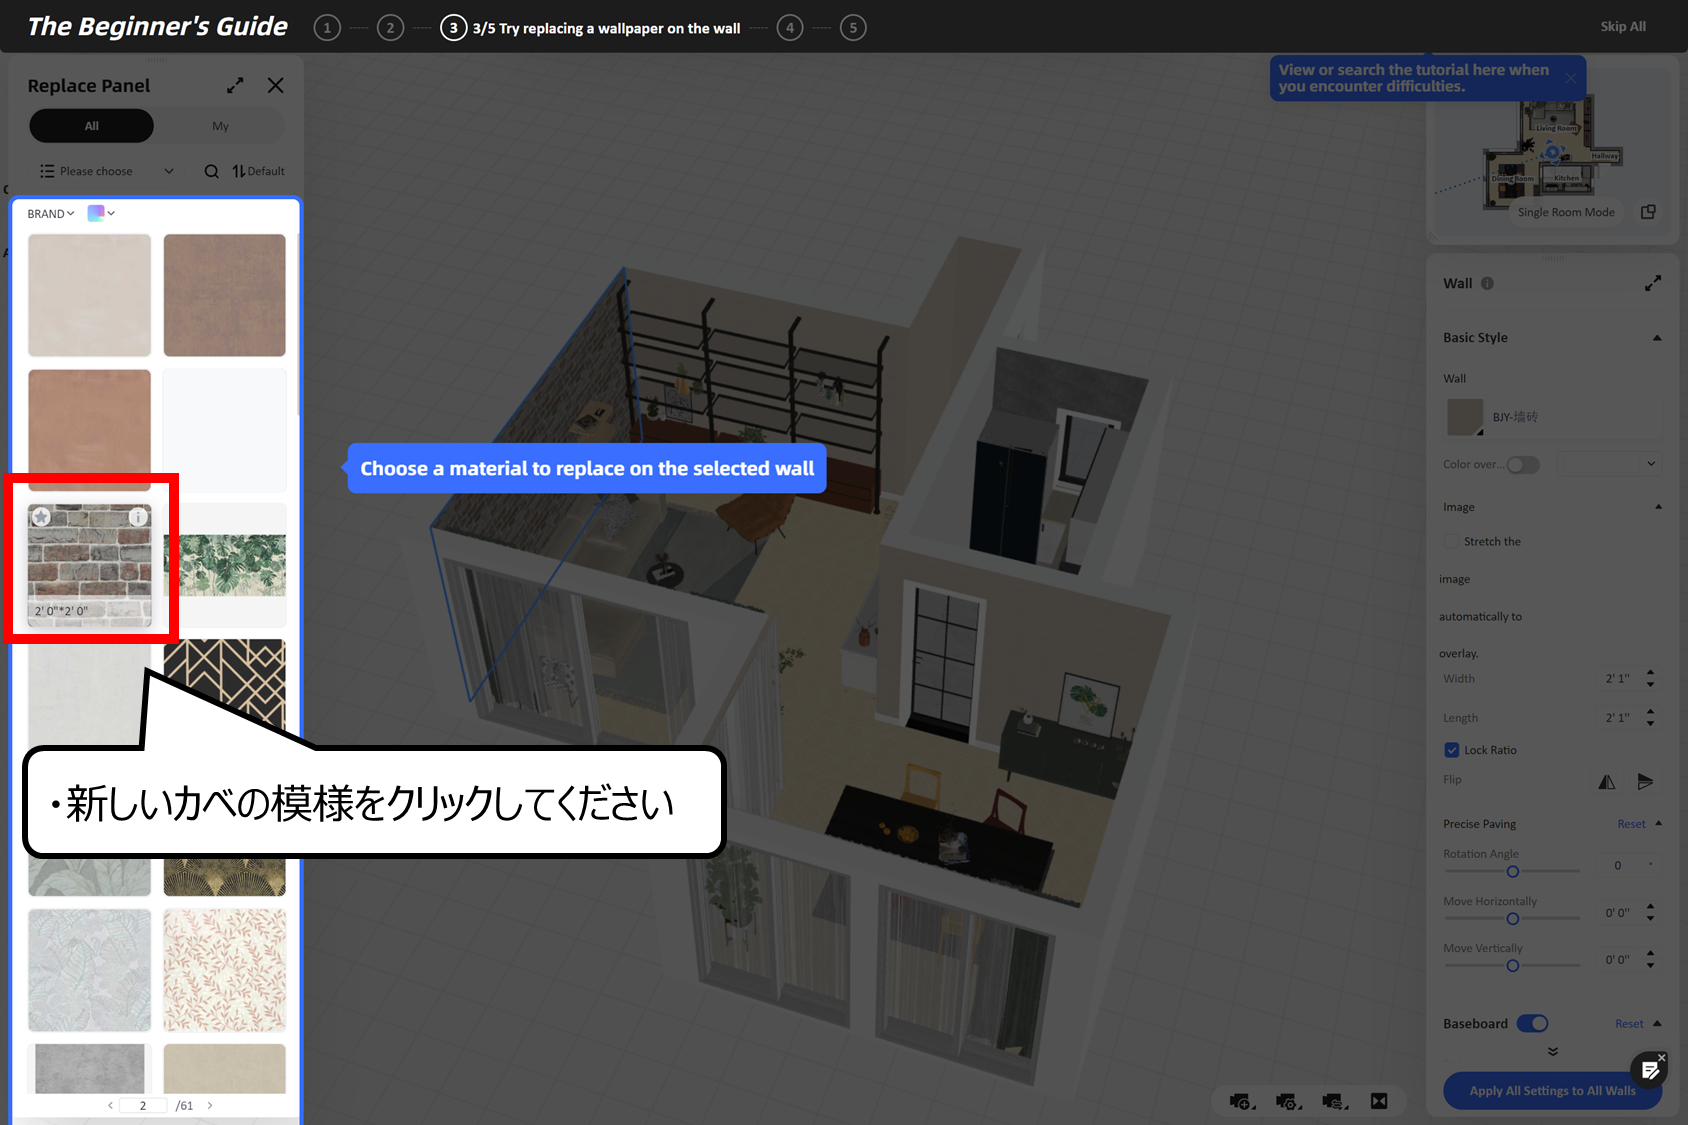
カベの模様をクリックしてください
・新しいカベの模様をクリックしてください
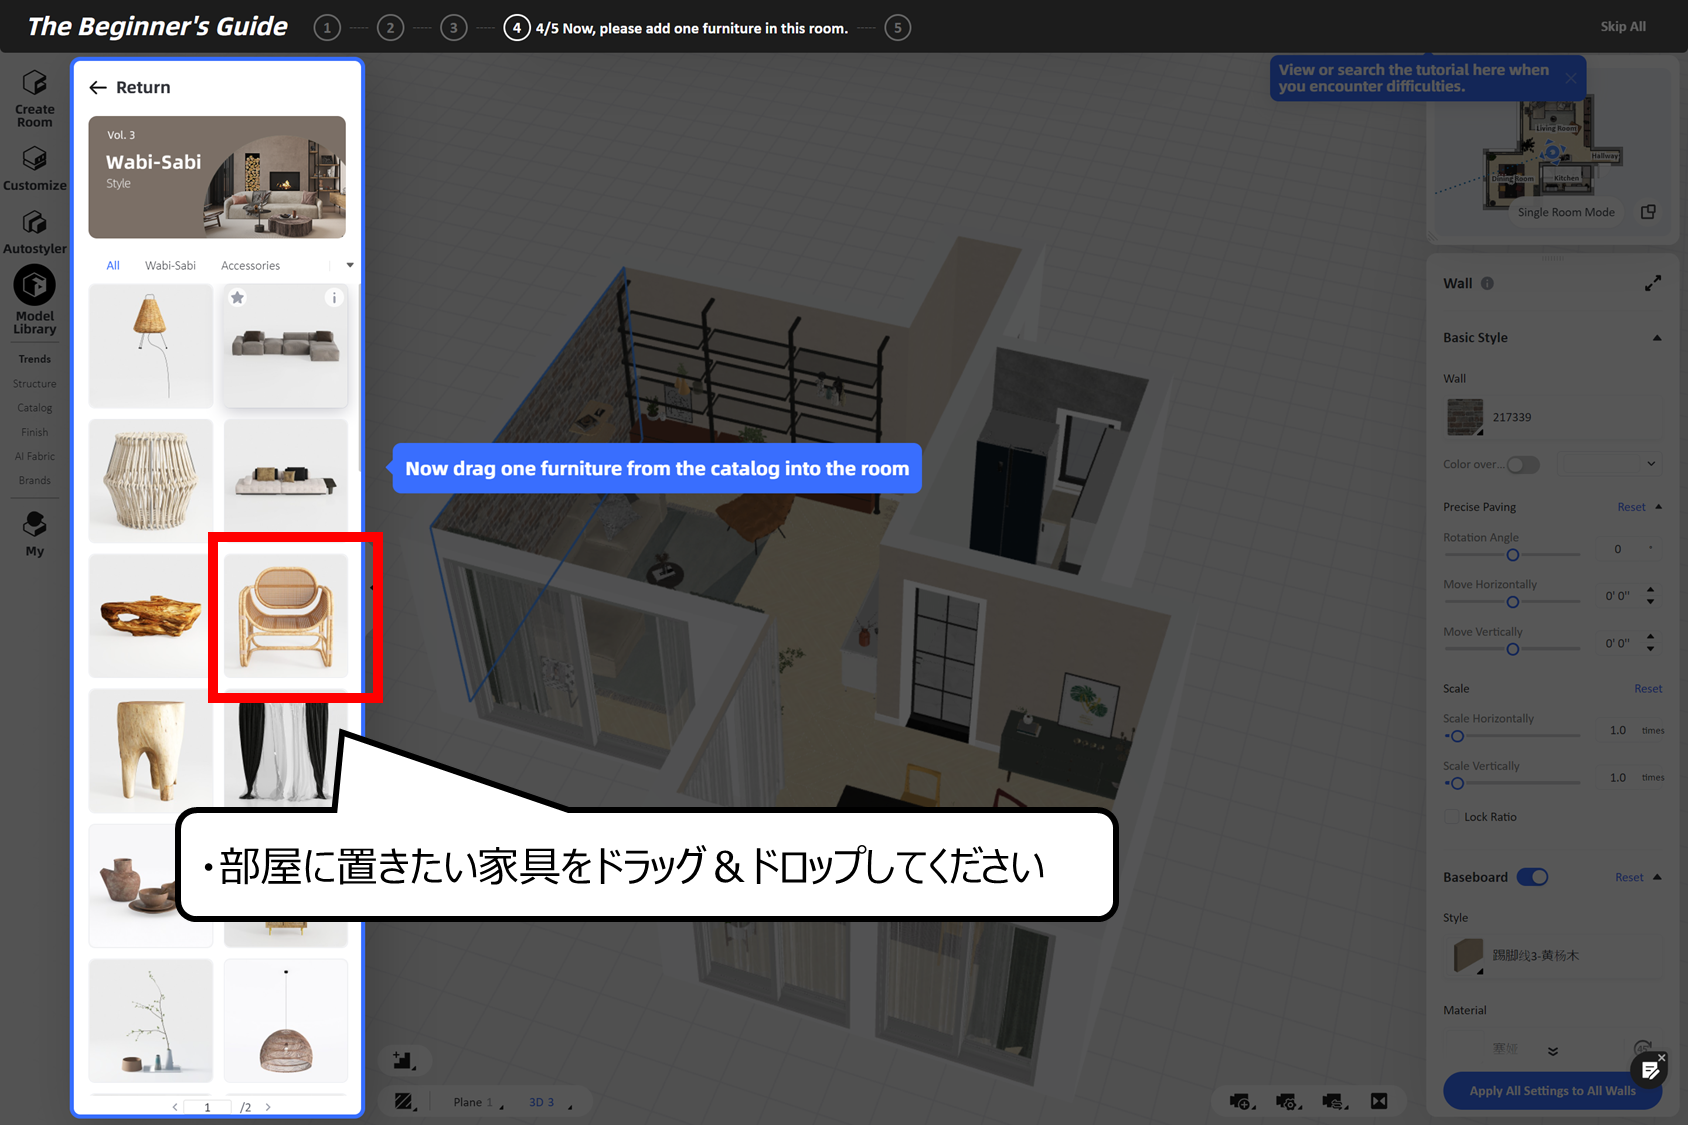
部屋に家具をくわえることができます
・部屋に置きたい家具をドラッグ&ドロップしてください

3Dモデルを向きを変えることができます
・あらわれた「矢印」、「青いライン」をドラッグして位置を変えてください
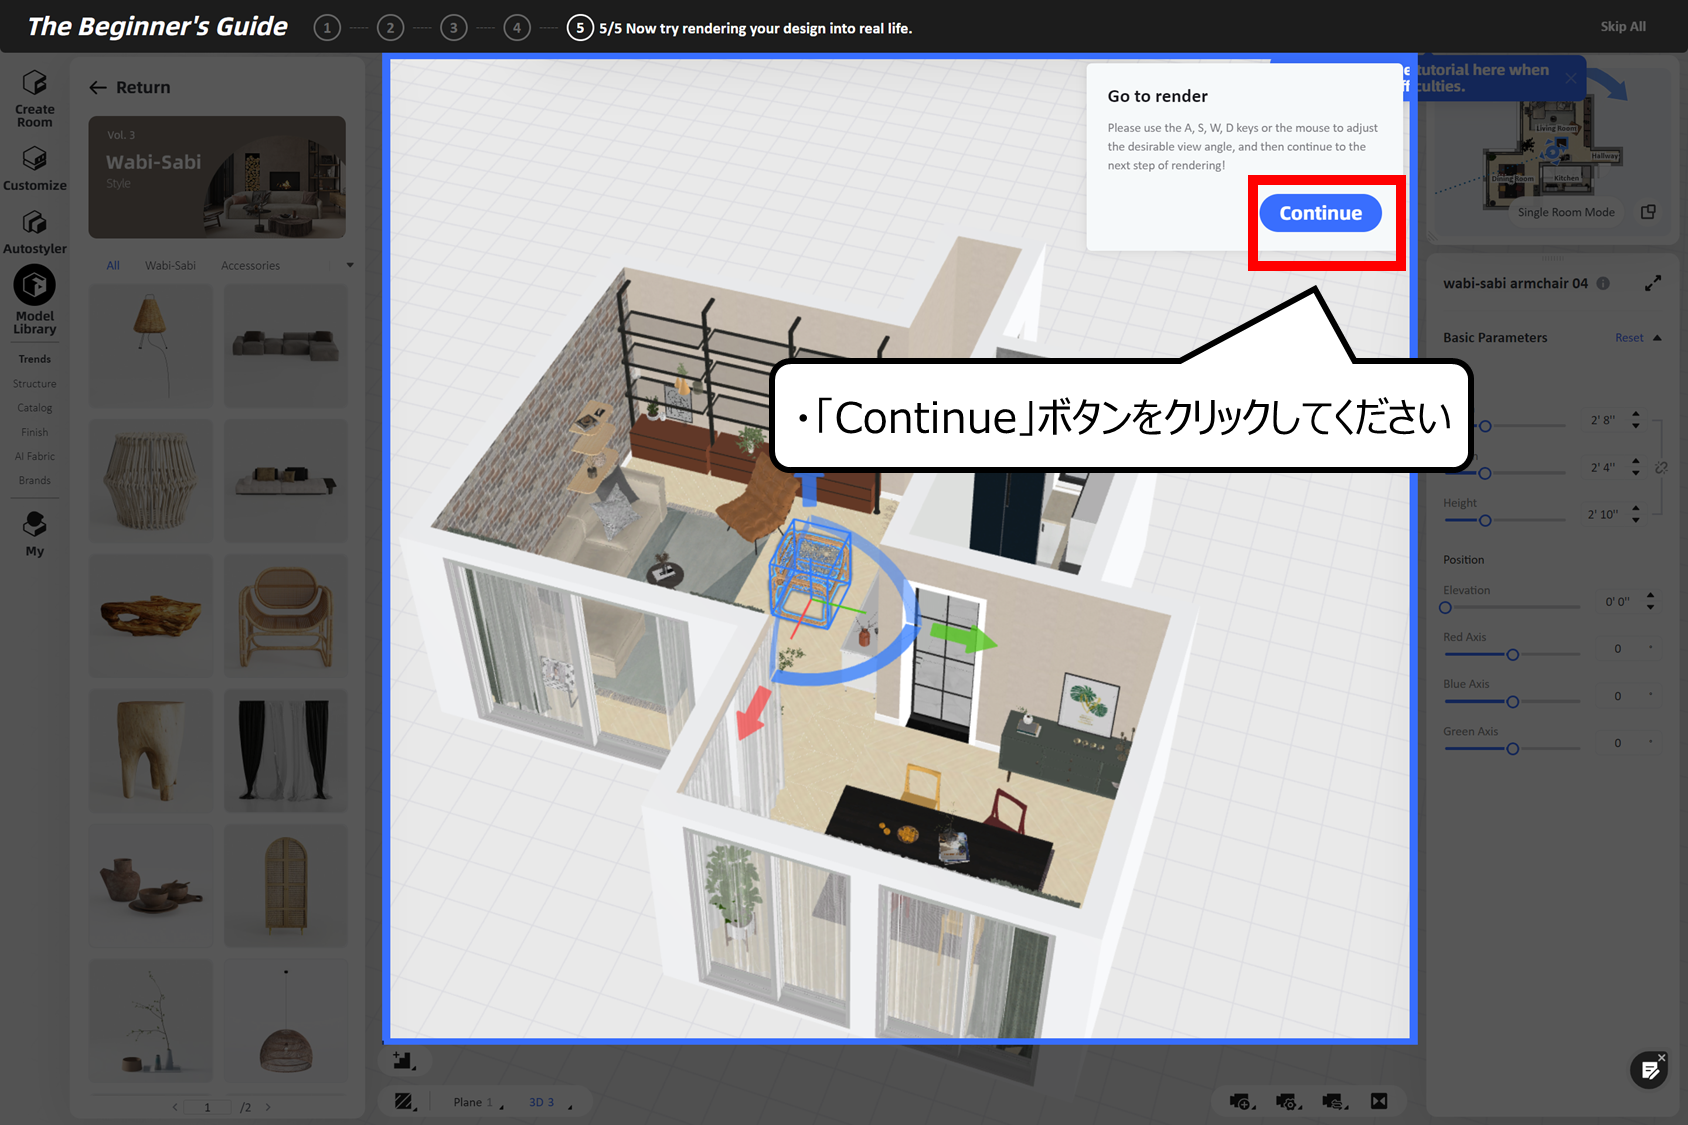
これでインテリア作りは終わりです
・「Continue」ボタンをクリックしてください
・キレイな3D絵を「レンダリング」で作る方法
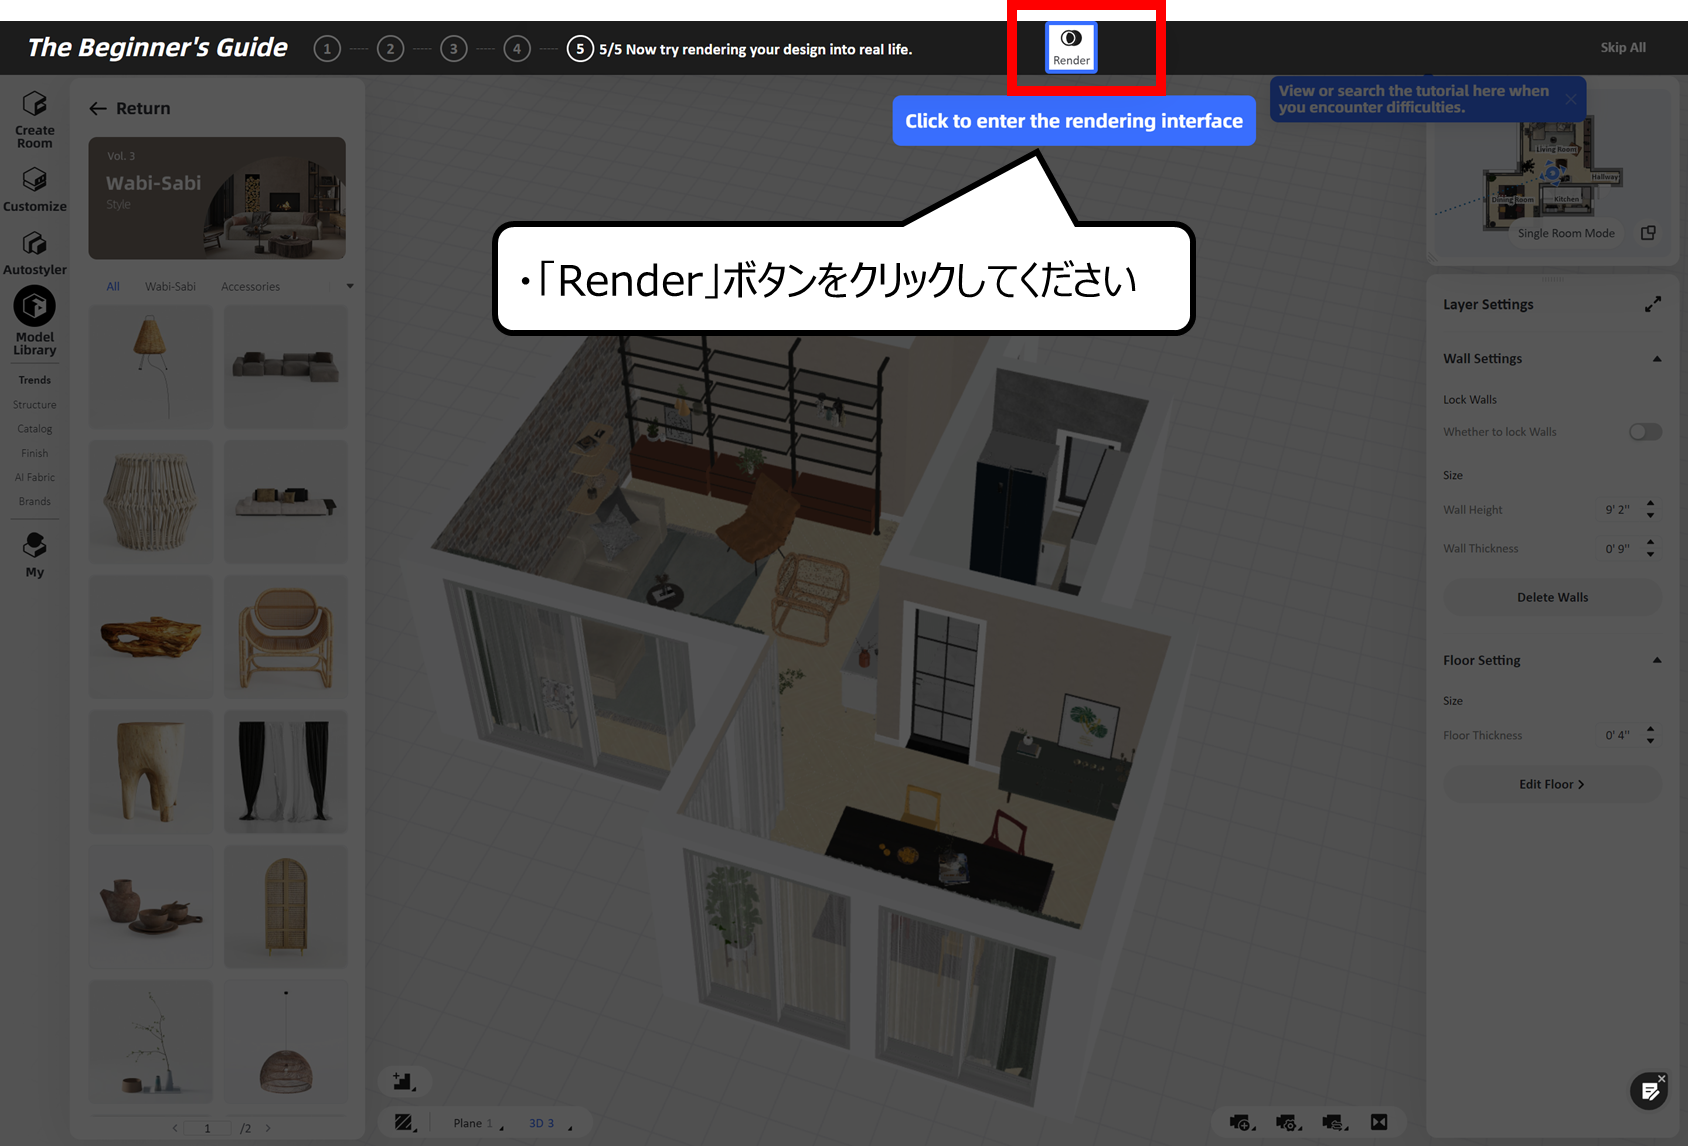
レンダーボタンをクリックしてください
・「Render」ボタンをクリックしてください
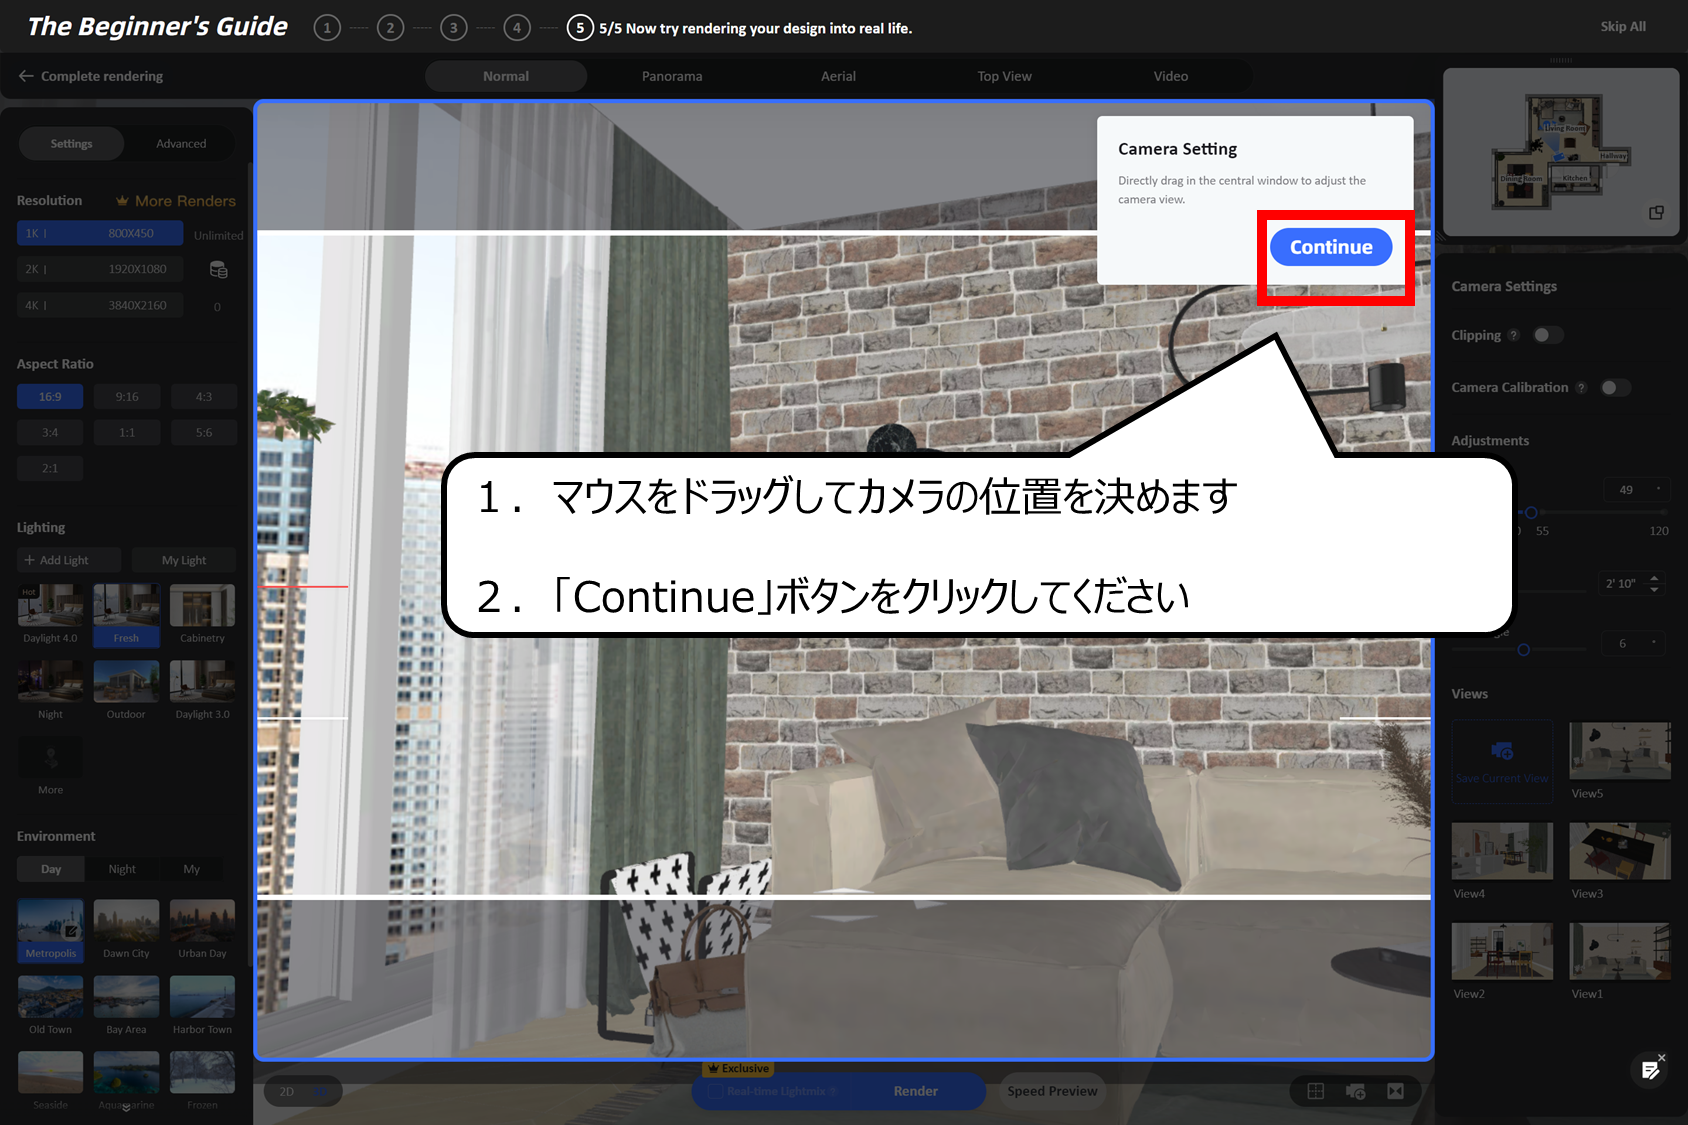
カメラを動かして、絵をつくる画面を決めます
1.マウスをドラッグしてカメラの位置を決めます
2.「Continue」ボタンをクリックしてください
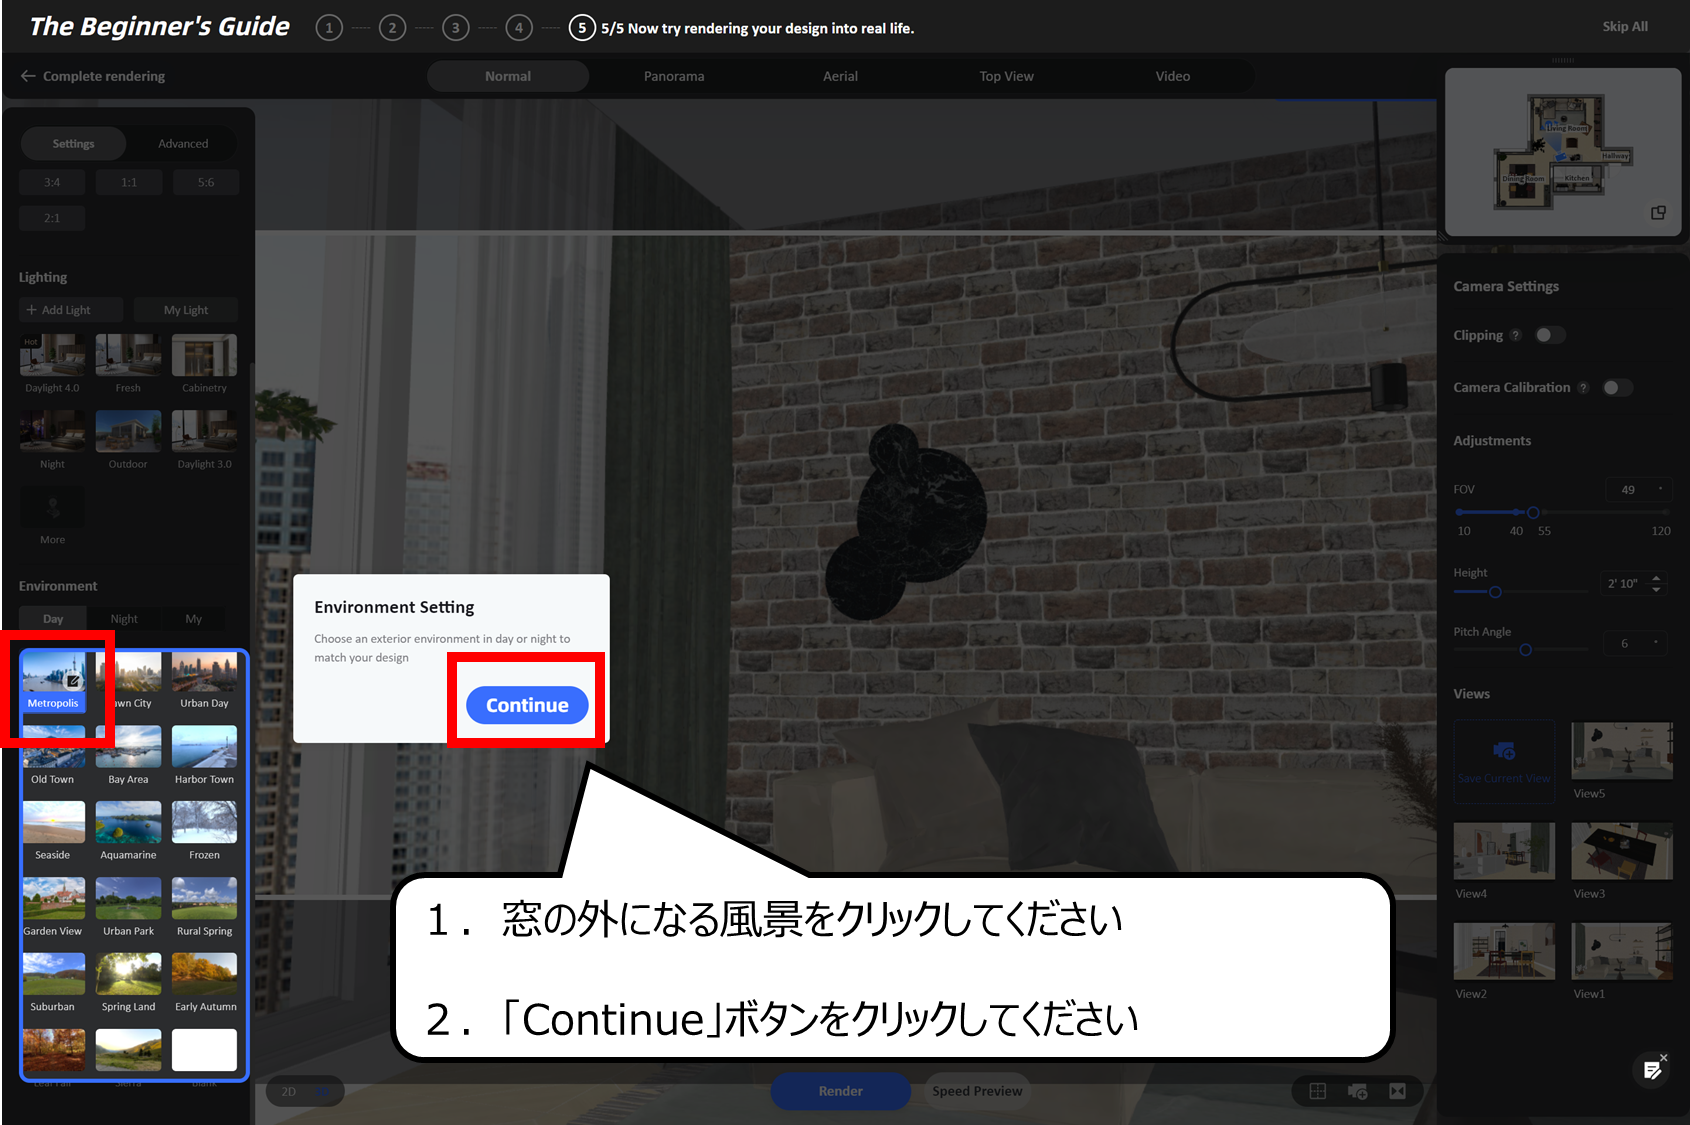
背景になる風景を決めます
1.窓の外になる風景をクリックしてください
2.「Continue」ボタンをクリックしてください

光の種類を決めます
1.光の「Daylight」ボタンをクリックしてください
2.「Continue」ボタンをクリックしてください

レンダーボタンをクリックすると、レンダリングが始まります
・「レンダー」ボタンをクリックしてください
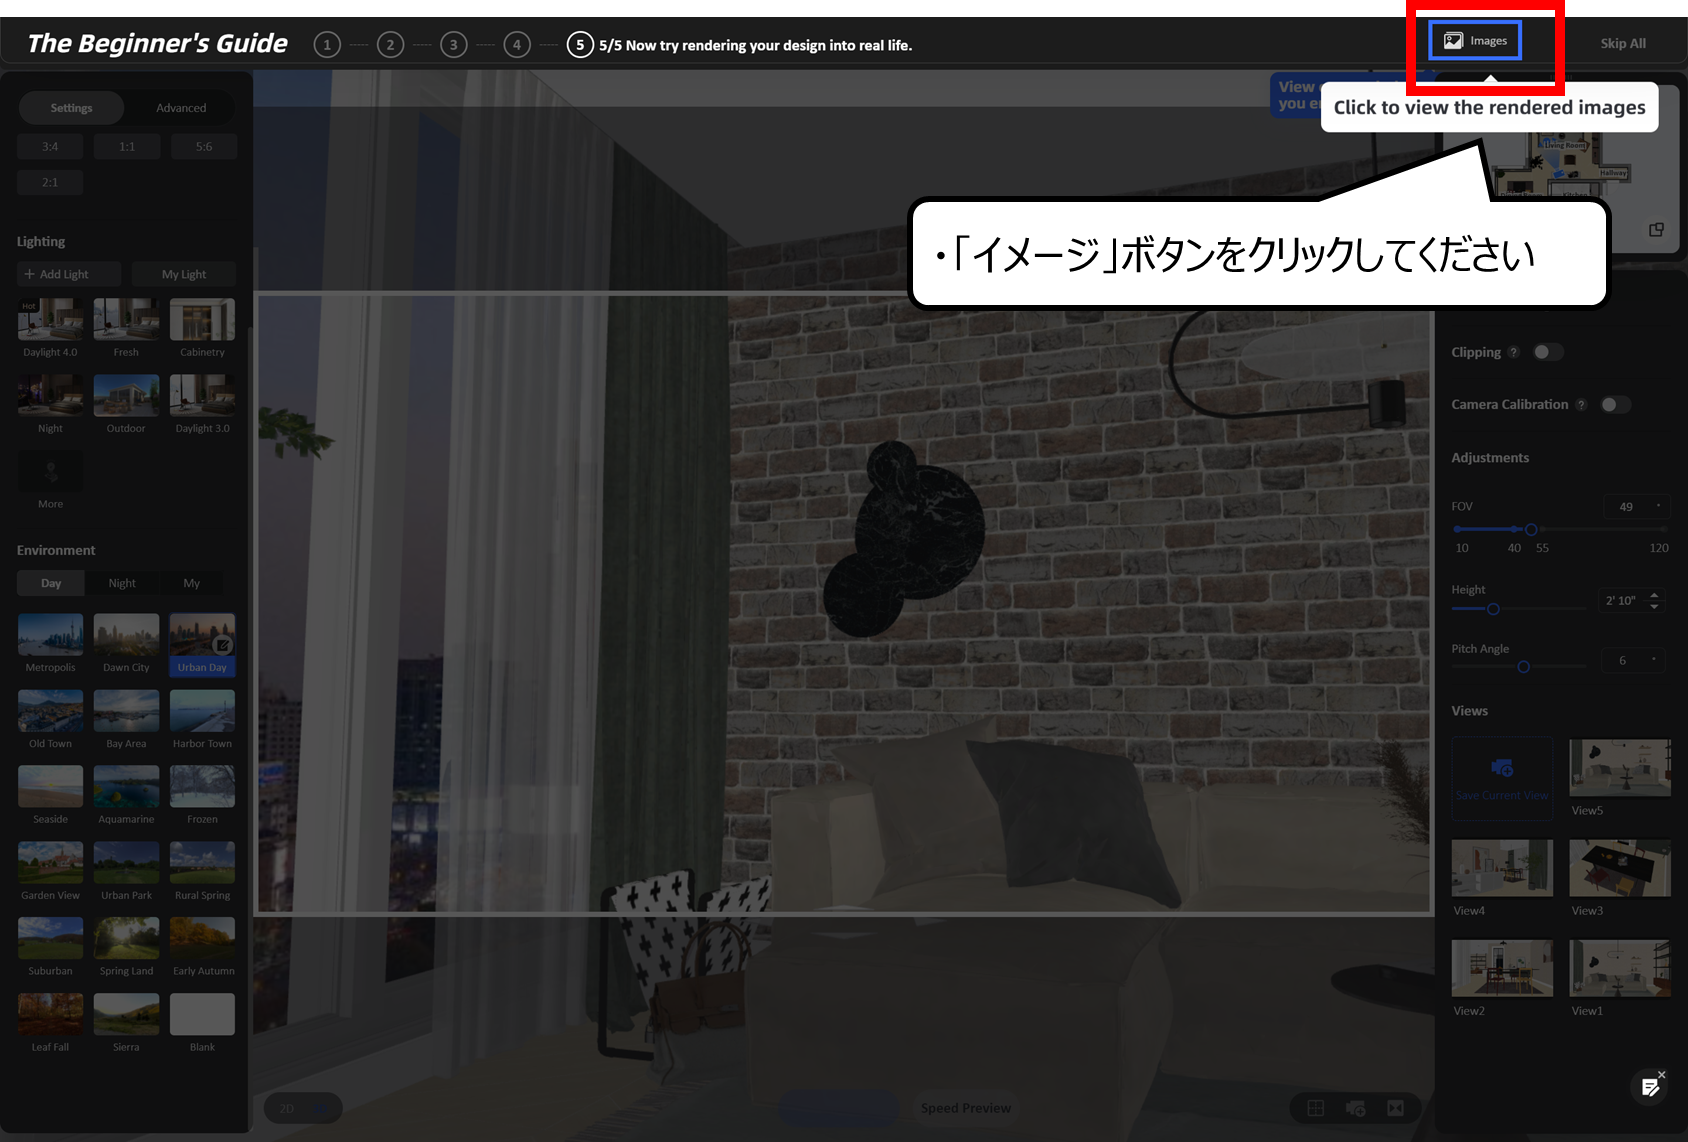
イメージをクリックすると、レンダリングの絵が見れます
・「イメージ」ボタンをクリックしてください
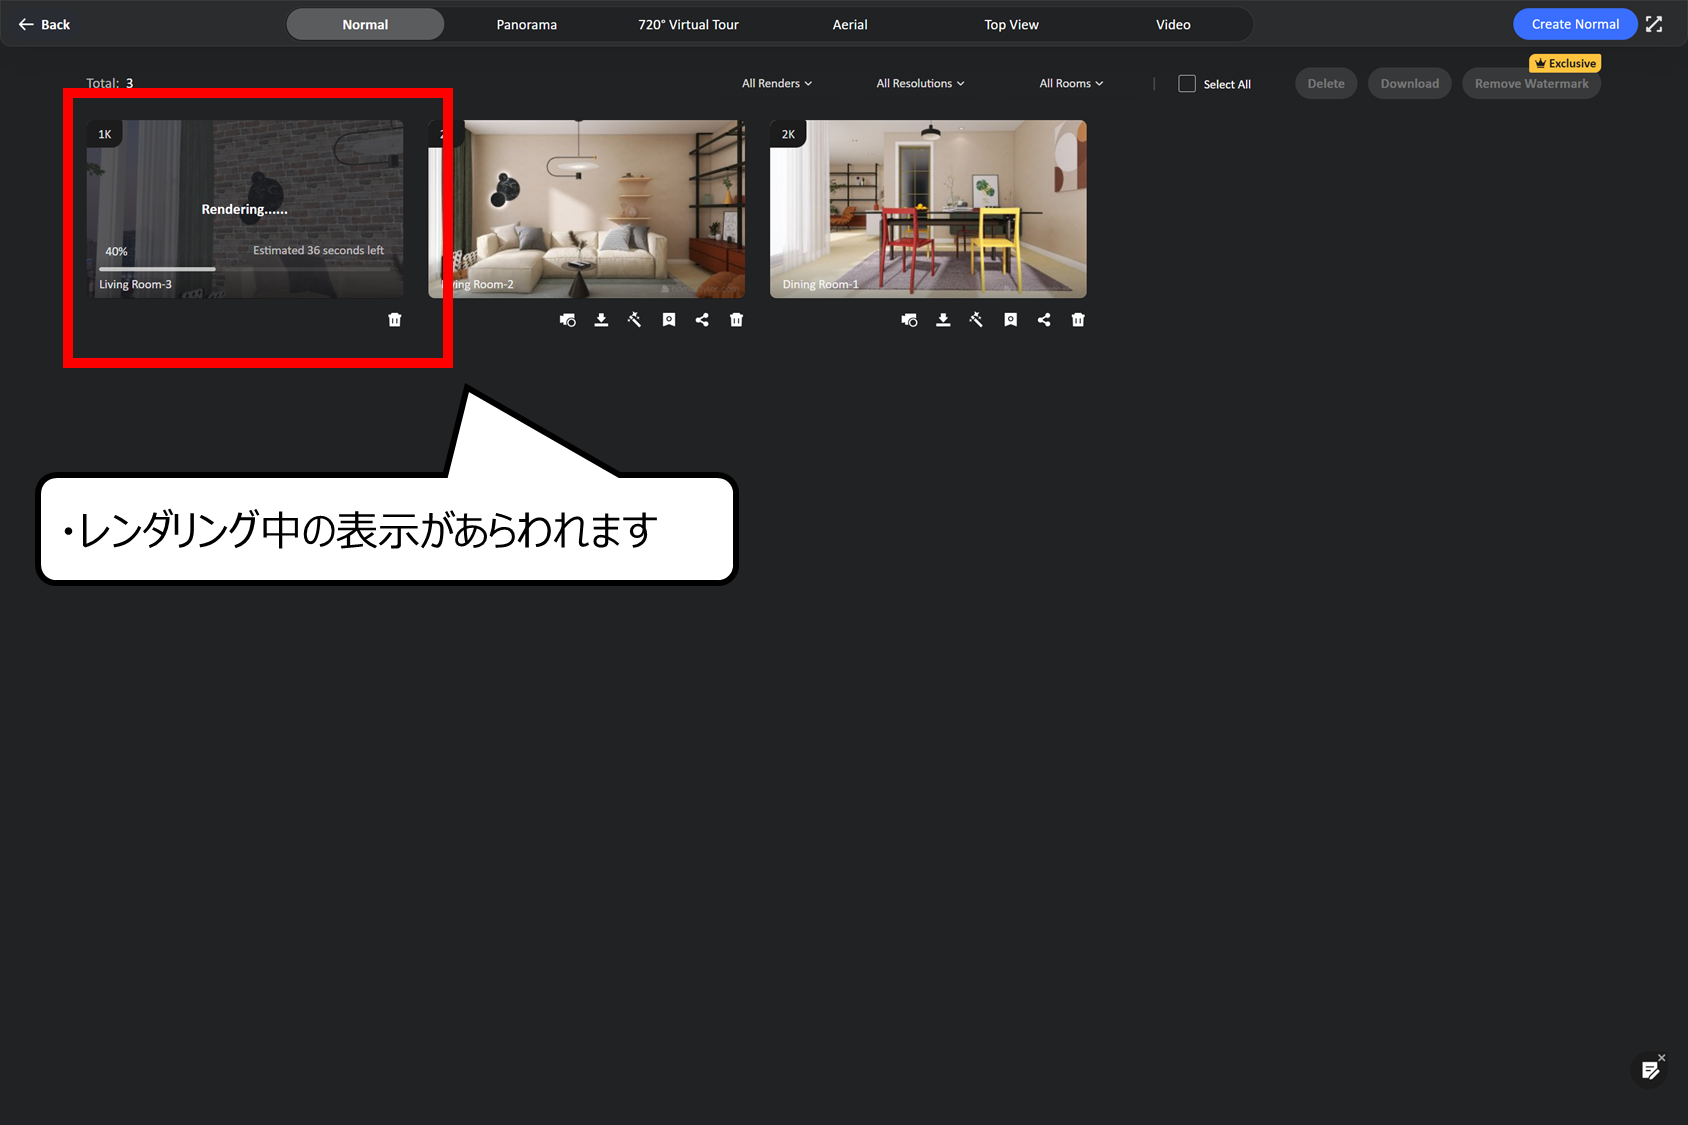
レンダリング中の絵が現れます
・レンダリング中の表示があらわれます
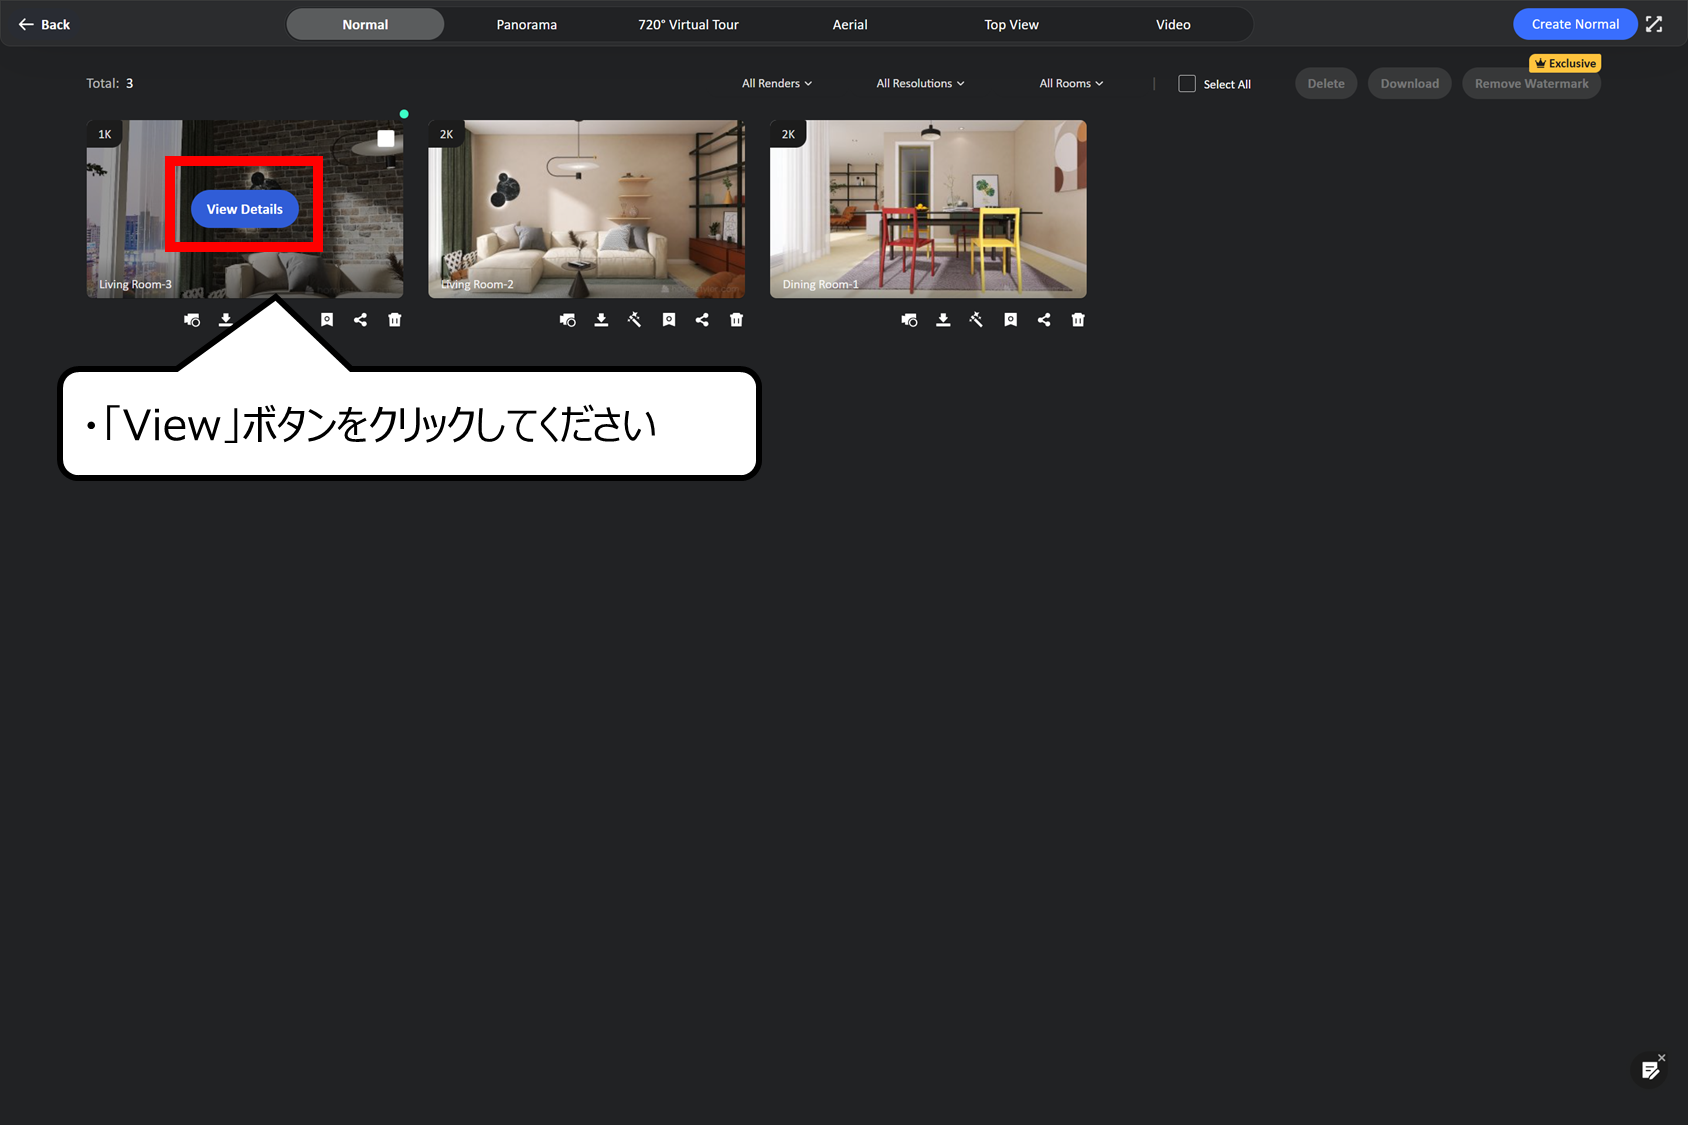
レンダリングが終わると、Viewボタンをクリックできるようになります
・「View」ボタンをクリックしてください
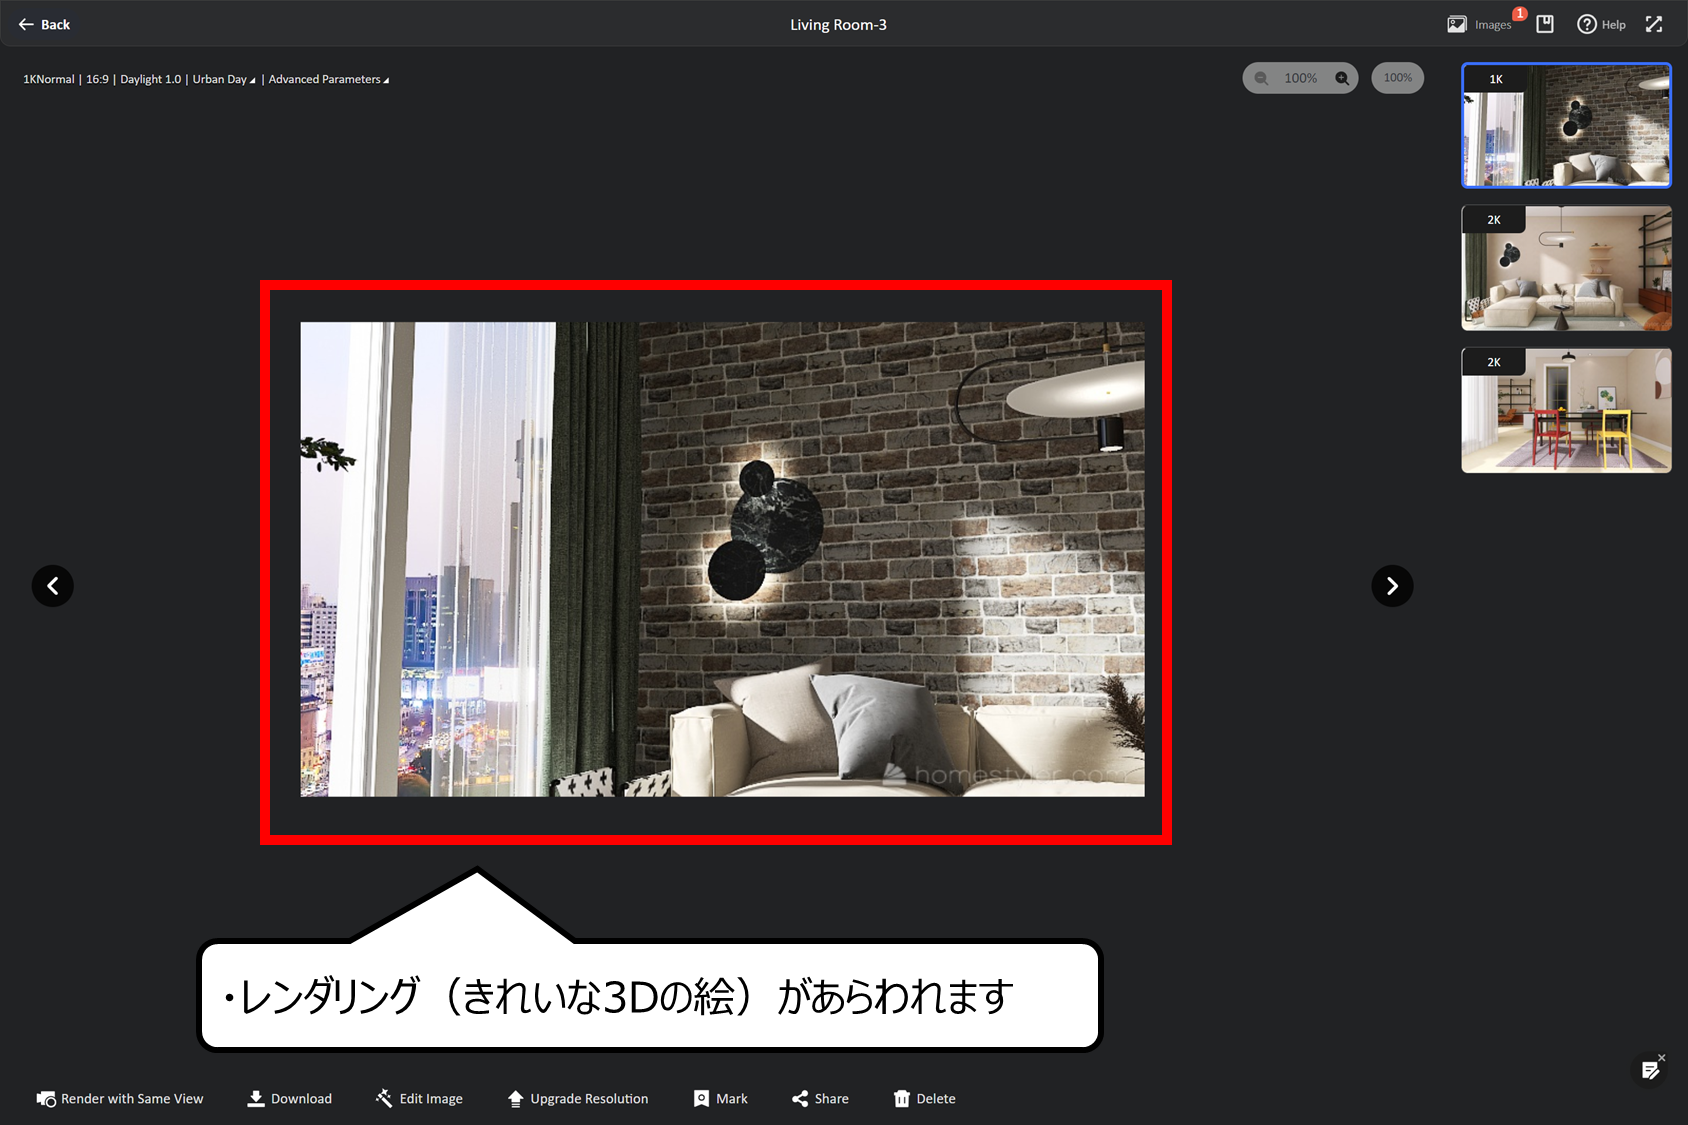
キレイな絵が現れました
・レンダリング(きれいな3Dの絵)があらわれます
・つくった3Dの部屋から漫画用の背景をつくろう
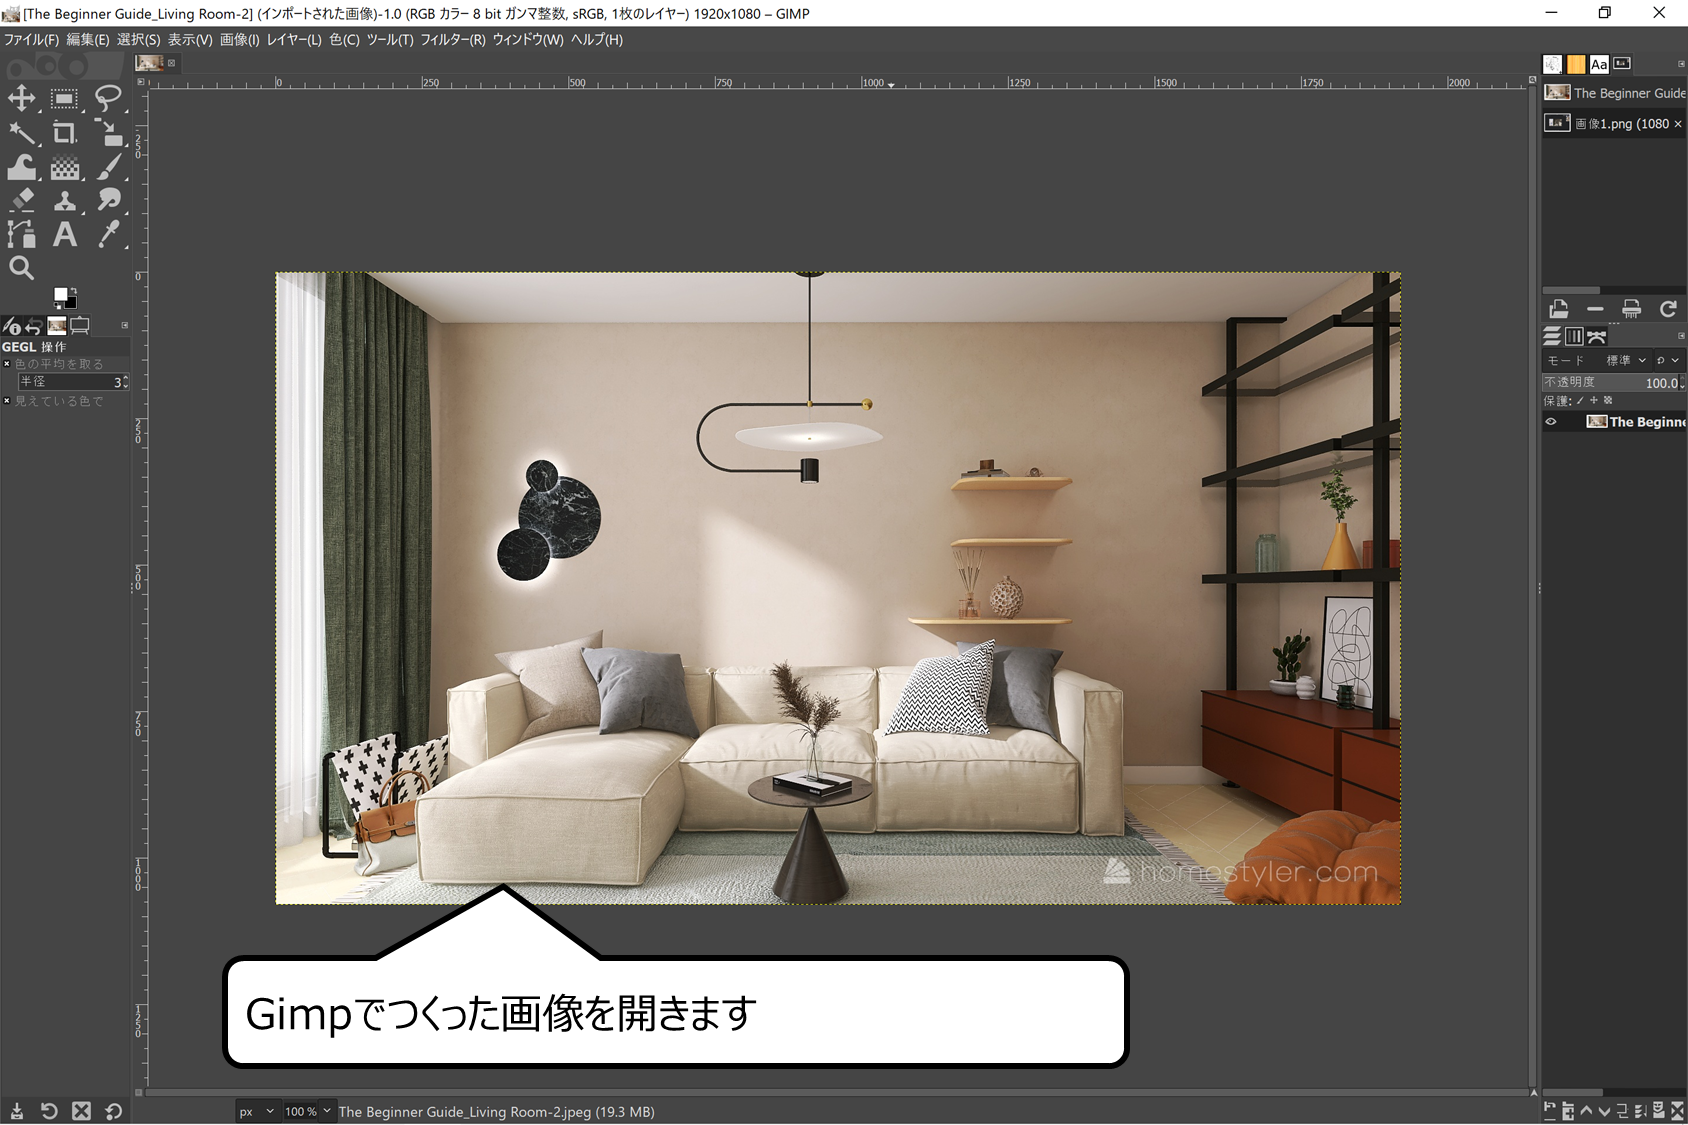
今回はフリーのお絵描きソフトGimpで漫画用の背景をつくります
※Gimpは公式サイトからダウンロードできます
<Gimp公式サイト>
https://www.gimp.org/
・Gimpでつくった画像を開きます
アウトラインがクッキリ出るように変えます
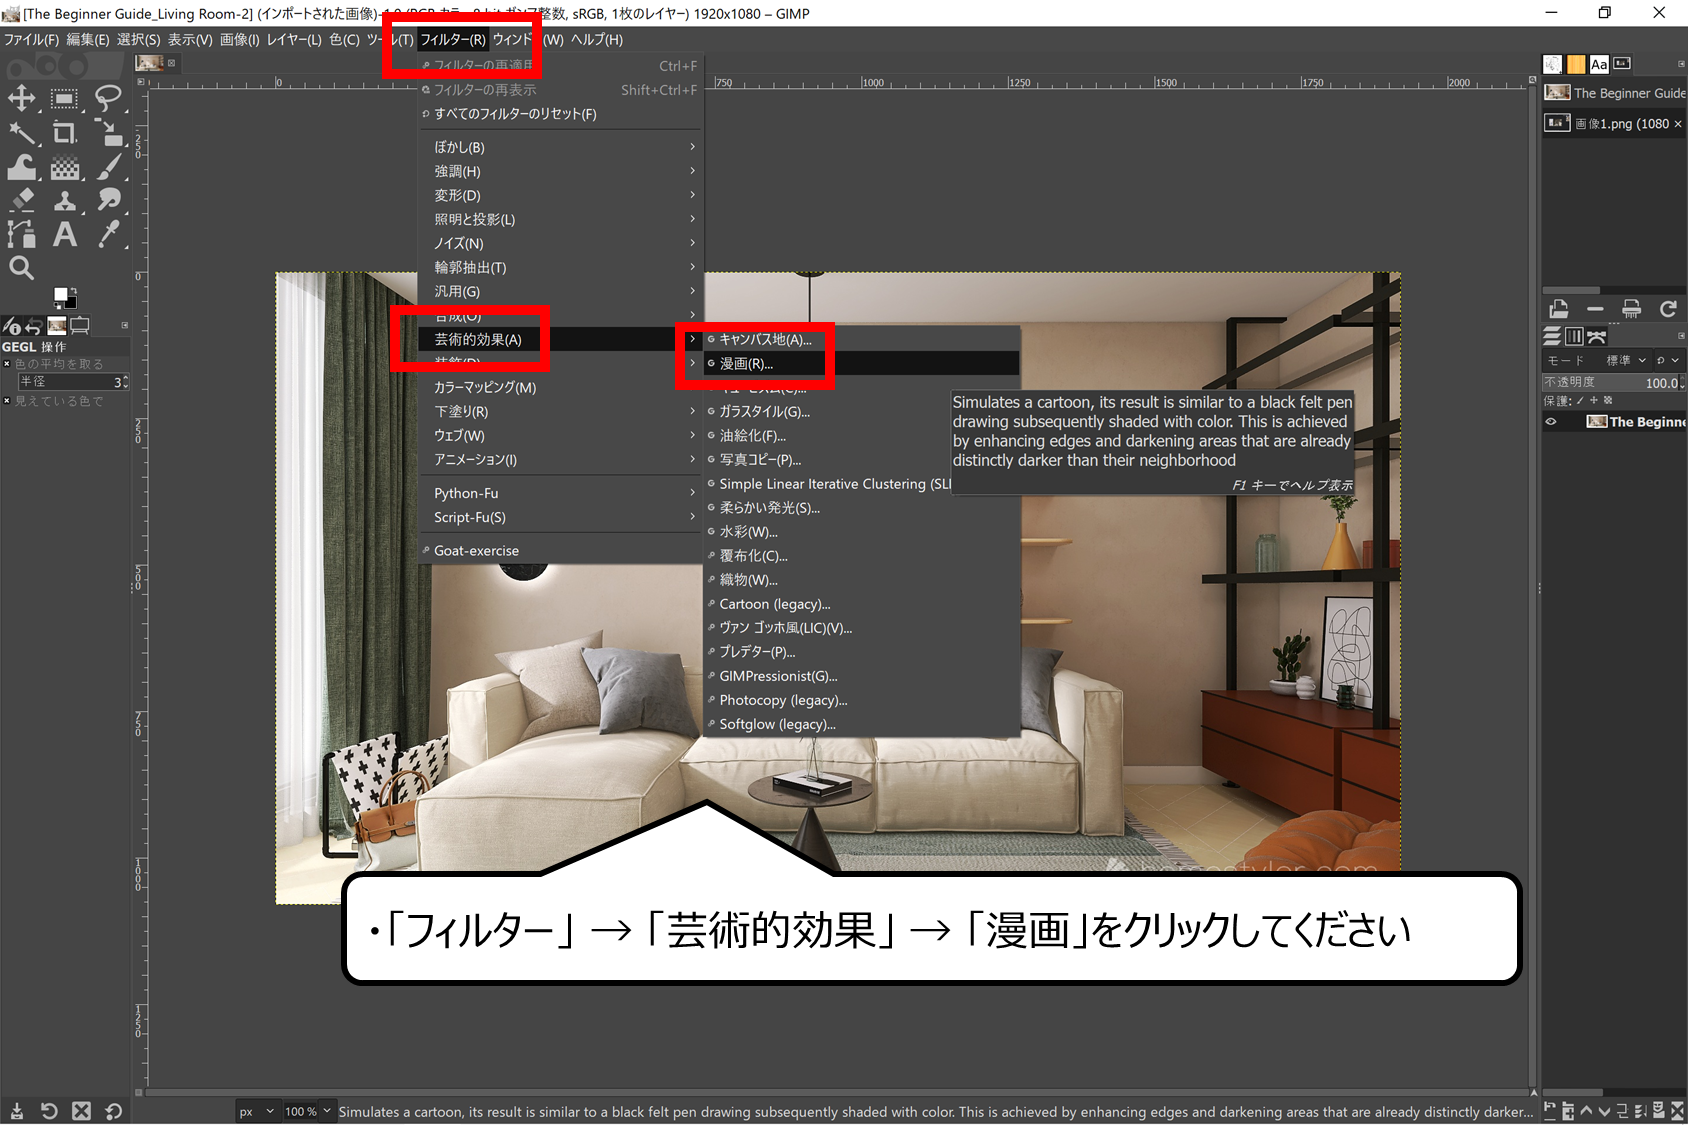
・「フィルター」 → 「芸術的効果」 → 「漫画」をクリックしてください
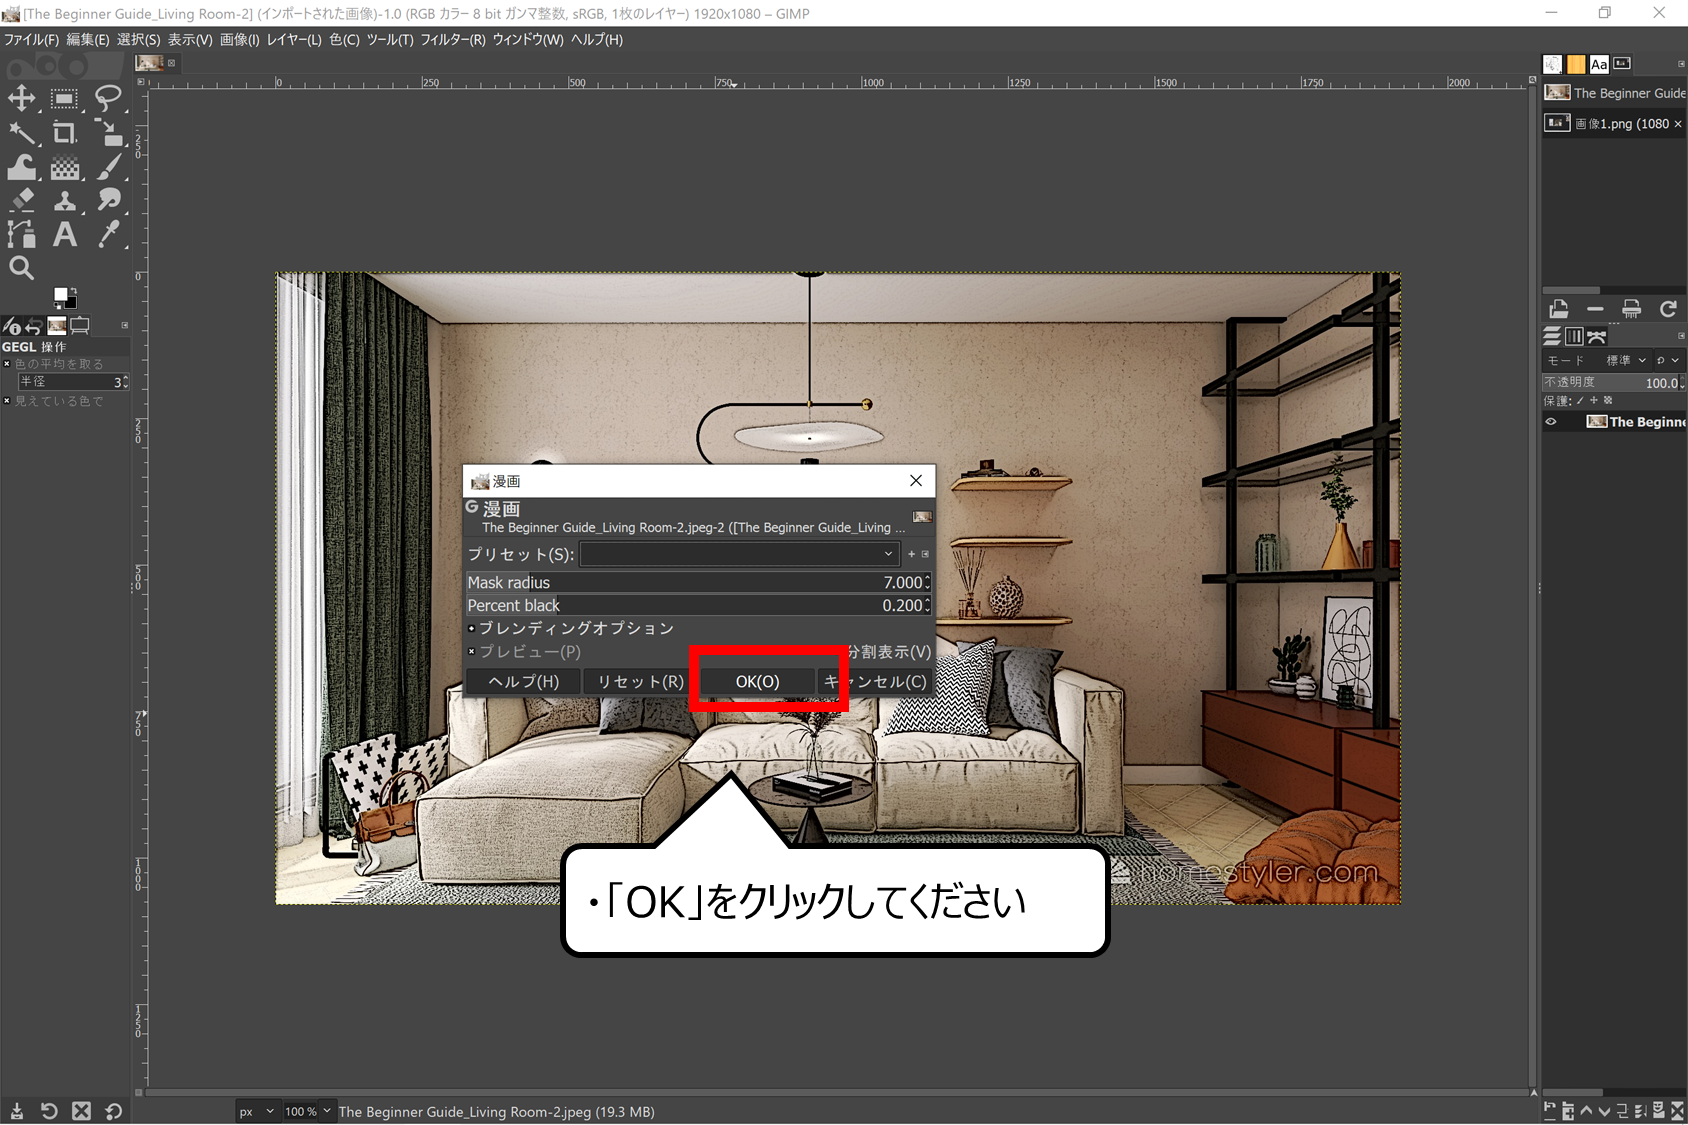
アウトラインが変わり、黒色が強くなりました
・「OK」をクリックしてください
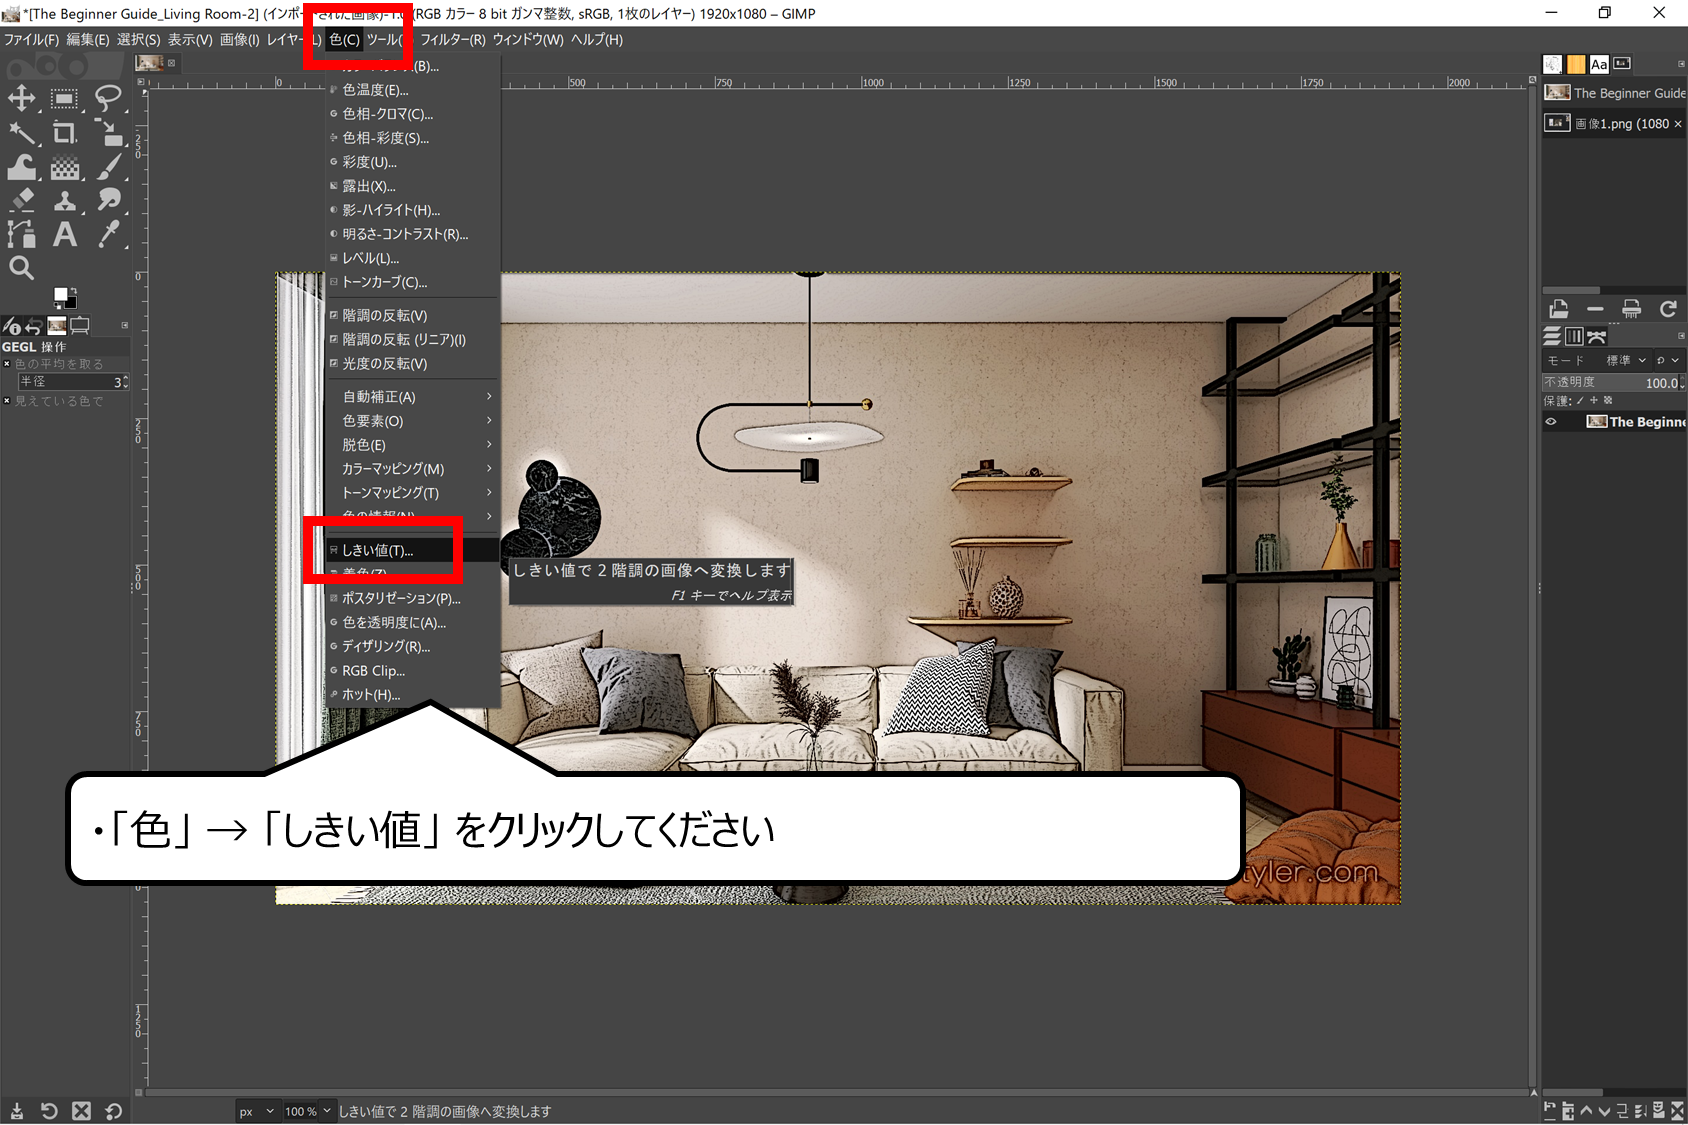
モノクロの絵に変えます
・「色」 → 「しきい値」 をクリックしてください
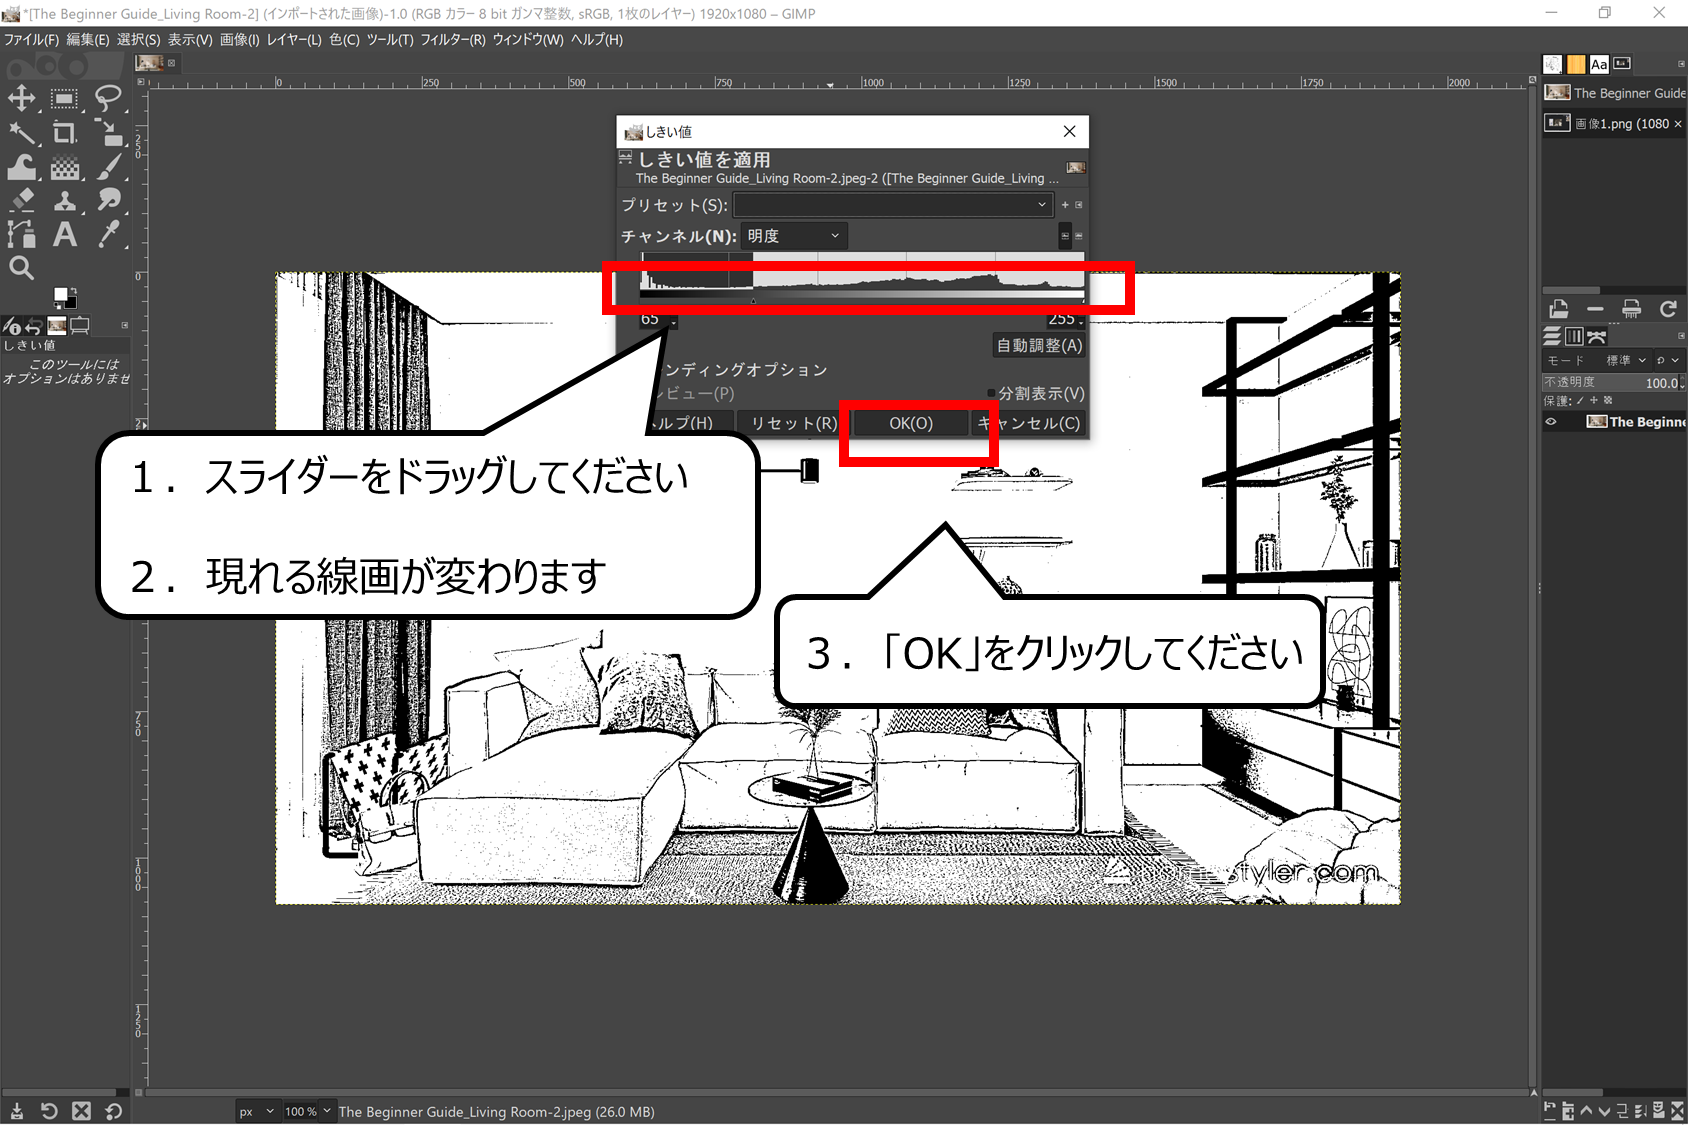
モノクロの絵に変わりました
1.スライダーをドラッグしてください
2.現れる線画が変わります
3.「OK」をクリックしてください
3Dモデルから漫画用の背景つくりが完成しました
・こんなこともできる
・ナナメの天井をつくってみよう
ナナメに天井を作る方法です
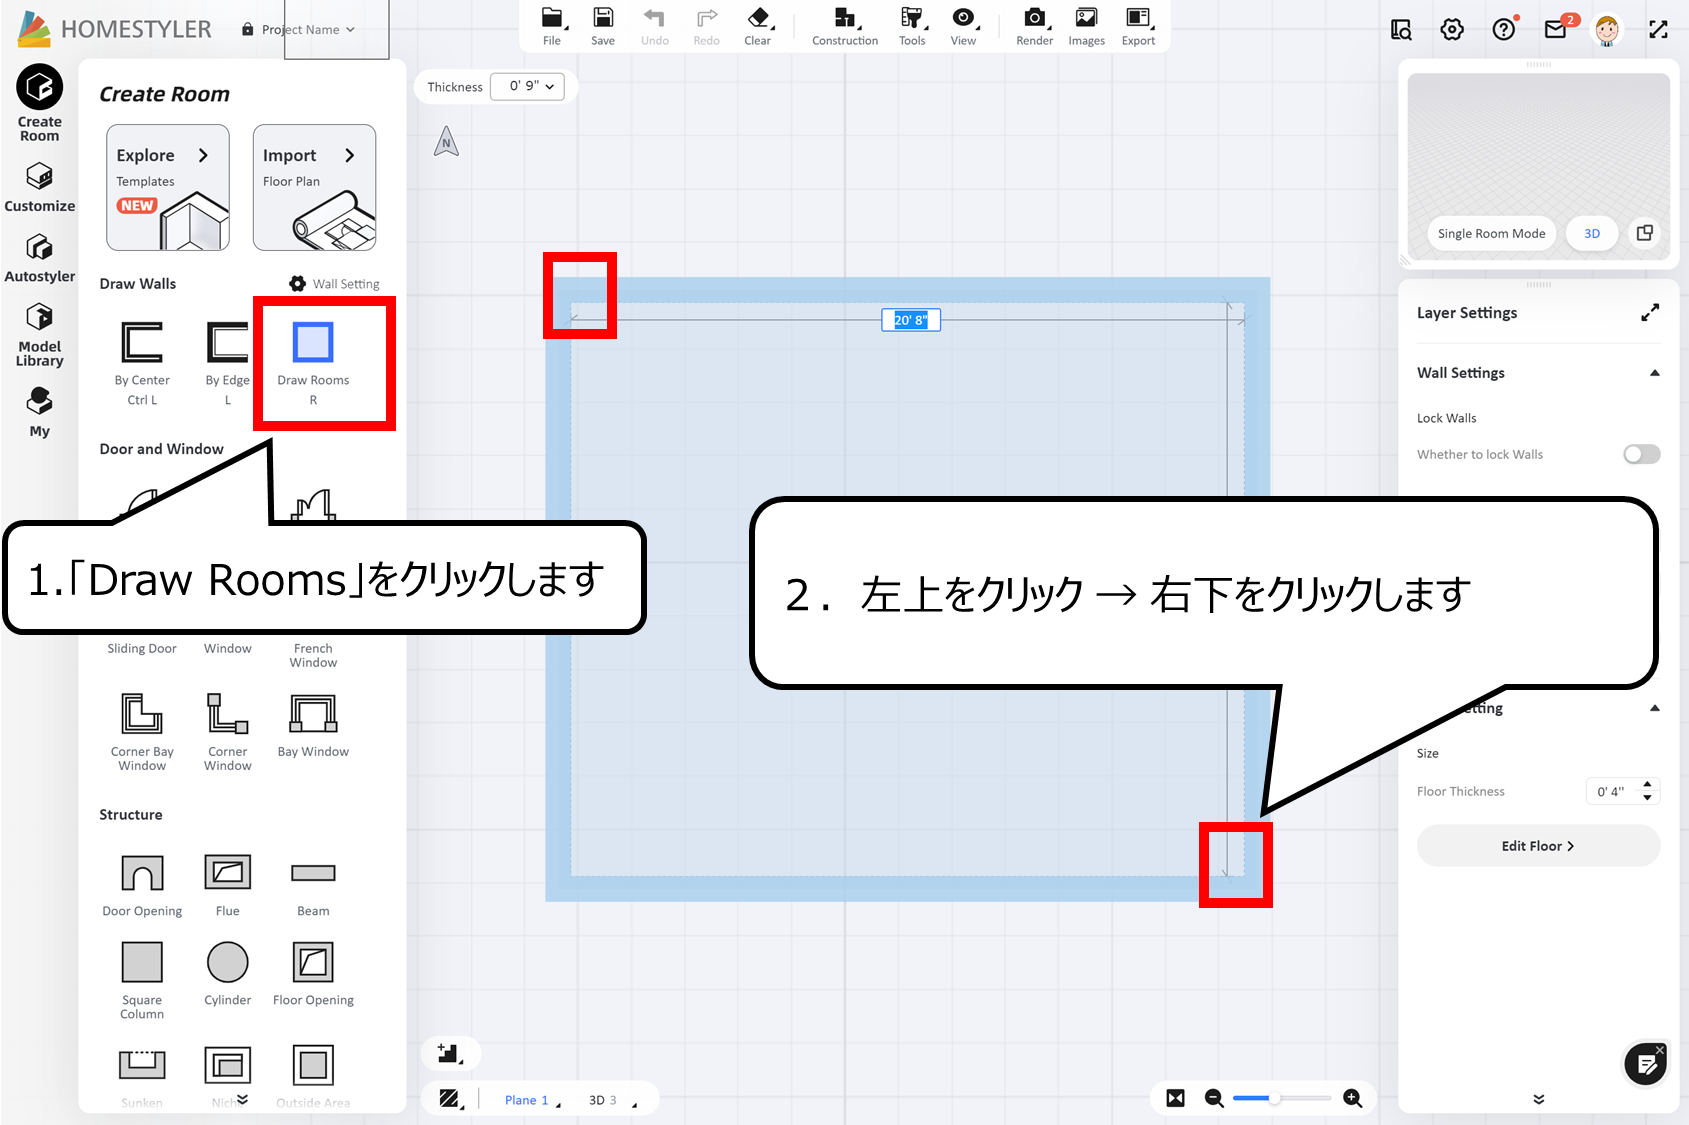
はじめにフロアーをつくります
1.「Draw Rooms」をクリックします
2.左上をクリック → 右下をクリックします
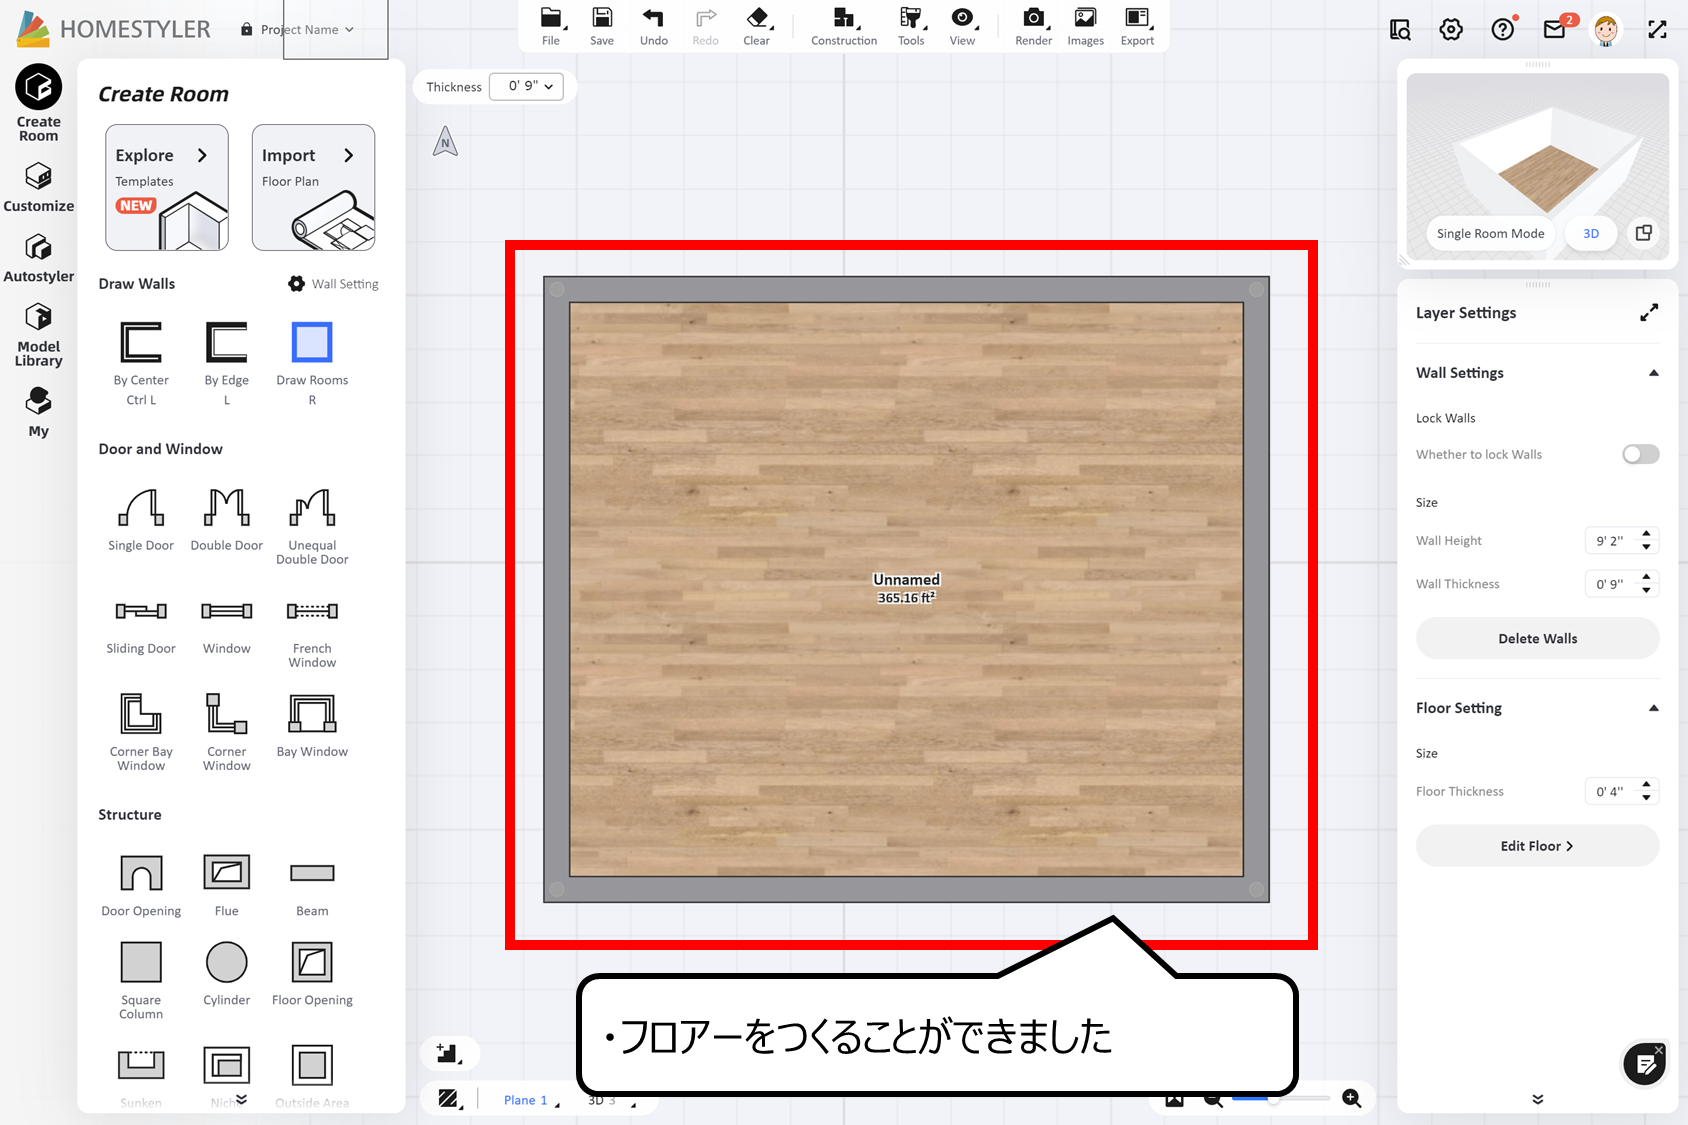
フロアーがあらわれました
・フロアーをつくることができました
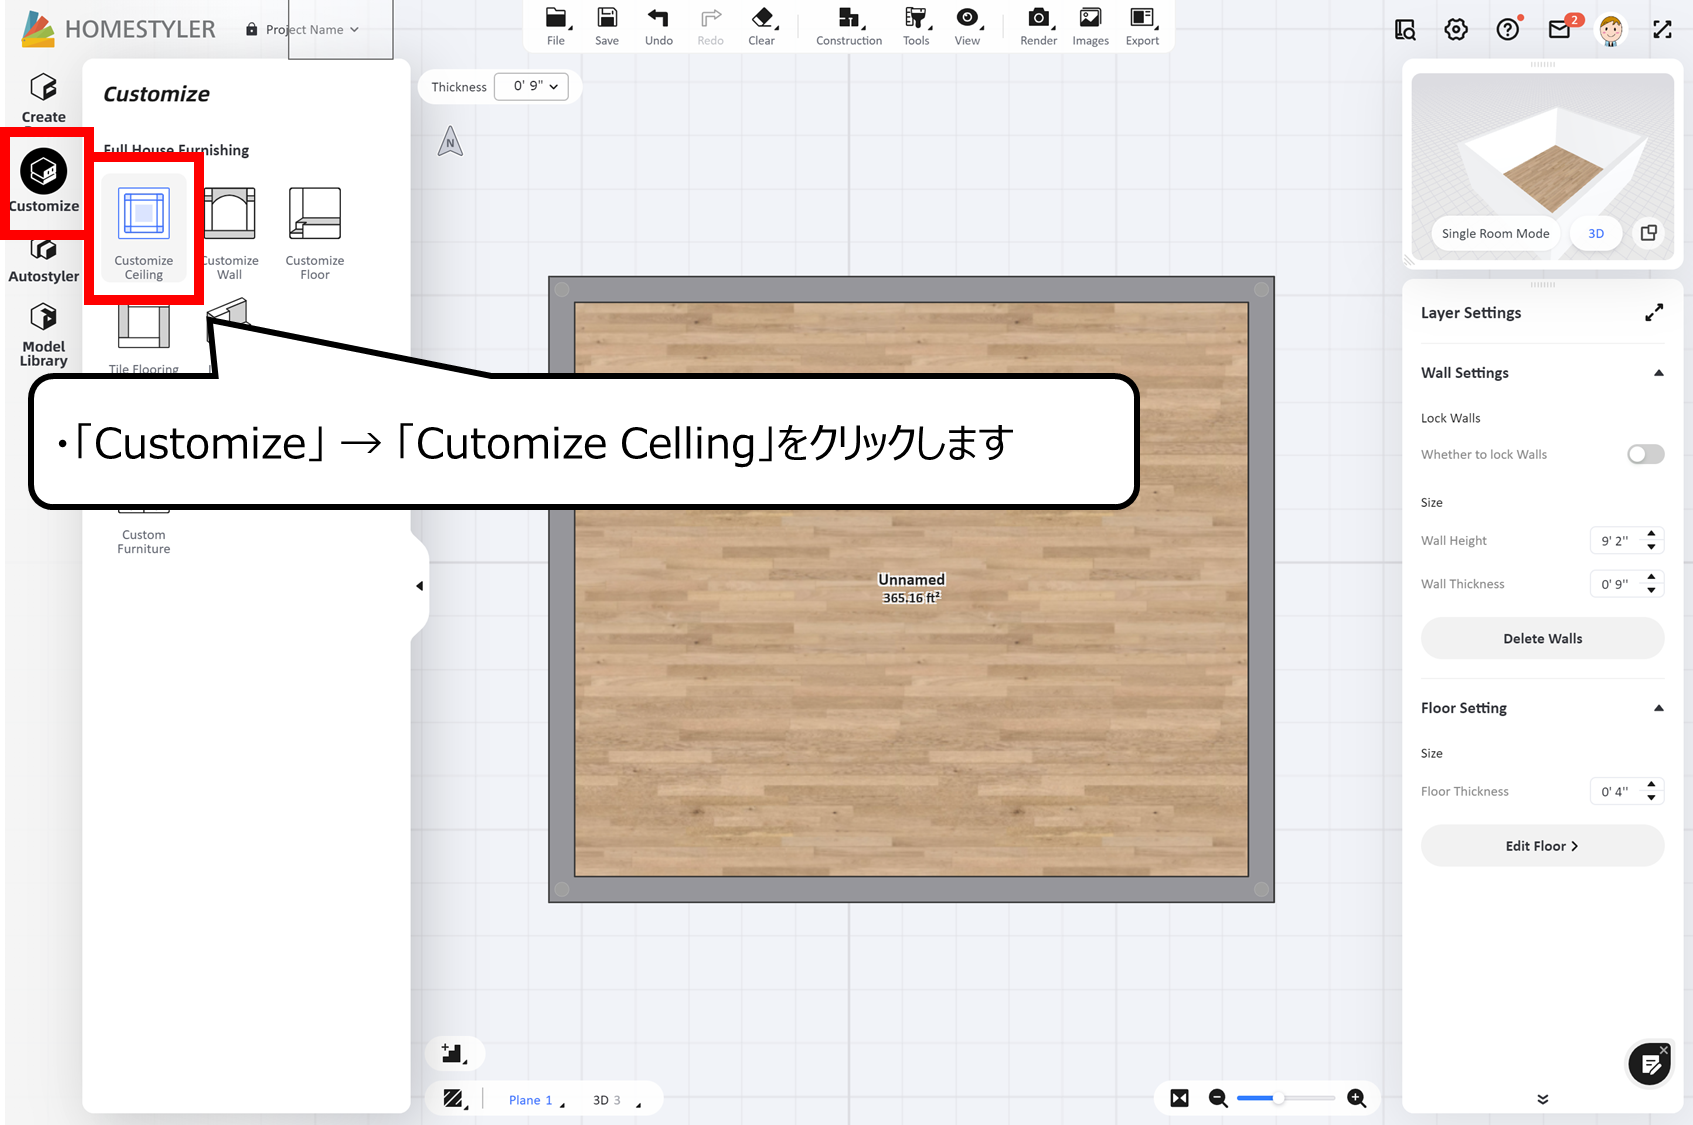
メニューの「カスタマイズ」をクリックします
・「Customize」 → 「Cutomize Celling」をクリックします
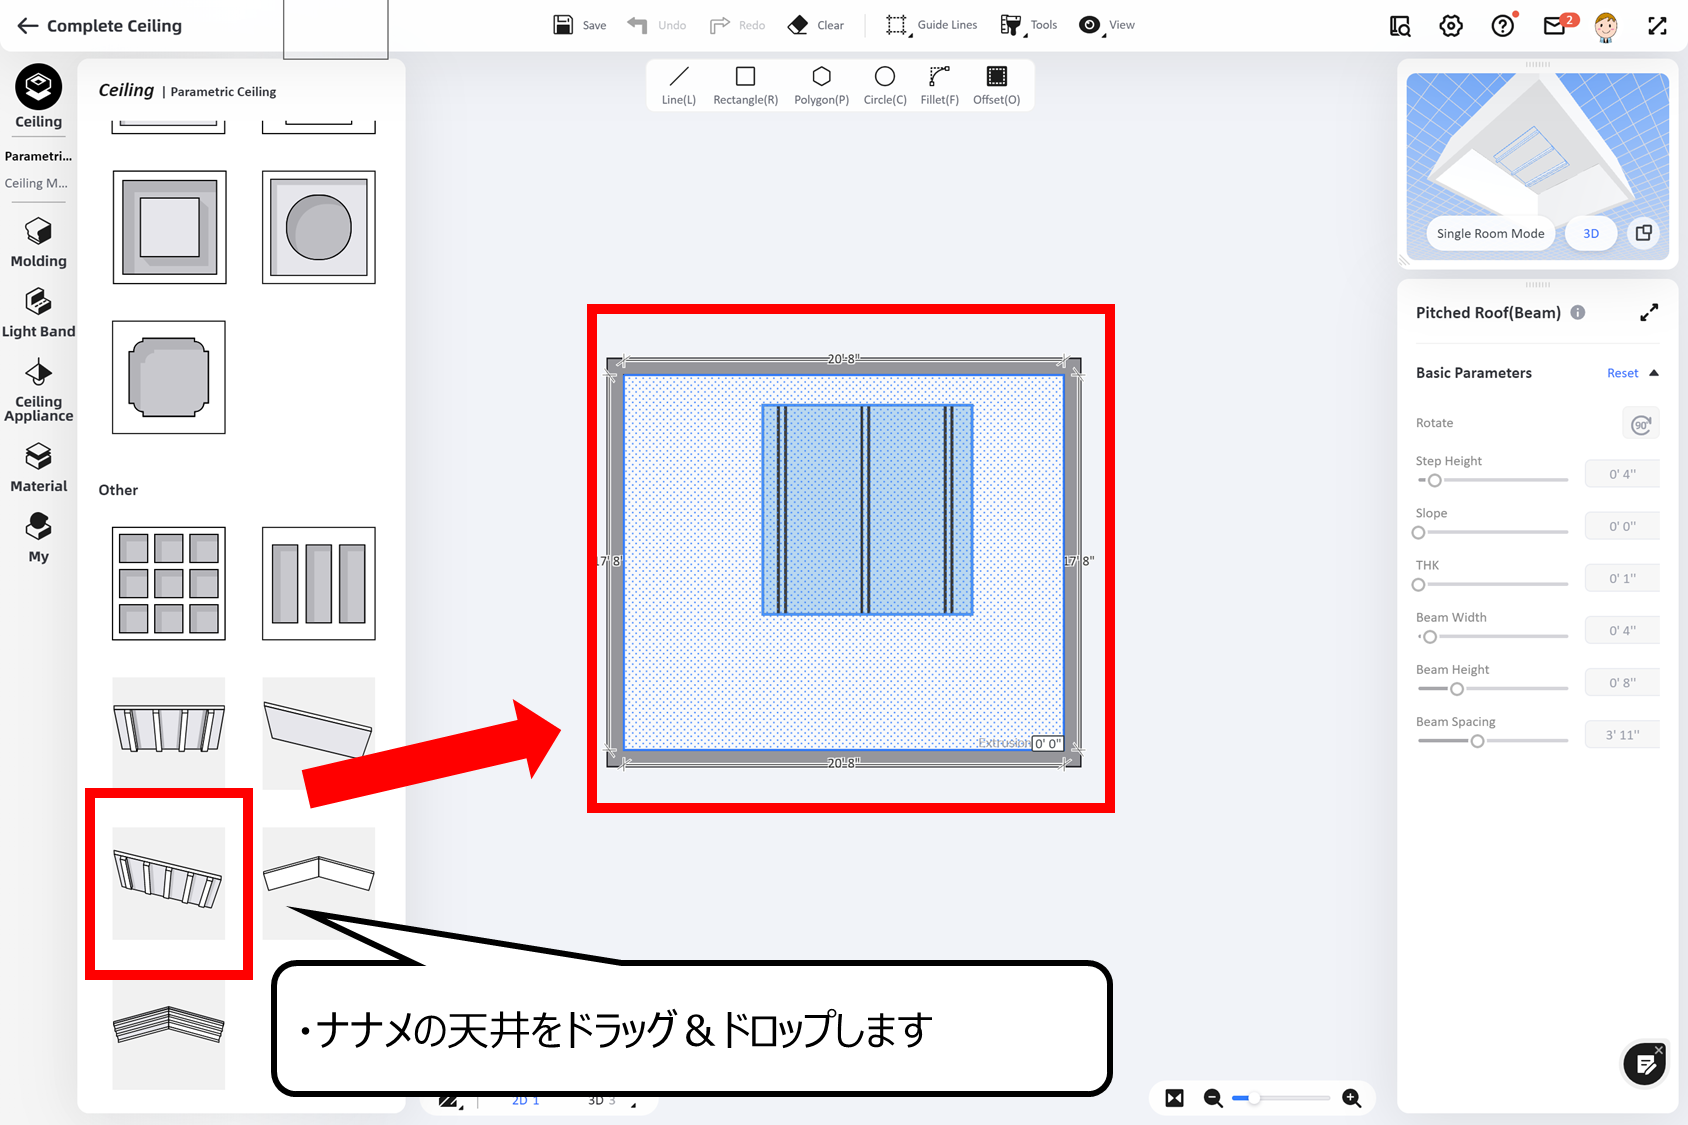
ナナメの天井のメニューがあらわれます
・ナナメの天井をドラッグ&ドロップします
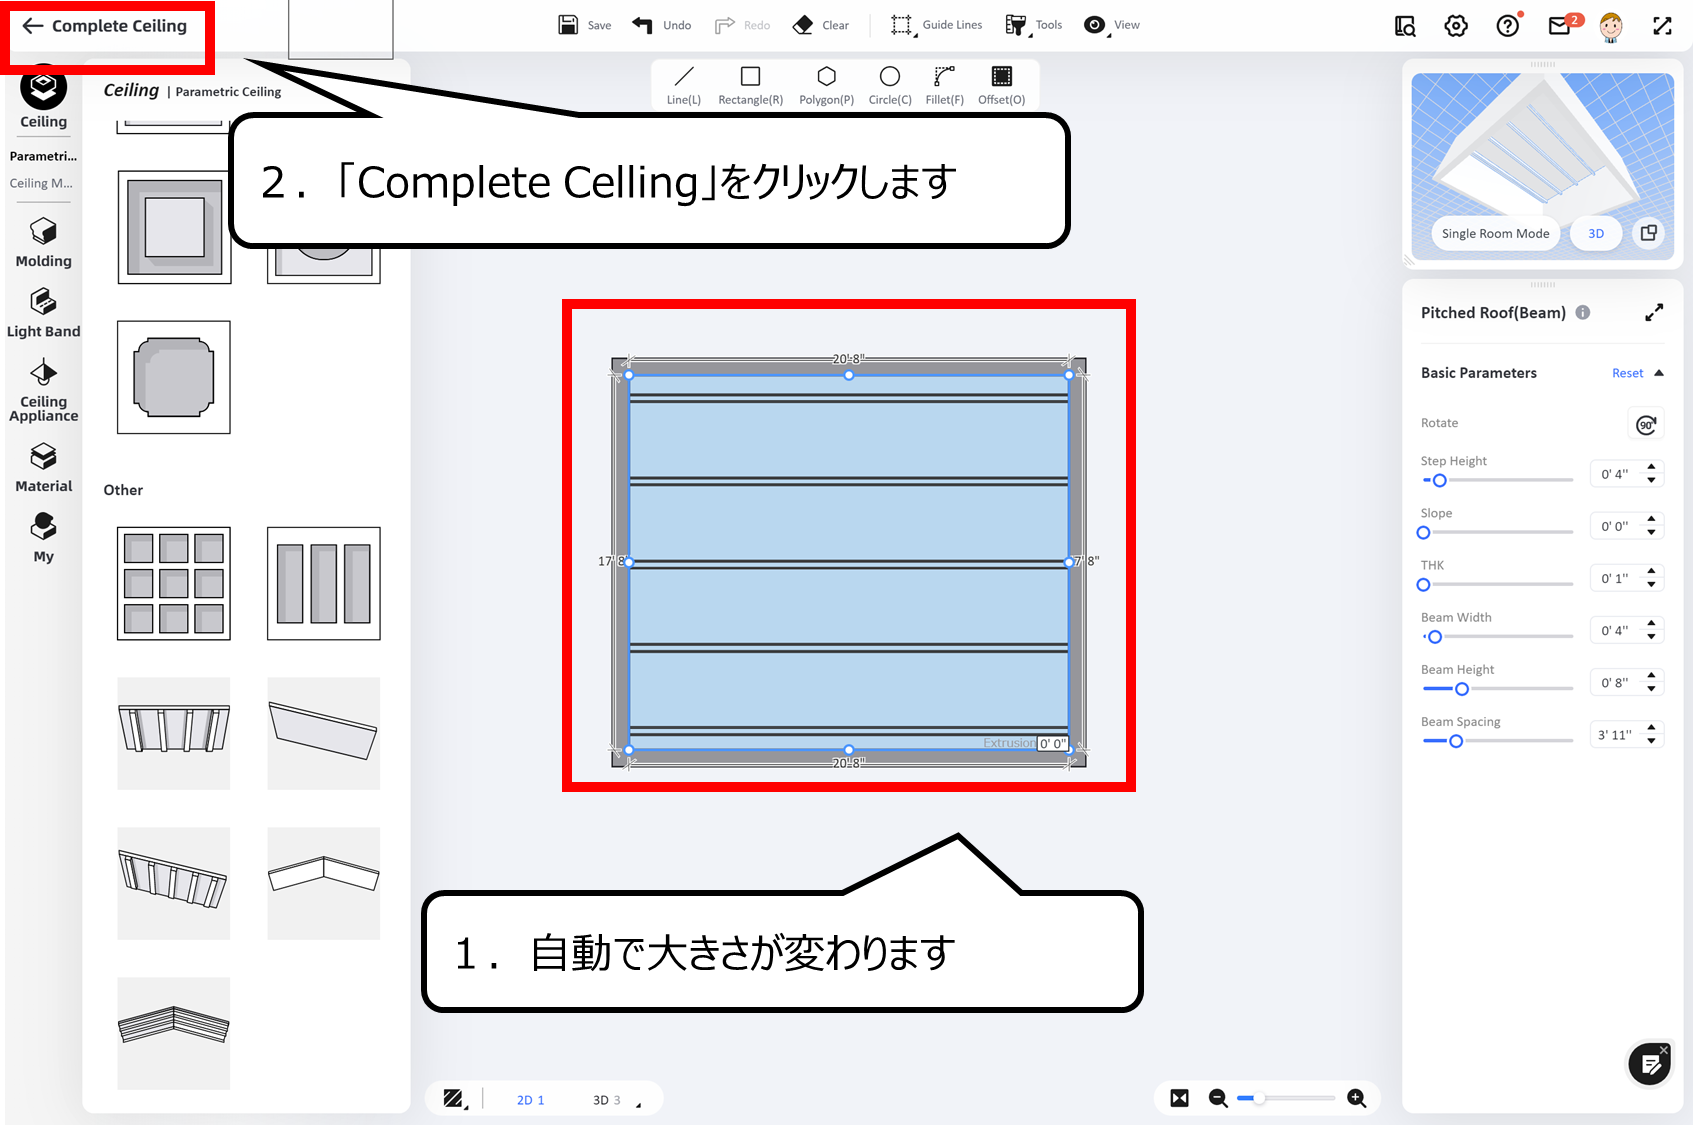
ドラッグ&ドロップすると大きさが自動で変わります
1.自動で大きさが変わります
2.「Complete Celling」をクリックします
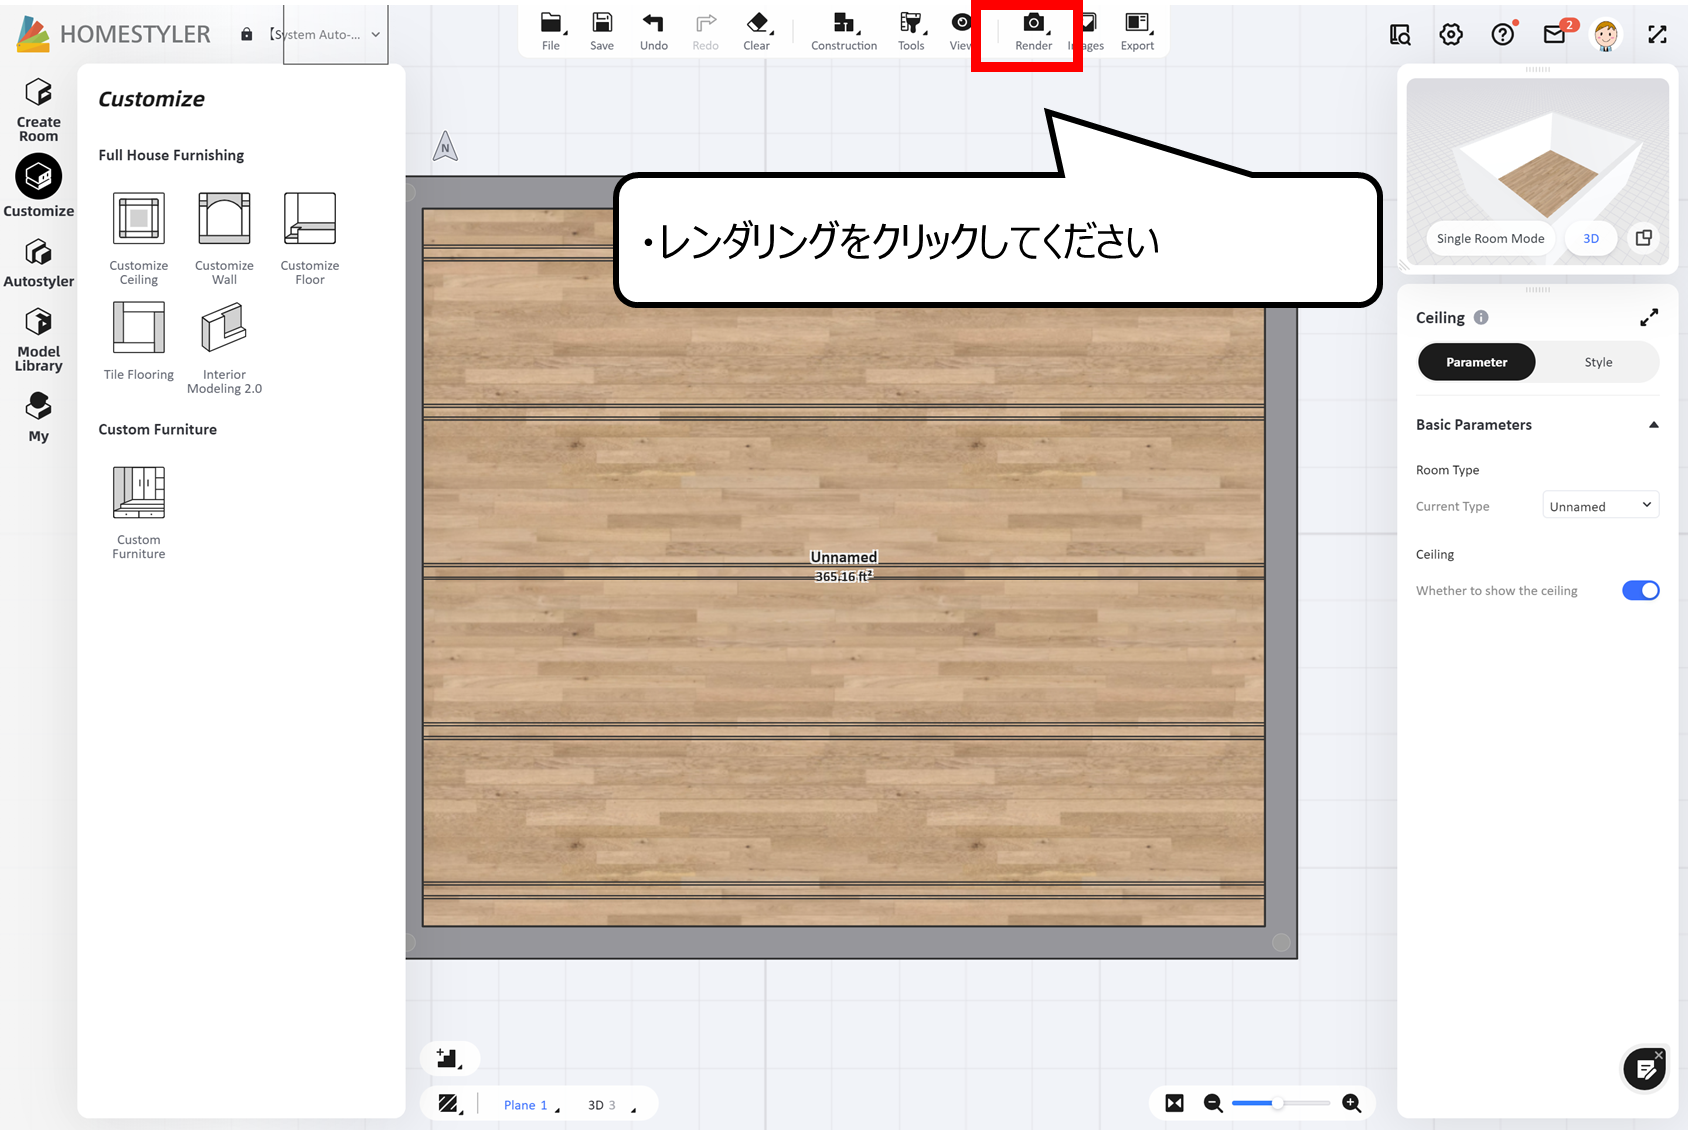
キレイな絵をつくり確認してください
・レンダリングをクリックしてください
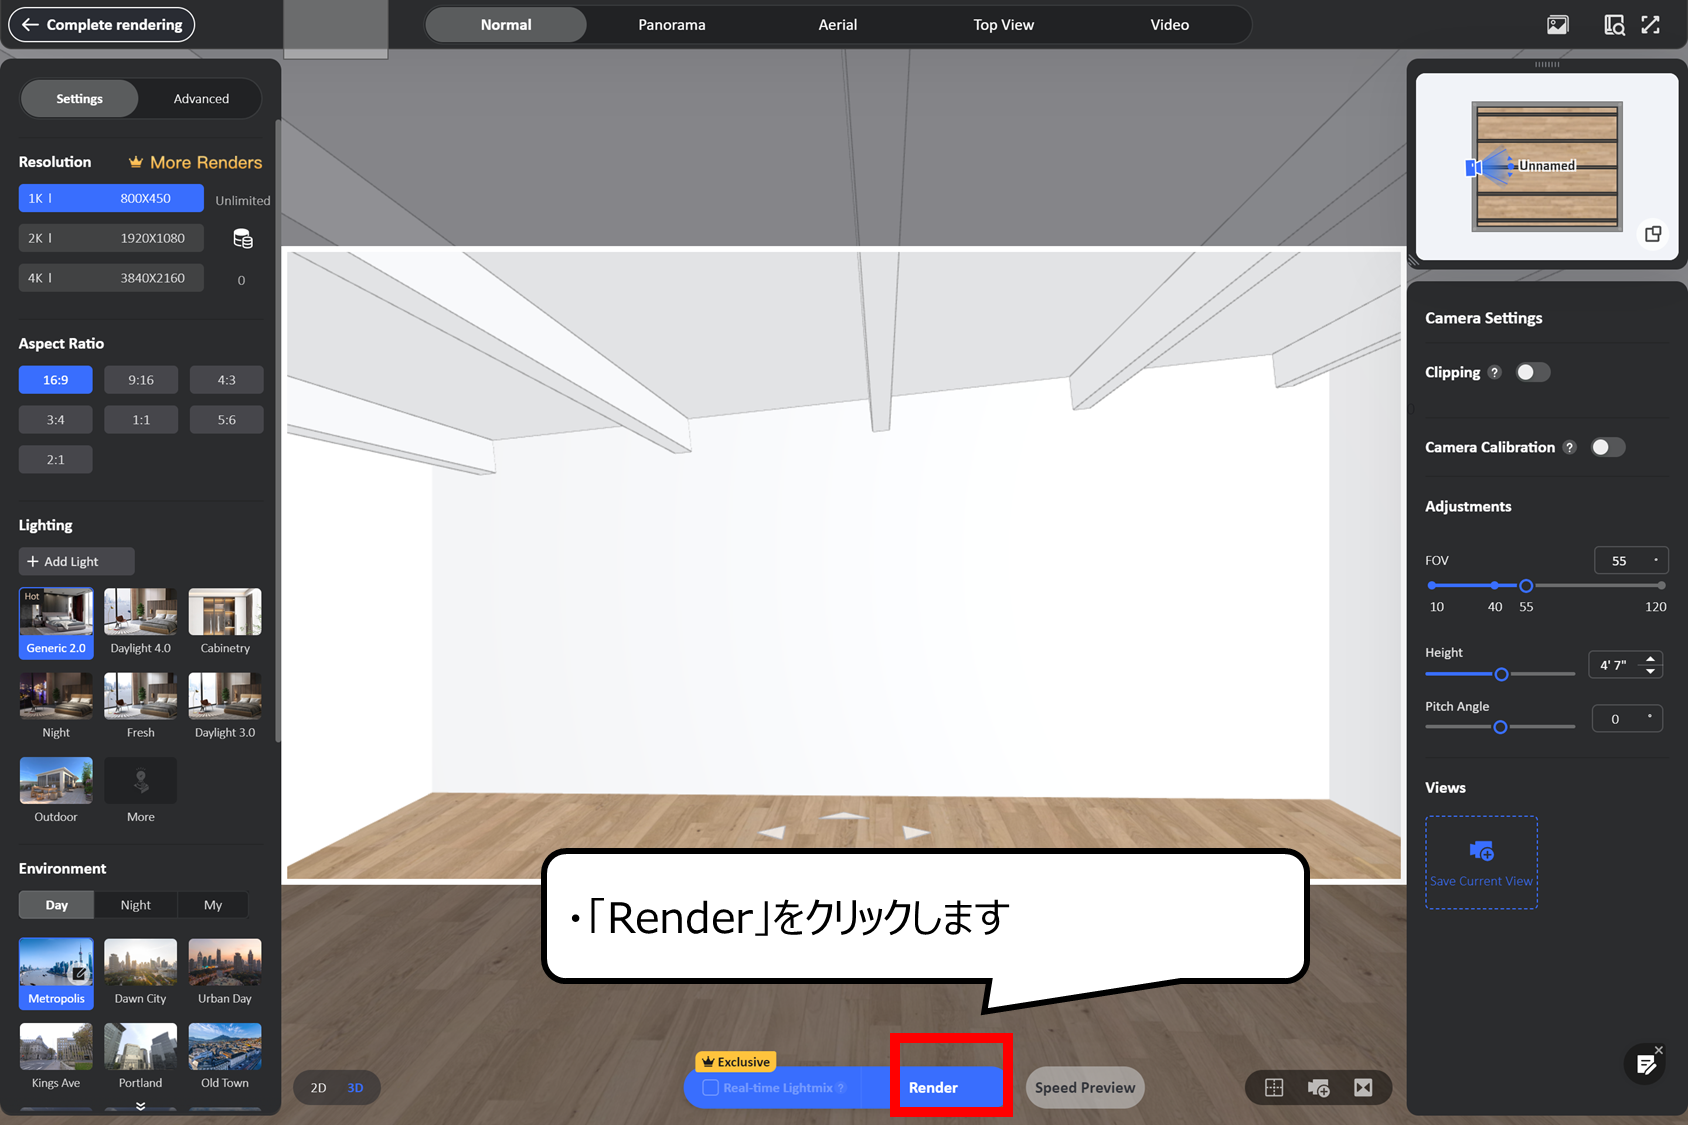
レンダリングの調整の画面があらわれます
1.カメラの位置を調整してください
2.「Render」をクリックしてください
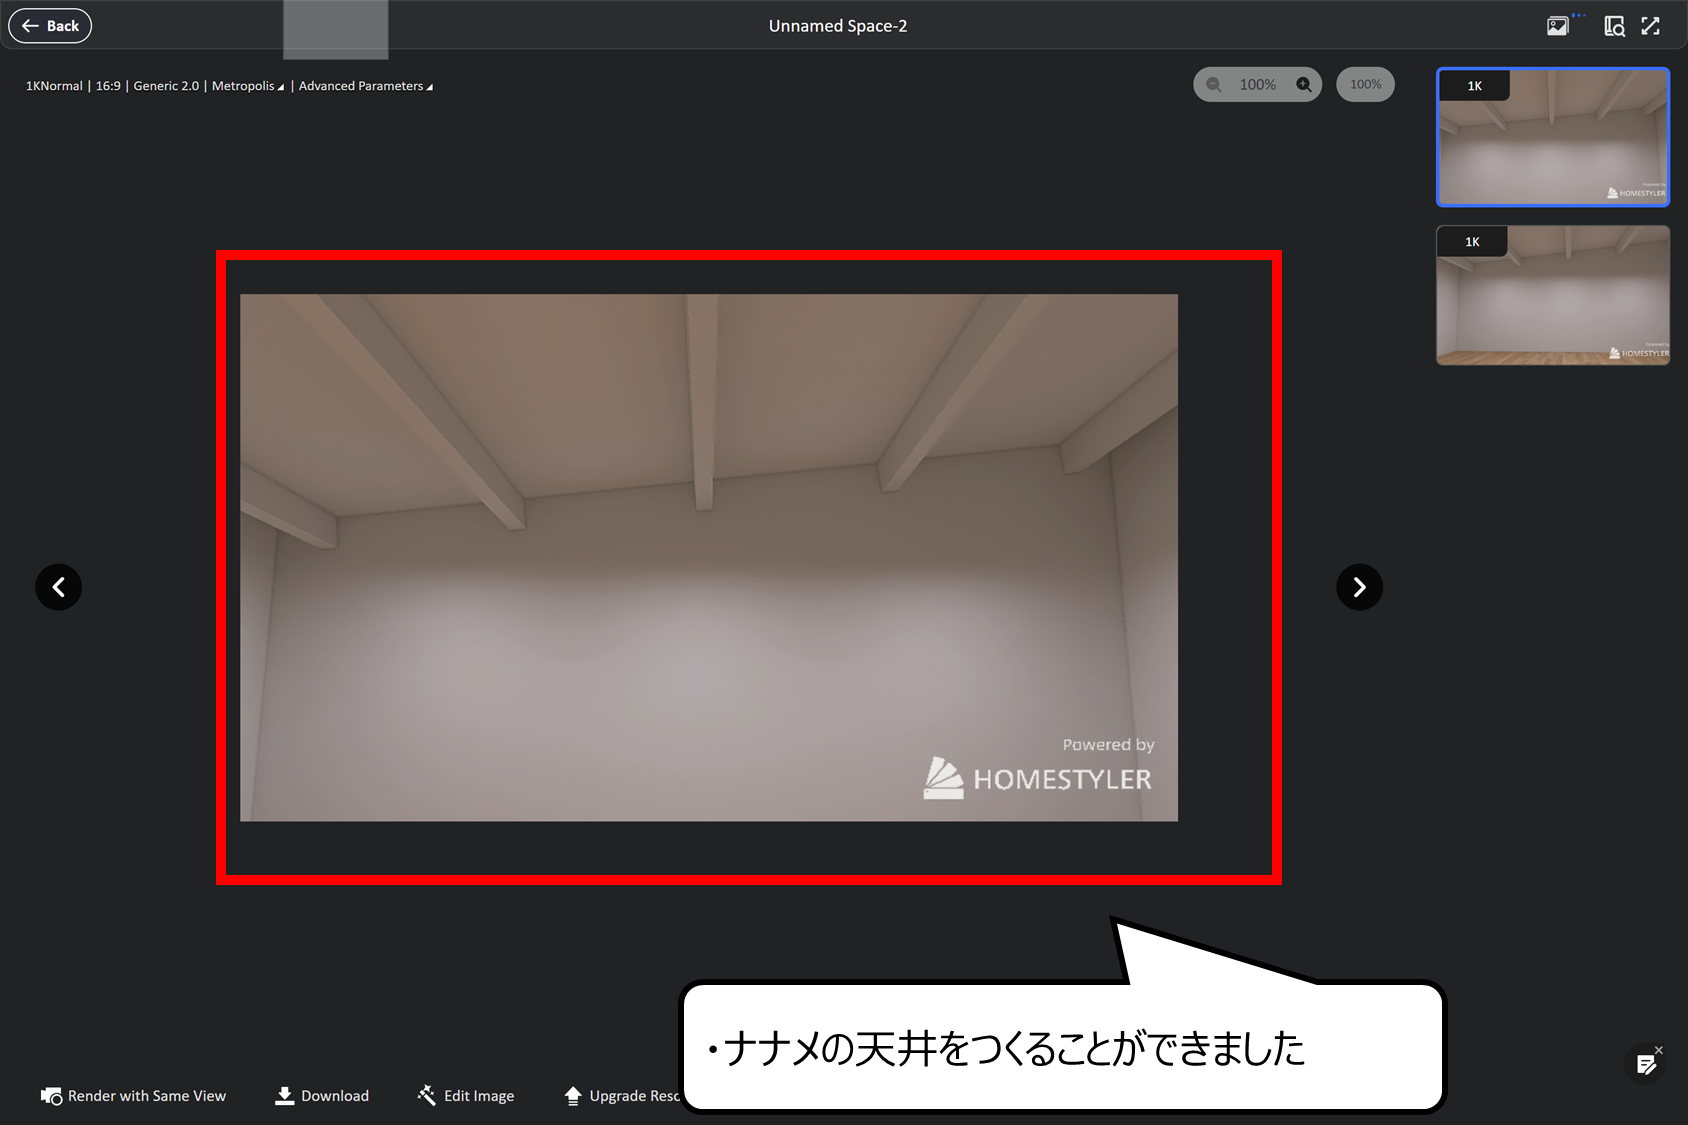
レンダリングの絵です
ナナメの天井をつくることができました
・ナナメの天井をつくることができました
・まとめ
今回は無料ソフト「Homestyler」と「Gimp」で、3D建物と漫画用背景のつくり方を紹介しました
Youtubeでは、さらにおもしろく絵のつくり方を紹介しています
また、他のページでもCG・映像のつくり方について紹介しています


コメント