

「ちょっとカッコイイムービーをつくってみたい」
「おしゃれなムービーのつくり方が知りたい」
・・・でも
「なにから始めればいいか、わからない」
「どの動画編集ソフトがいいか、わからない」
「ムズかしそう」
と悩んでいませんか?
このページでは、だれでも、できる方法で、お絵かきツールのつかい方を紹介しています
今回は無料ソフト「アイビスペイントX」のつかい方、合成画像をつくるテクニックを紹介します
ぜひ、チャレンジしてください
つぎの目次の流れにそって進めます
Youtubeでさらにくわしく、絵と映像のつくり方を紹介しています
・「アイビスペイントX」をはじめて聞いた方
「アイビスペイントX」スマートフォン用の無料のお絵かきソフトです
「アイビスペイントX」は「Android」、「iPhone」のスマートフォンで絵を描くためのソフトです
「アイビスペイントX」で絵を描いている映像です
インストールは「GooglePlay」、iPhoneの方は「App store」にアクセスしてください
・アイビスペイントXで合成画像を作って使い方を覚えよう
・紹介するお絵かきテクニック
今回、紹介するお絵かきテクニックの絵です
・合成画像をつくるために必要なファイルをダウンロードしよう
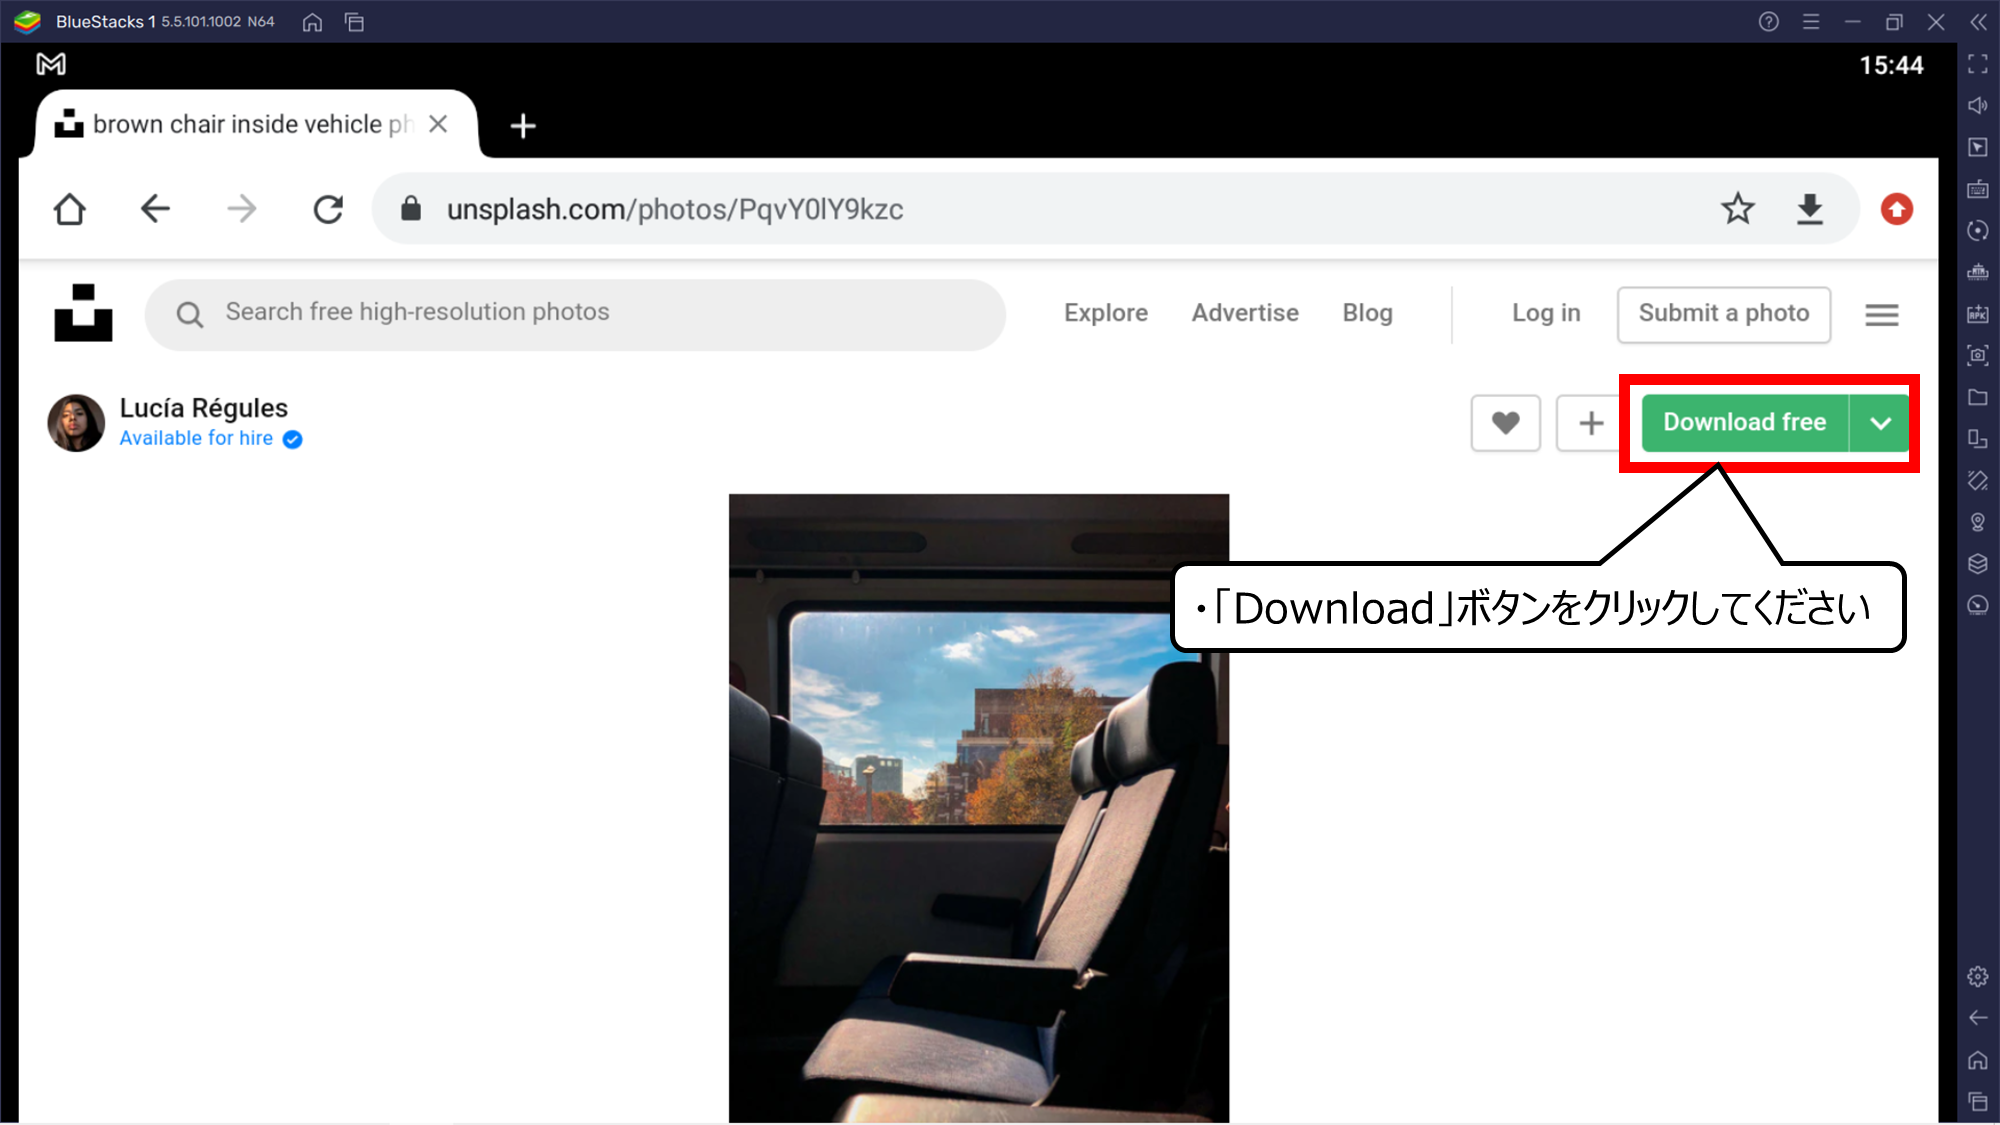
合成画像につかう「電車の窓」の写真をダウンロードします
1.無料の画像を「Unsplash」で公開しているアドレスにアクセスしてください
>> Luciaさん「brown chair inside vehicle photo」
2.「Download」ボタンをクリックしてください
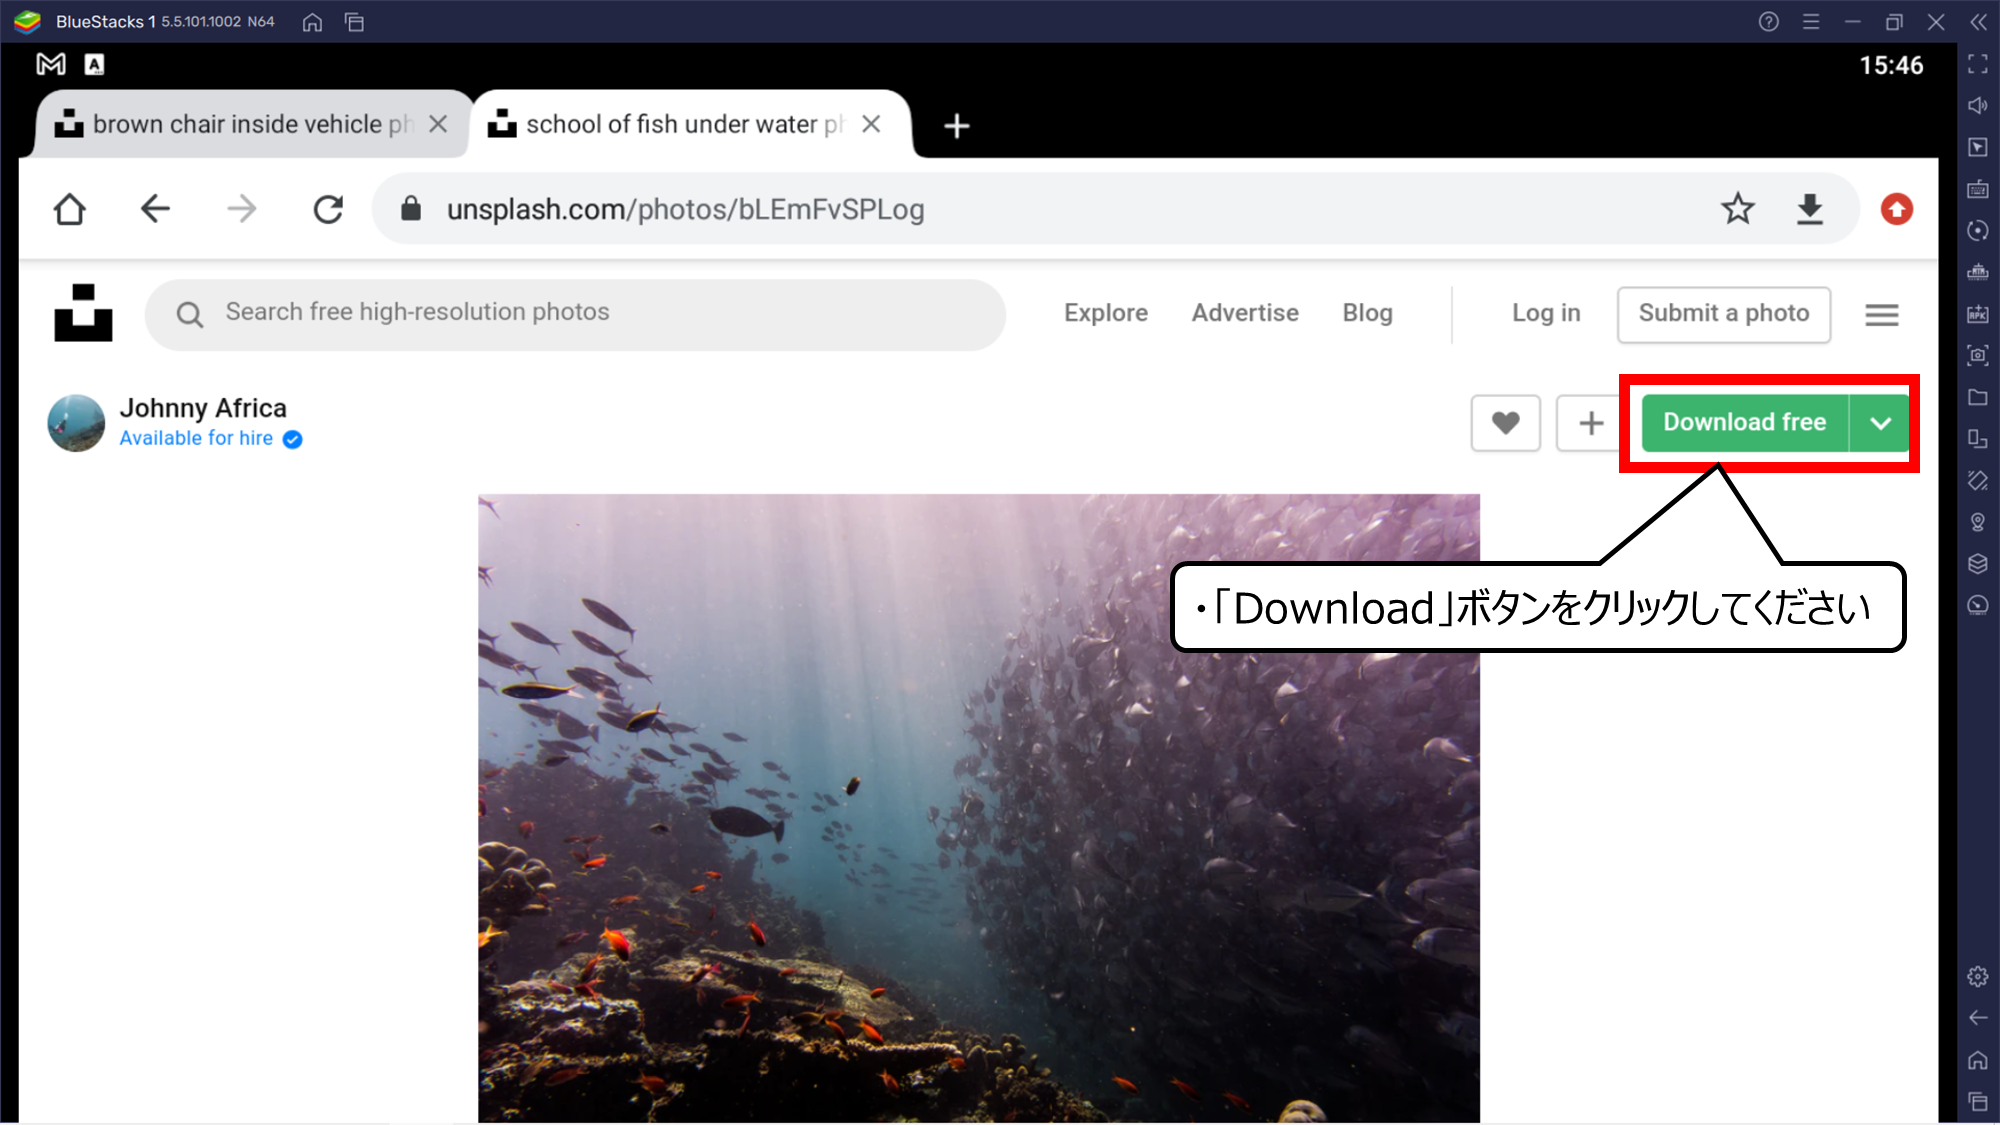
2枚目の合成画像につかう「海の魚」の写真をダウンロードします
1.無料の画像を「Unsplash」で公開しているアドレスにアクセスしてください
>> Johnnyさん「School of fish under water photo」
2.「Download」ボタンをクリックしてください
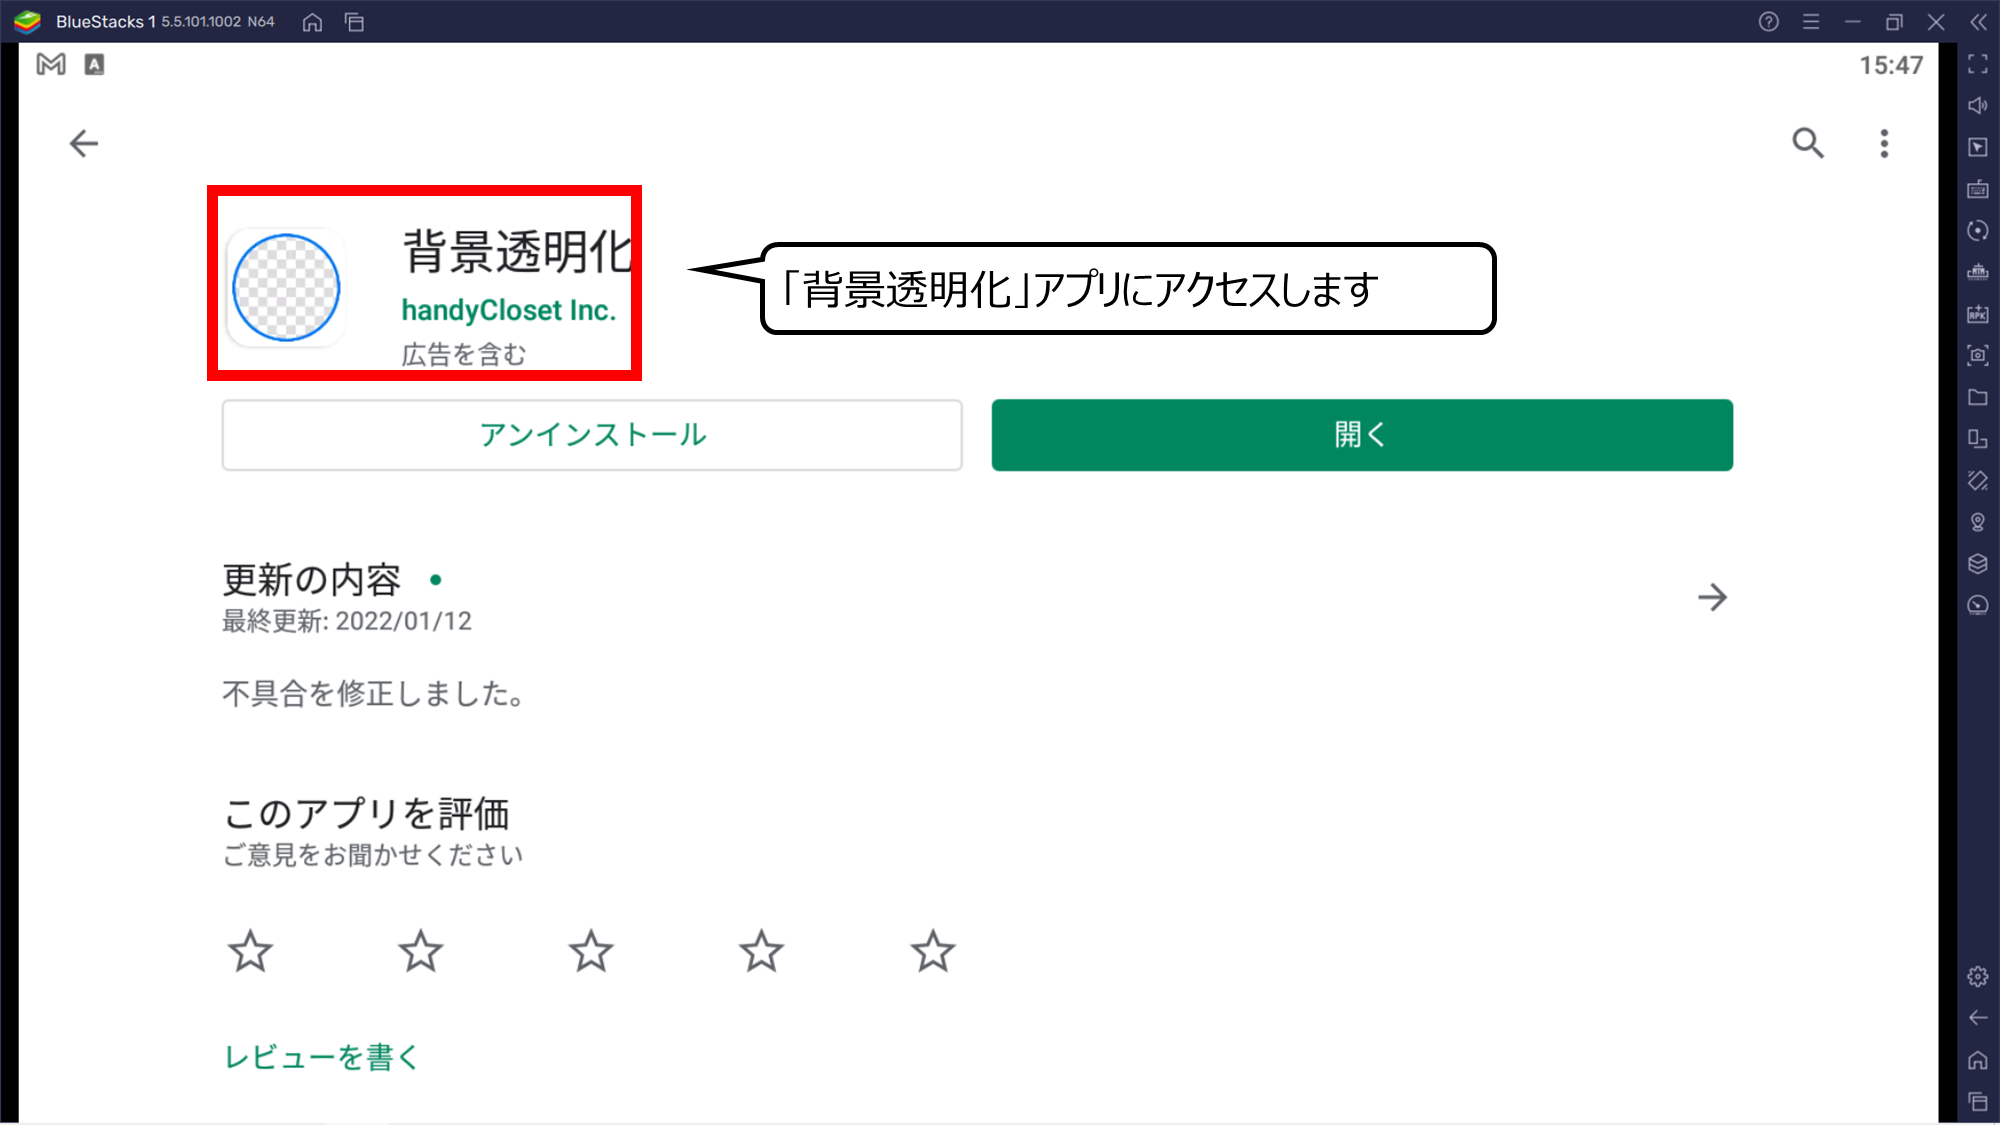
背景を透明にできるアプリをダウンロードします
・「背景透明化」アプリにアクセスします
お絵描きソフトのアイビスペイントをダウンロードします
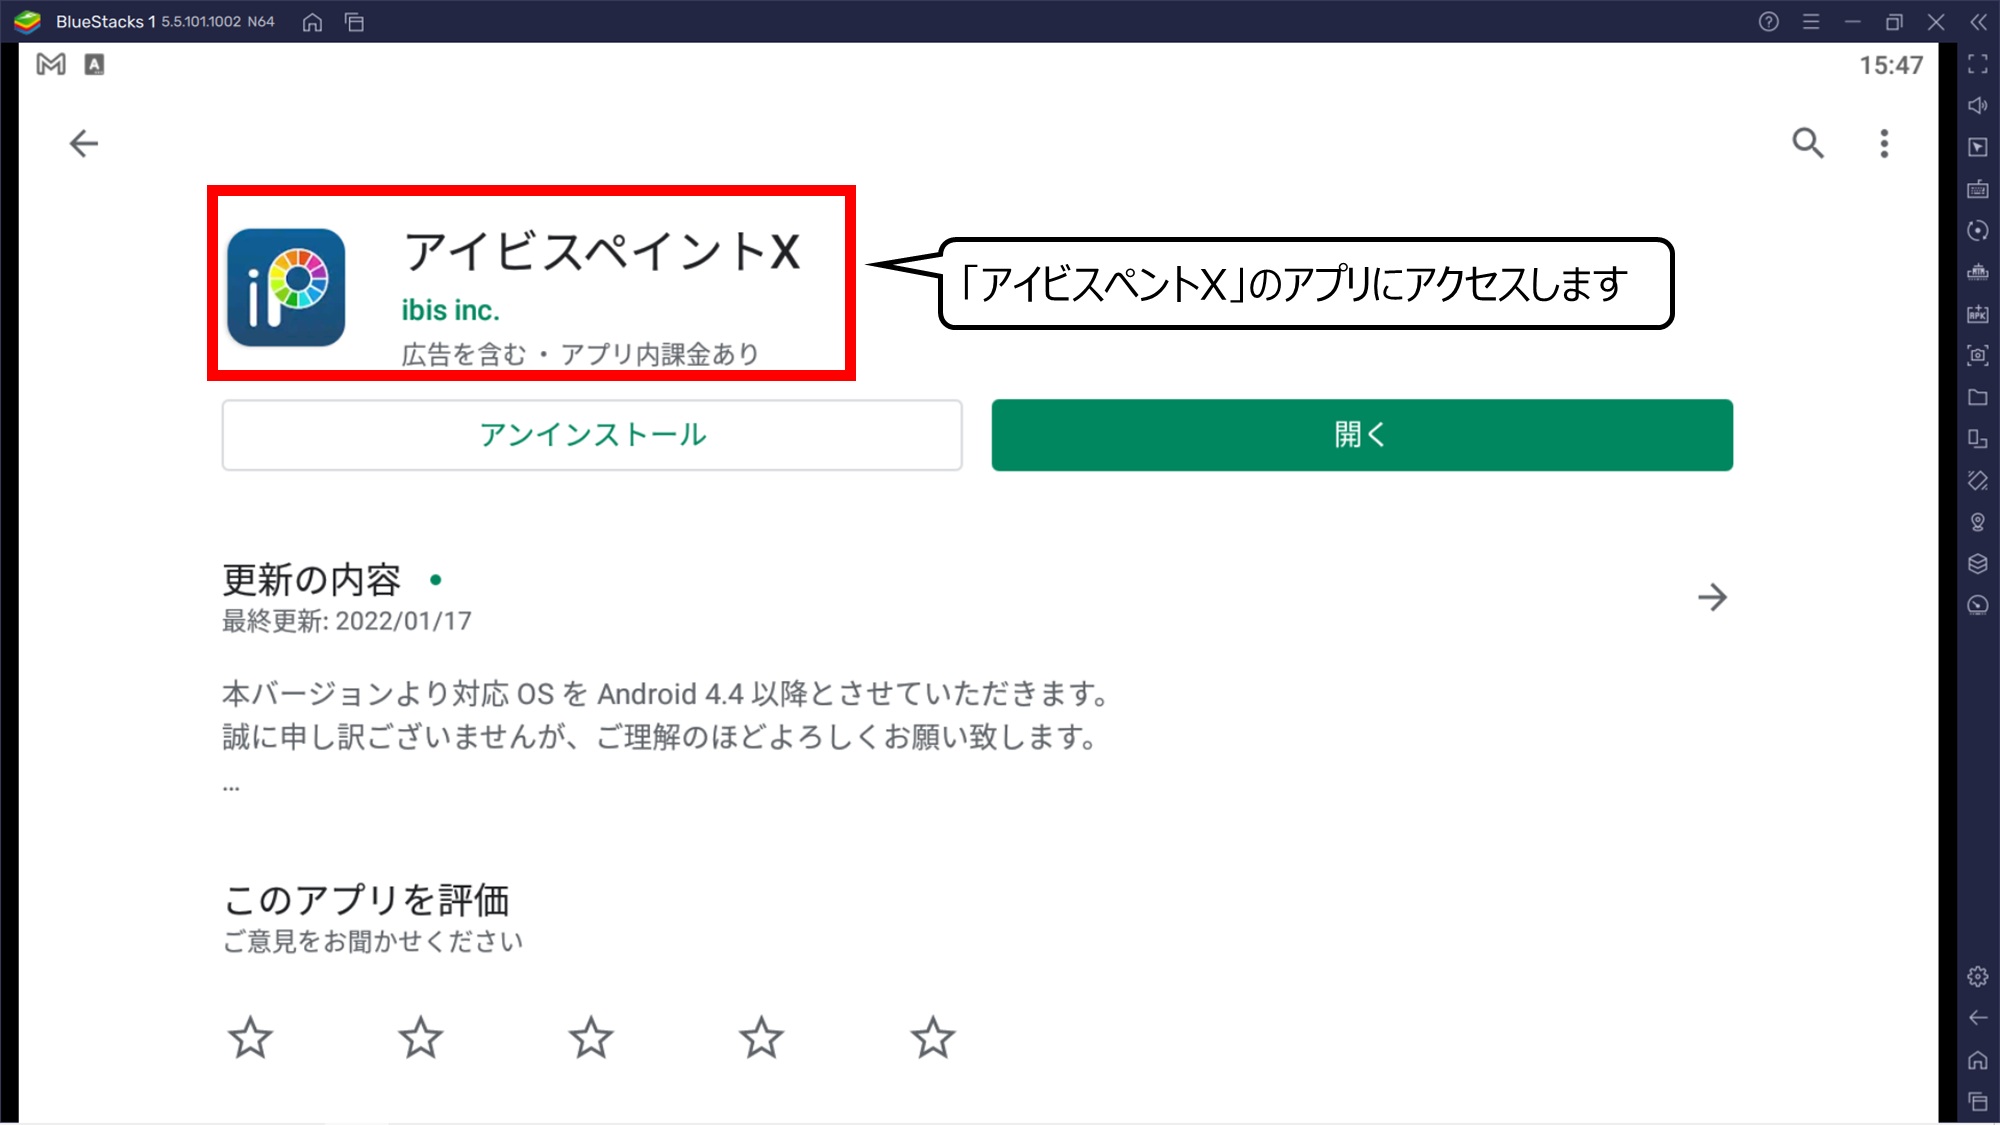
1.「アイビスペントX」のアプリをダウンロードしてください
>> ibis Paint X 「Google Play」
>> ibis Paint X「App store」
・合成する画像の背景を切り抜こう
はじめに、背景を透明化させます
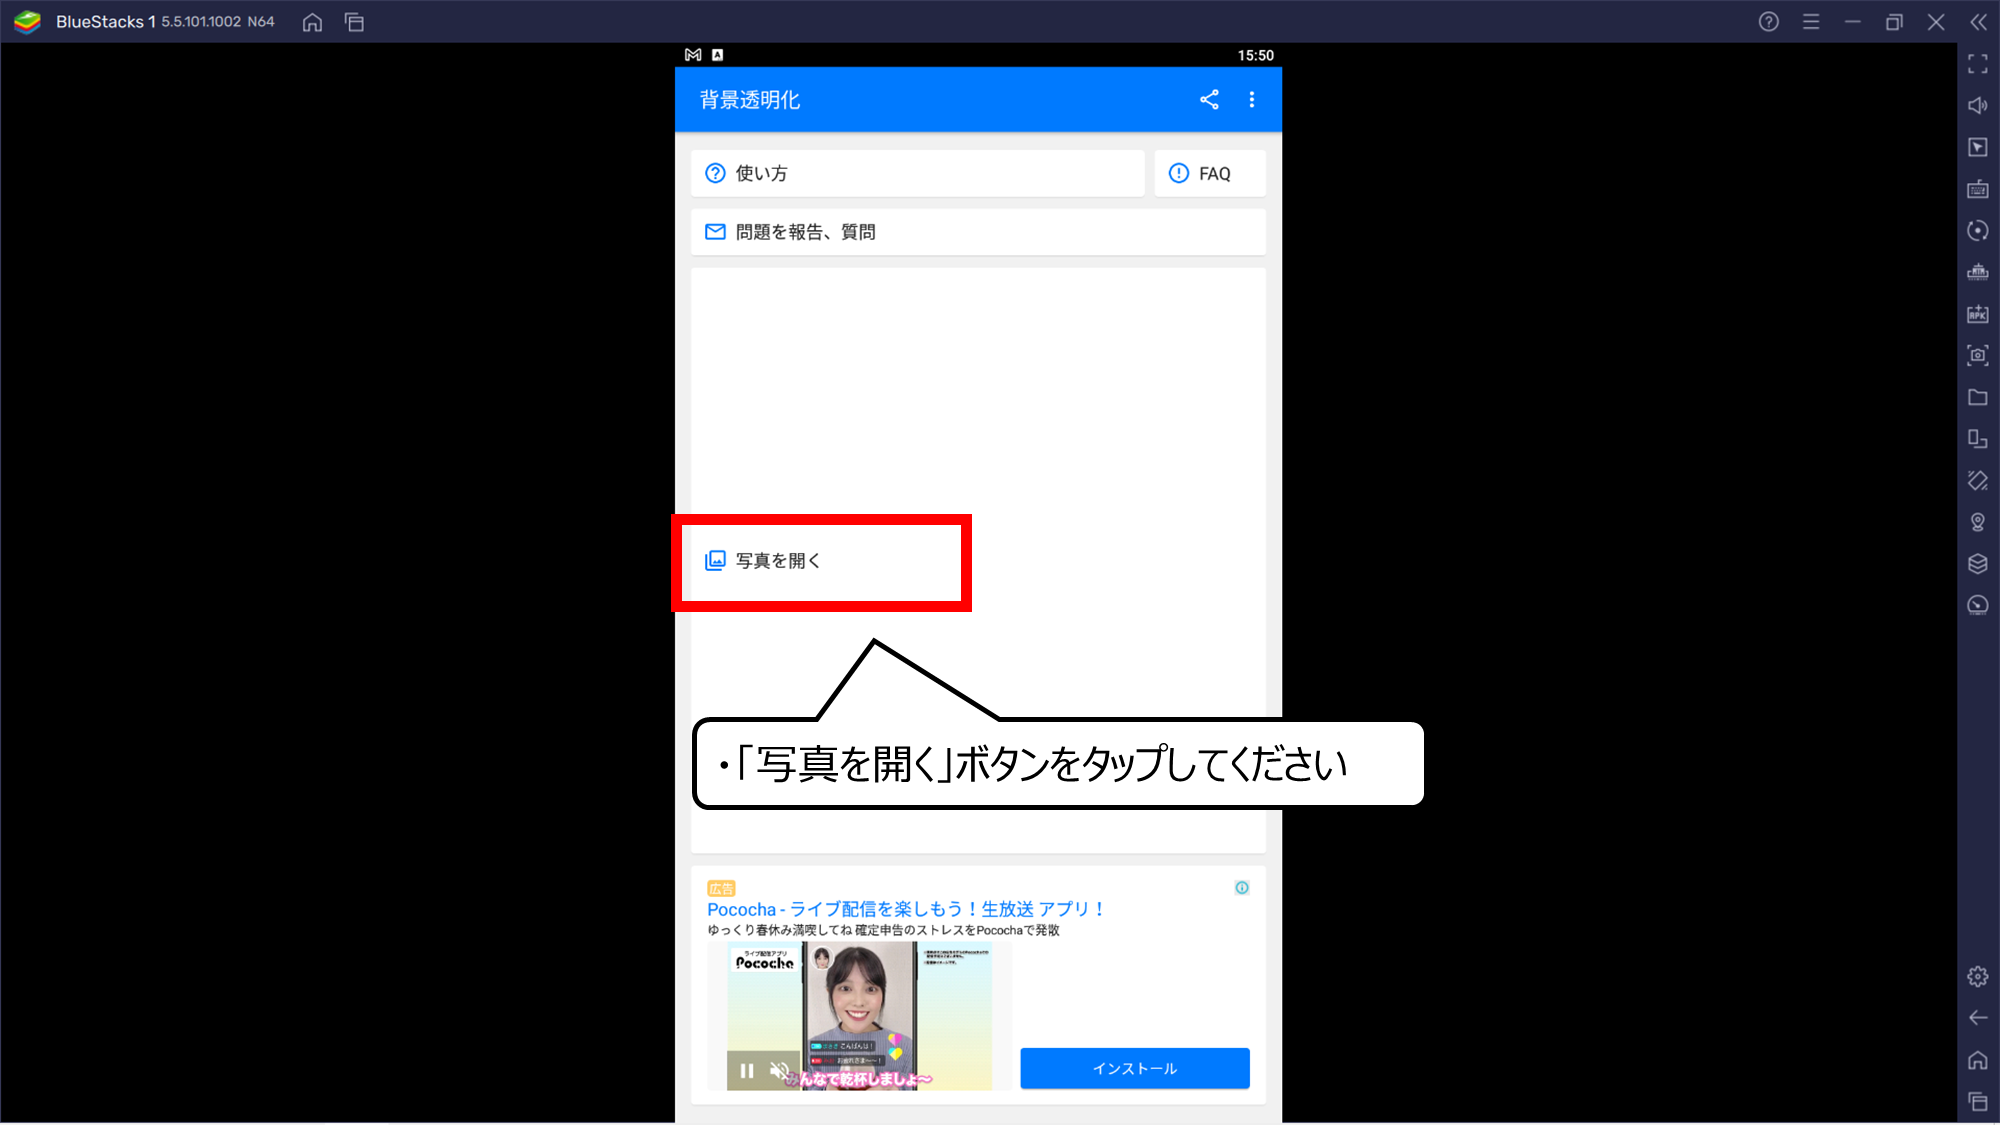
1.背景透明化アプリを起動してください
2.「写真を開く」ボタンをタップしてください
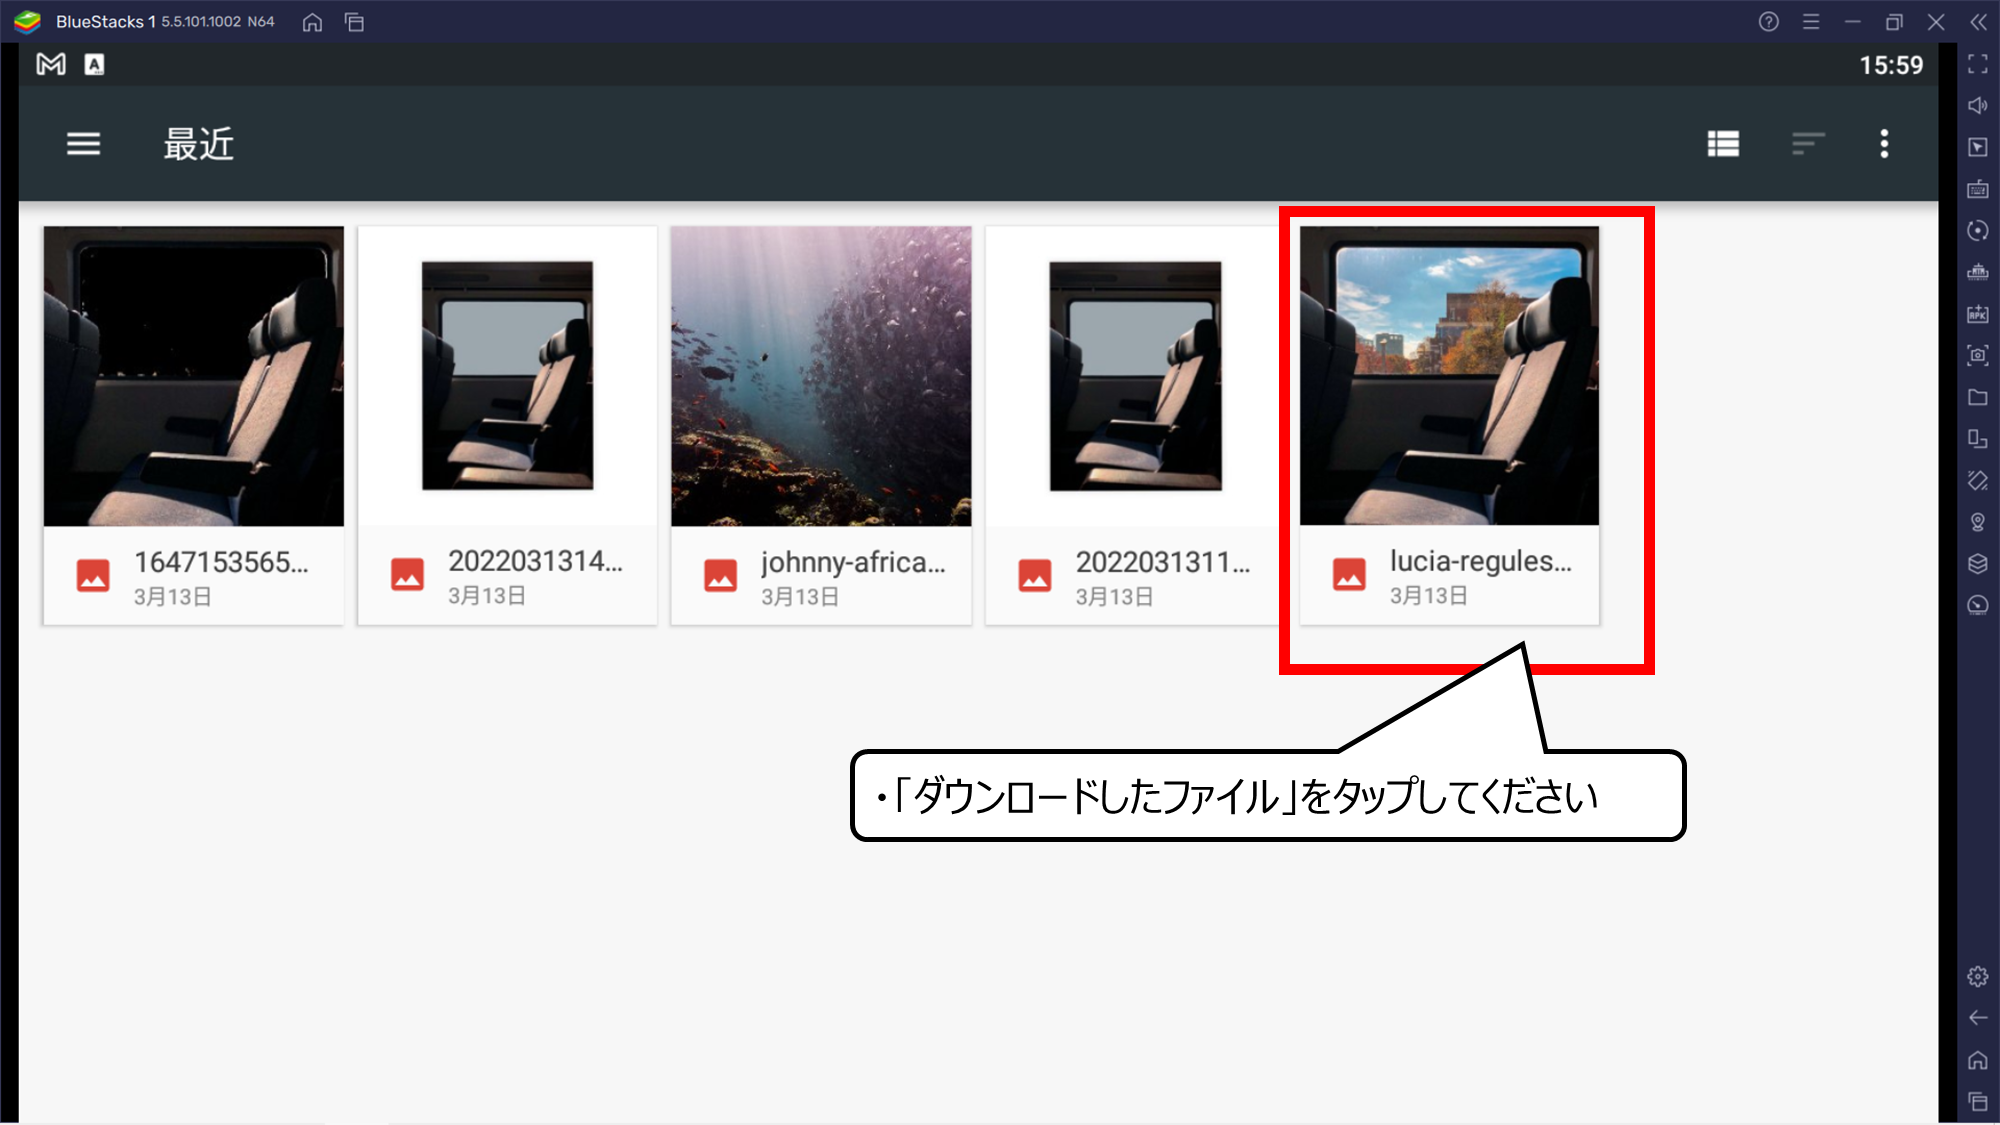
ダウンロードした「電車の窓」の写真をタップしてください
・「ダウンロードしたファイル」をタップしてください
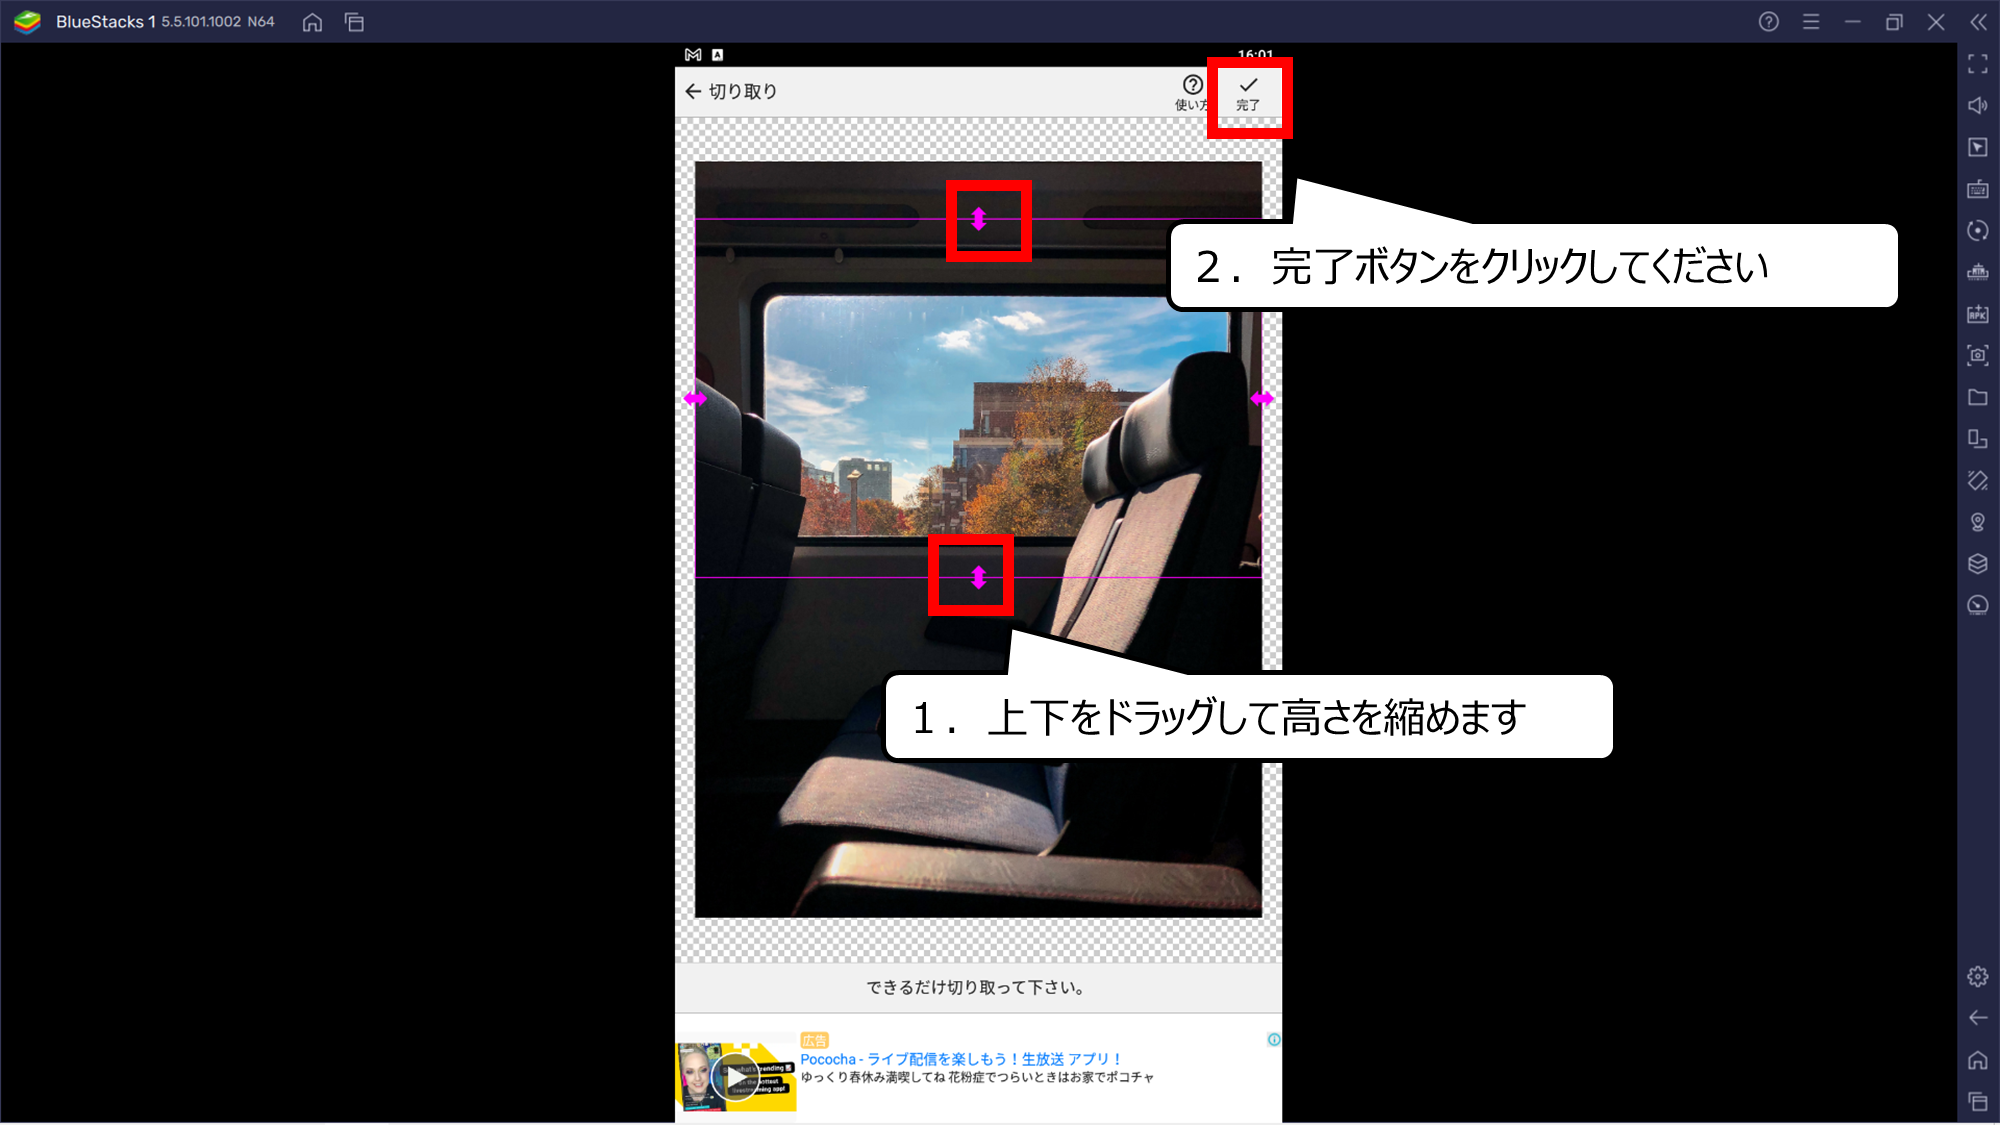
開いた写真の大きさを変えます
1.上下をドラッグして高さを縮めます
2.完了ボタンをクリックしてください
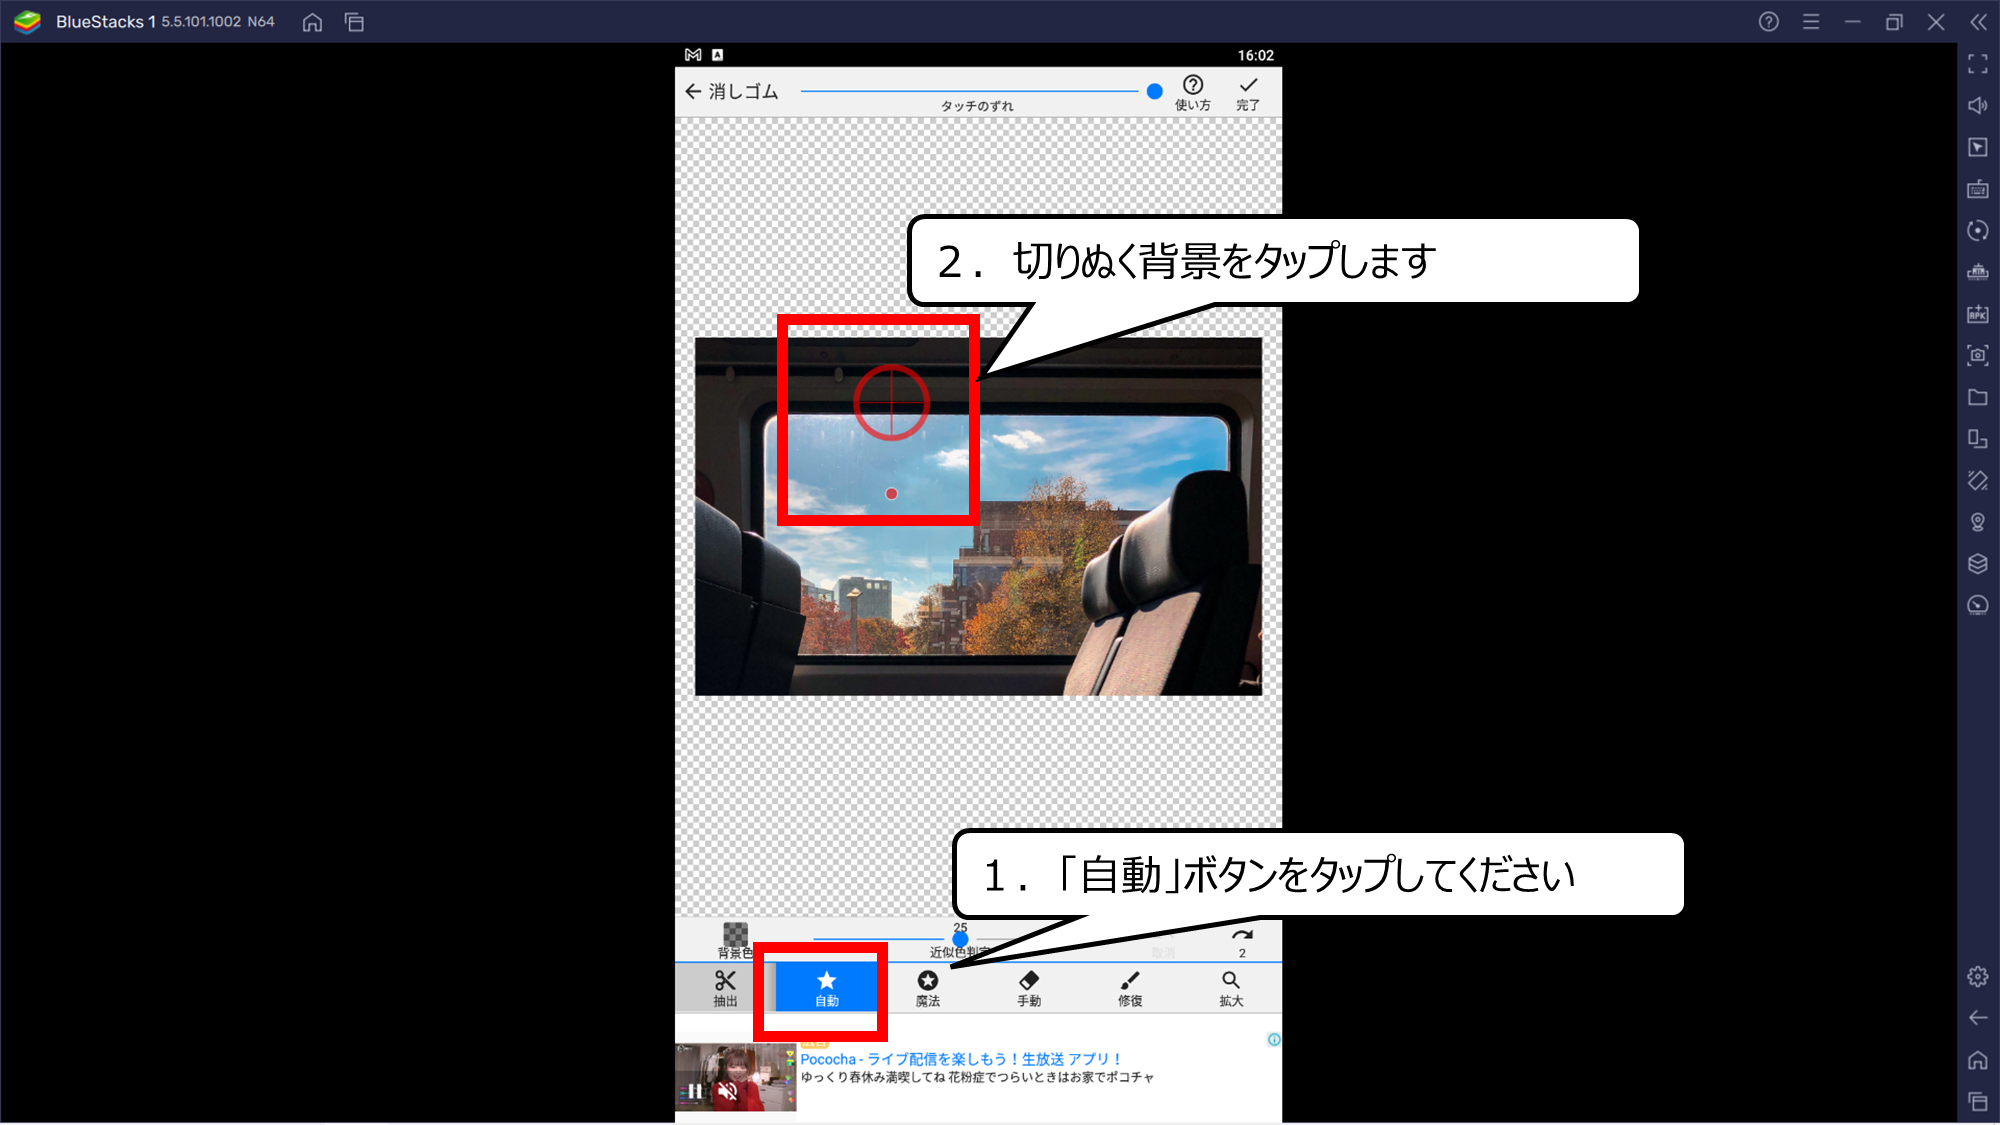
窓の景色を切り抜きます
1.「自動」ボタンをタップしてください
2.切りぬく背景をタップします
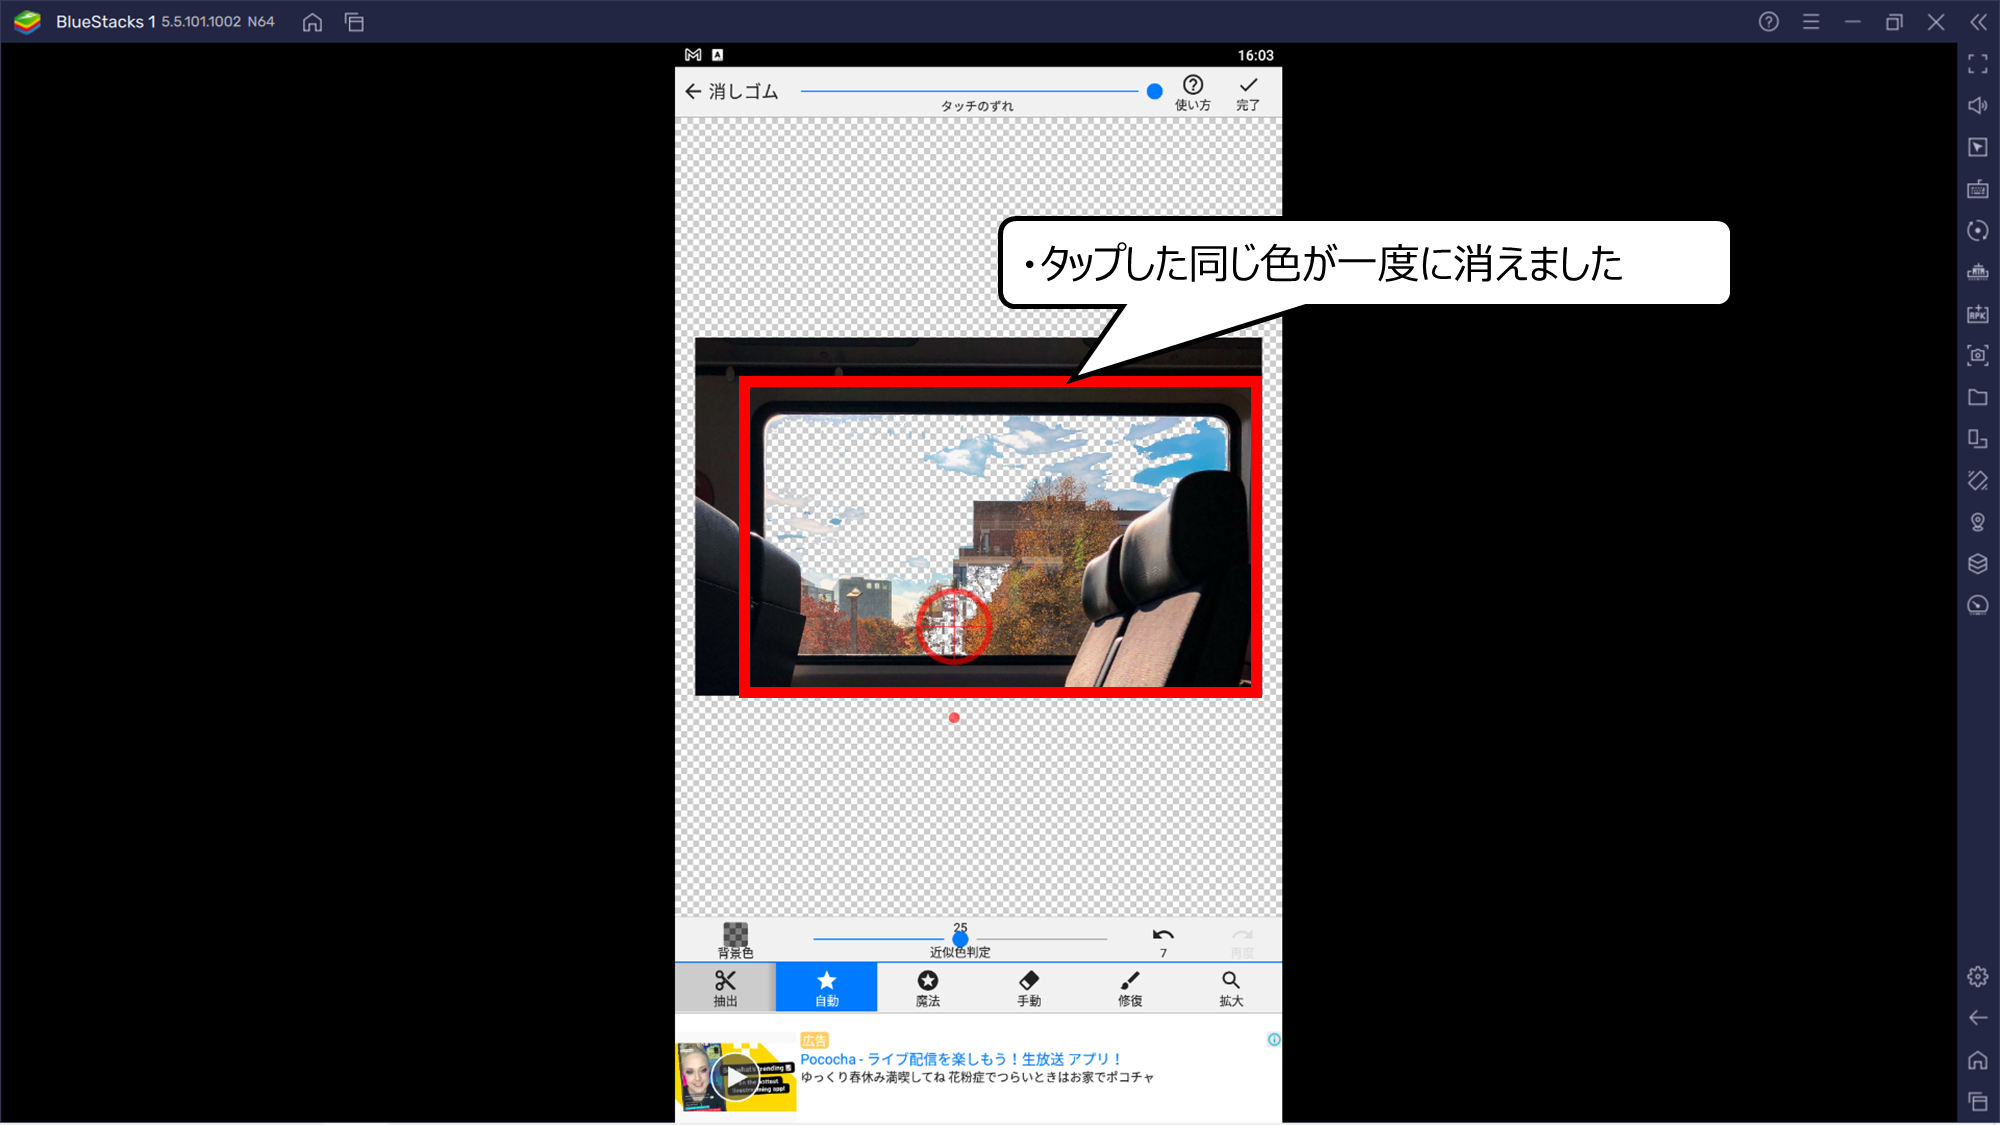
タップすると景色が消えます
・タップした同じ色が一度に消えました

魔法ツールをつかうと細かい部分を消せます
1.「魔法」ボタンをタップしてください
2.ドラッグすると細かい部分を消すことができます
3.「完了」ボタンをタップしてください
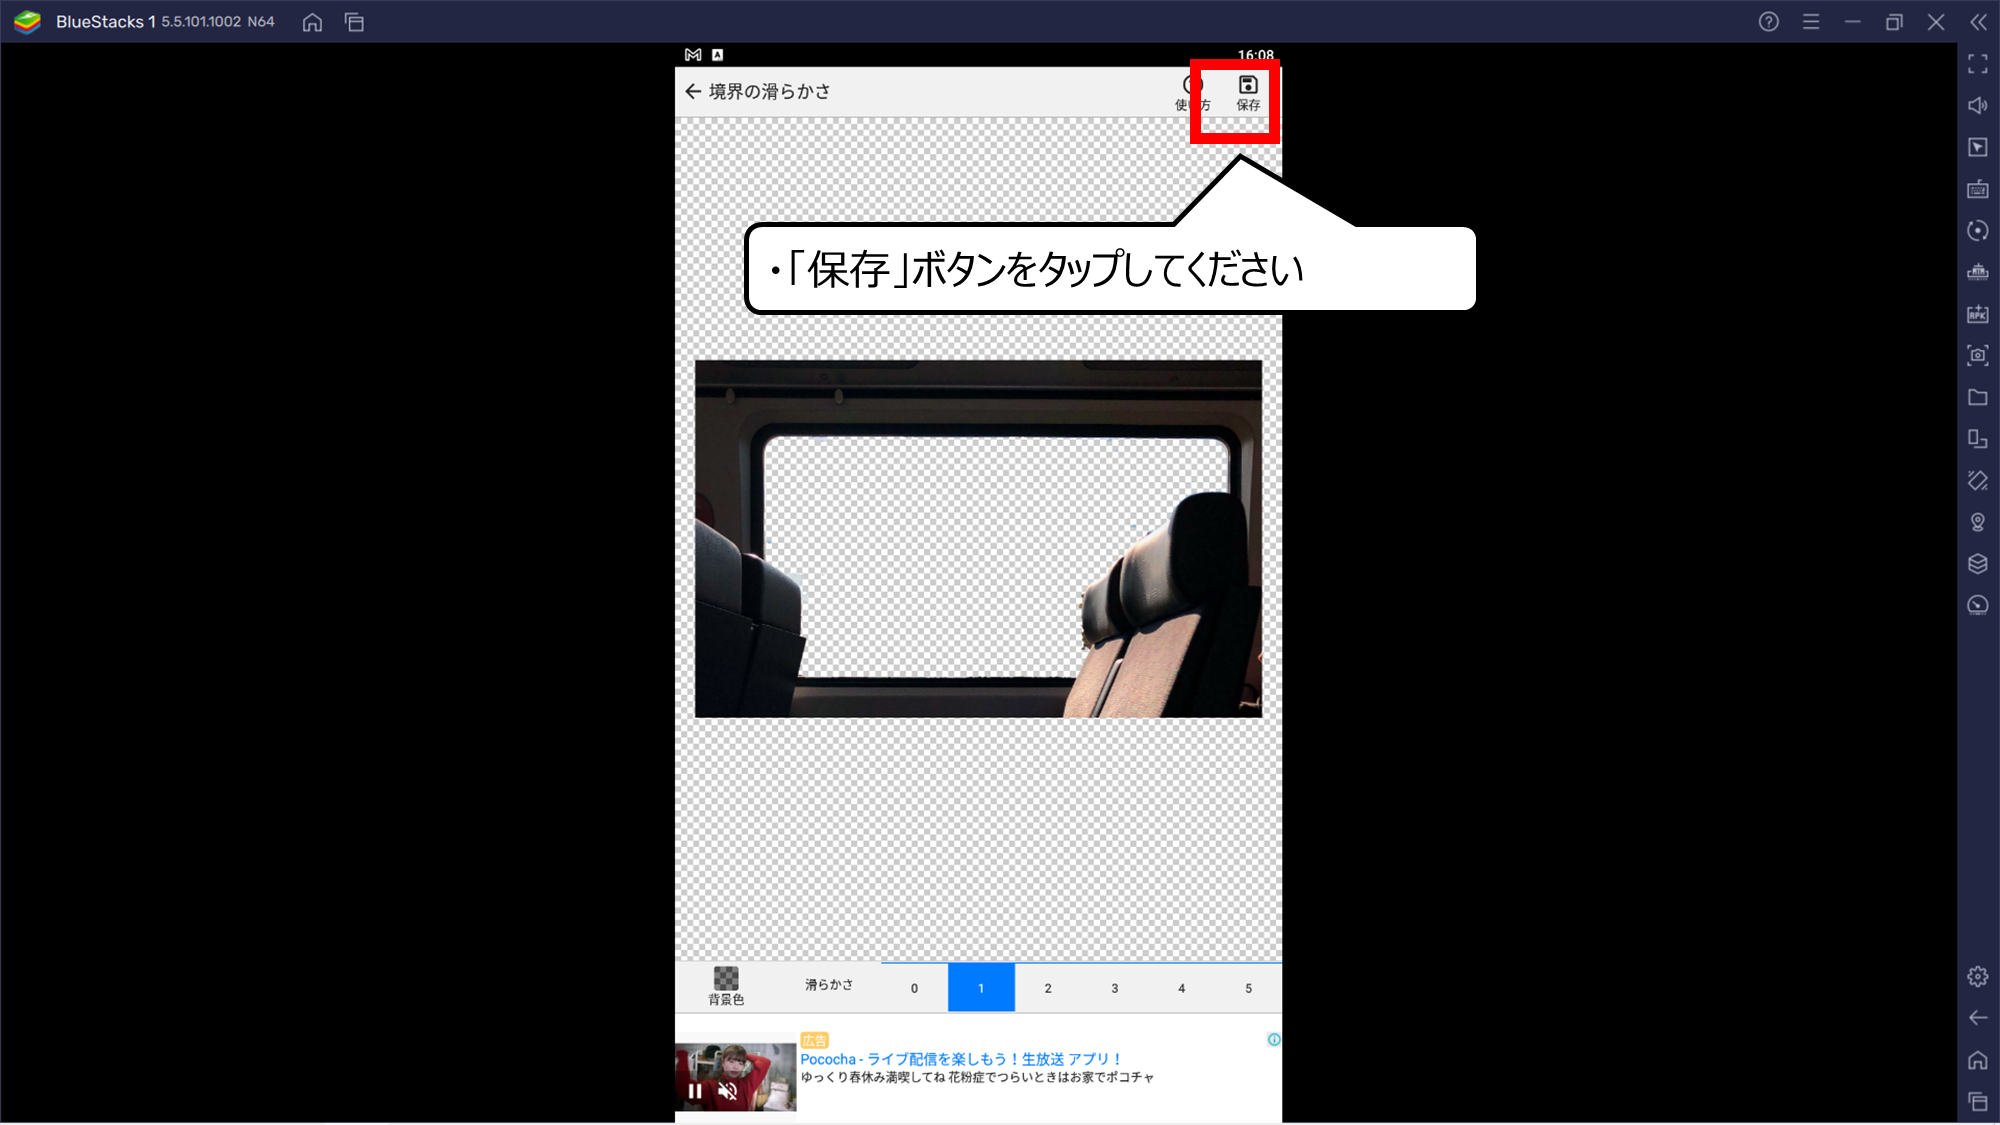
窓の中を透明にできたら保存します
・「保存」ボタンをタップしてください
・アイビスペイントで2枚の写真を合体させよう
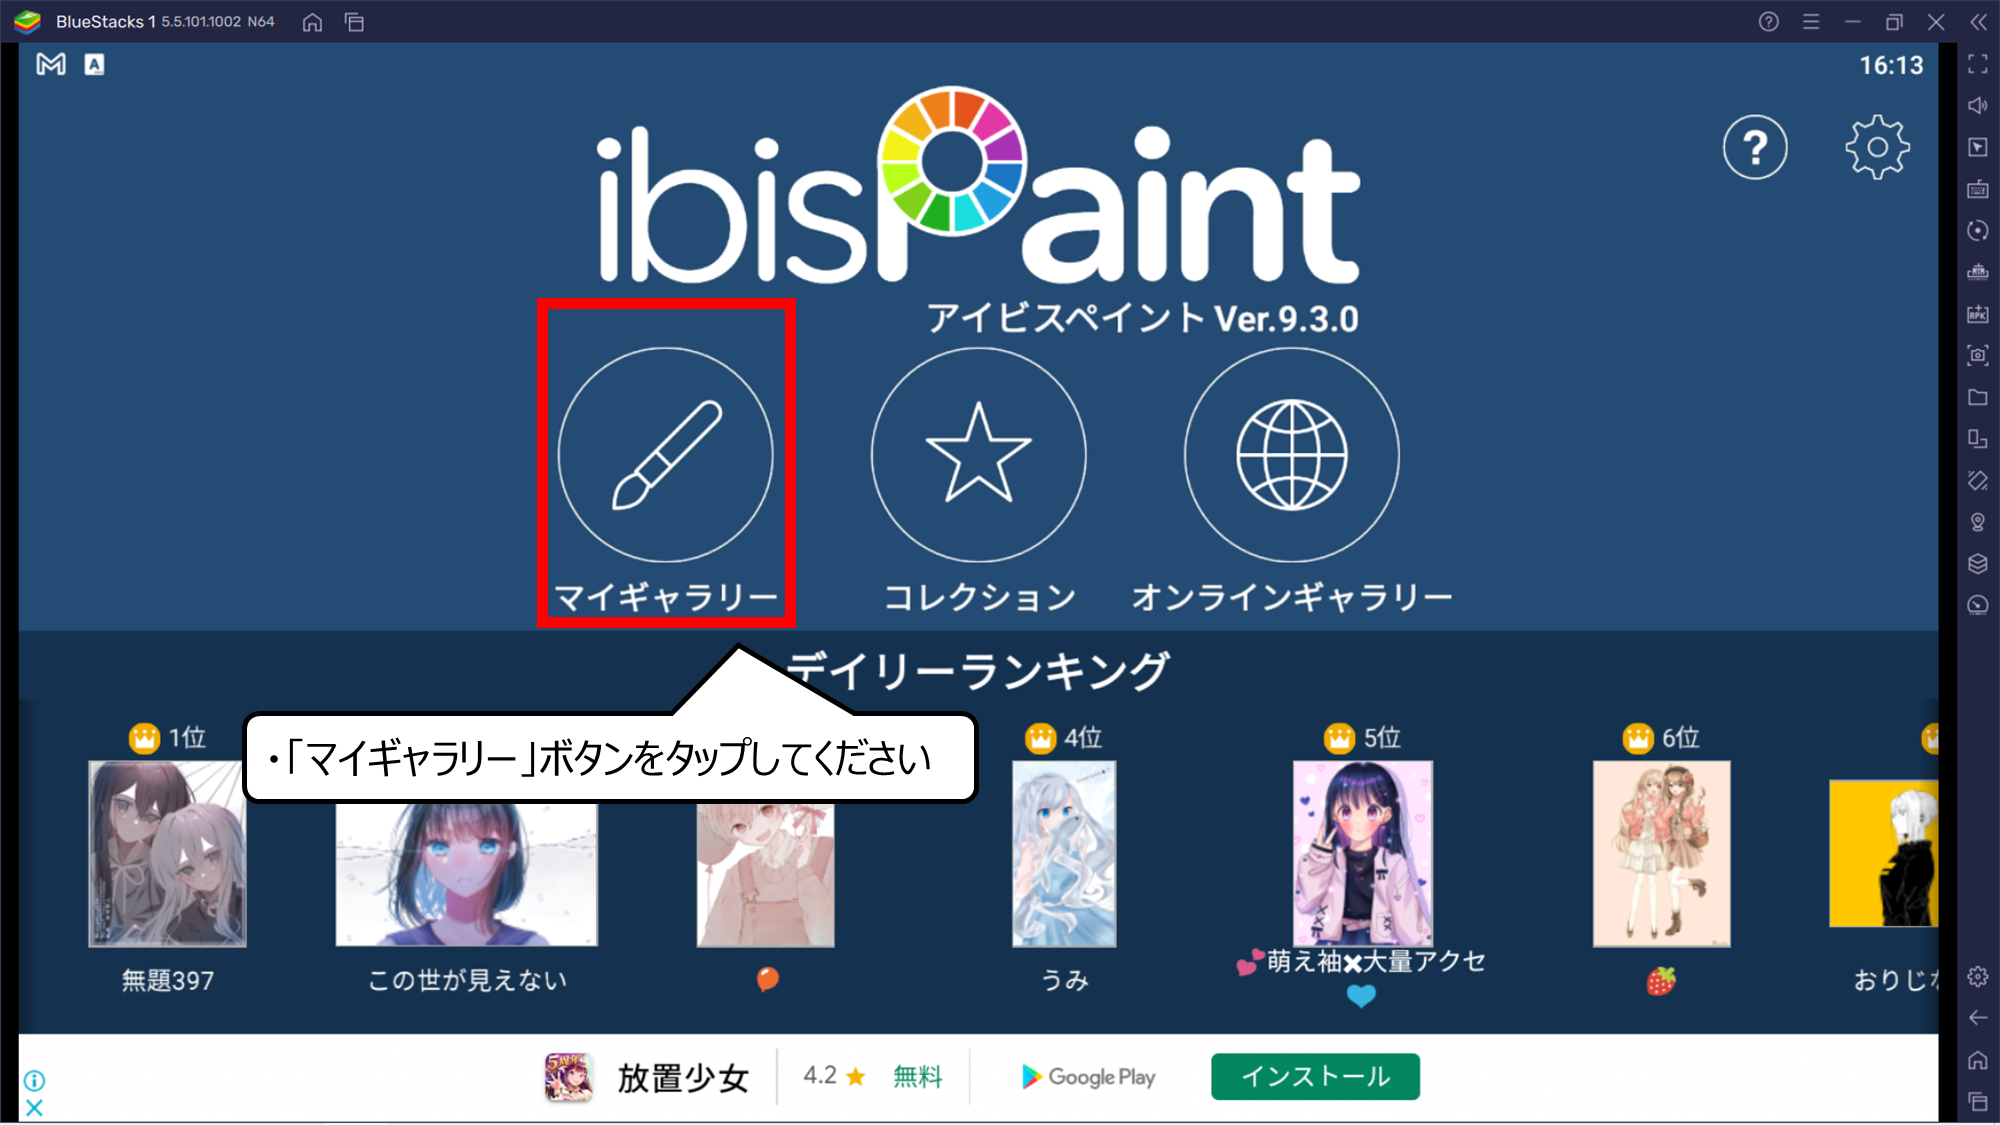
はじめに写真のファイルを読み込みます
・「マイギャラリー」ボタンをタップしてください
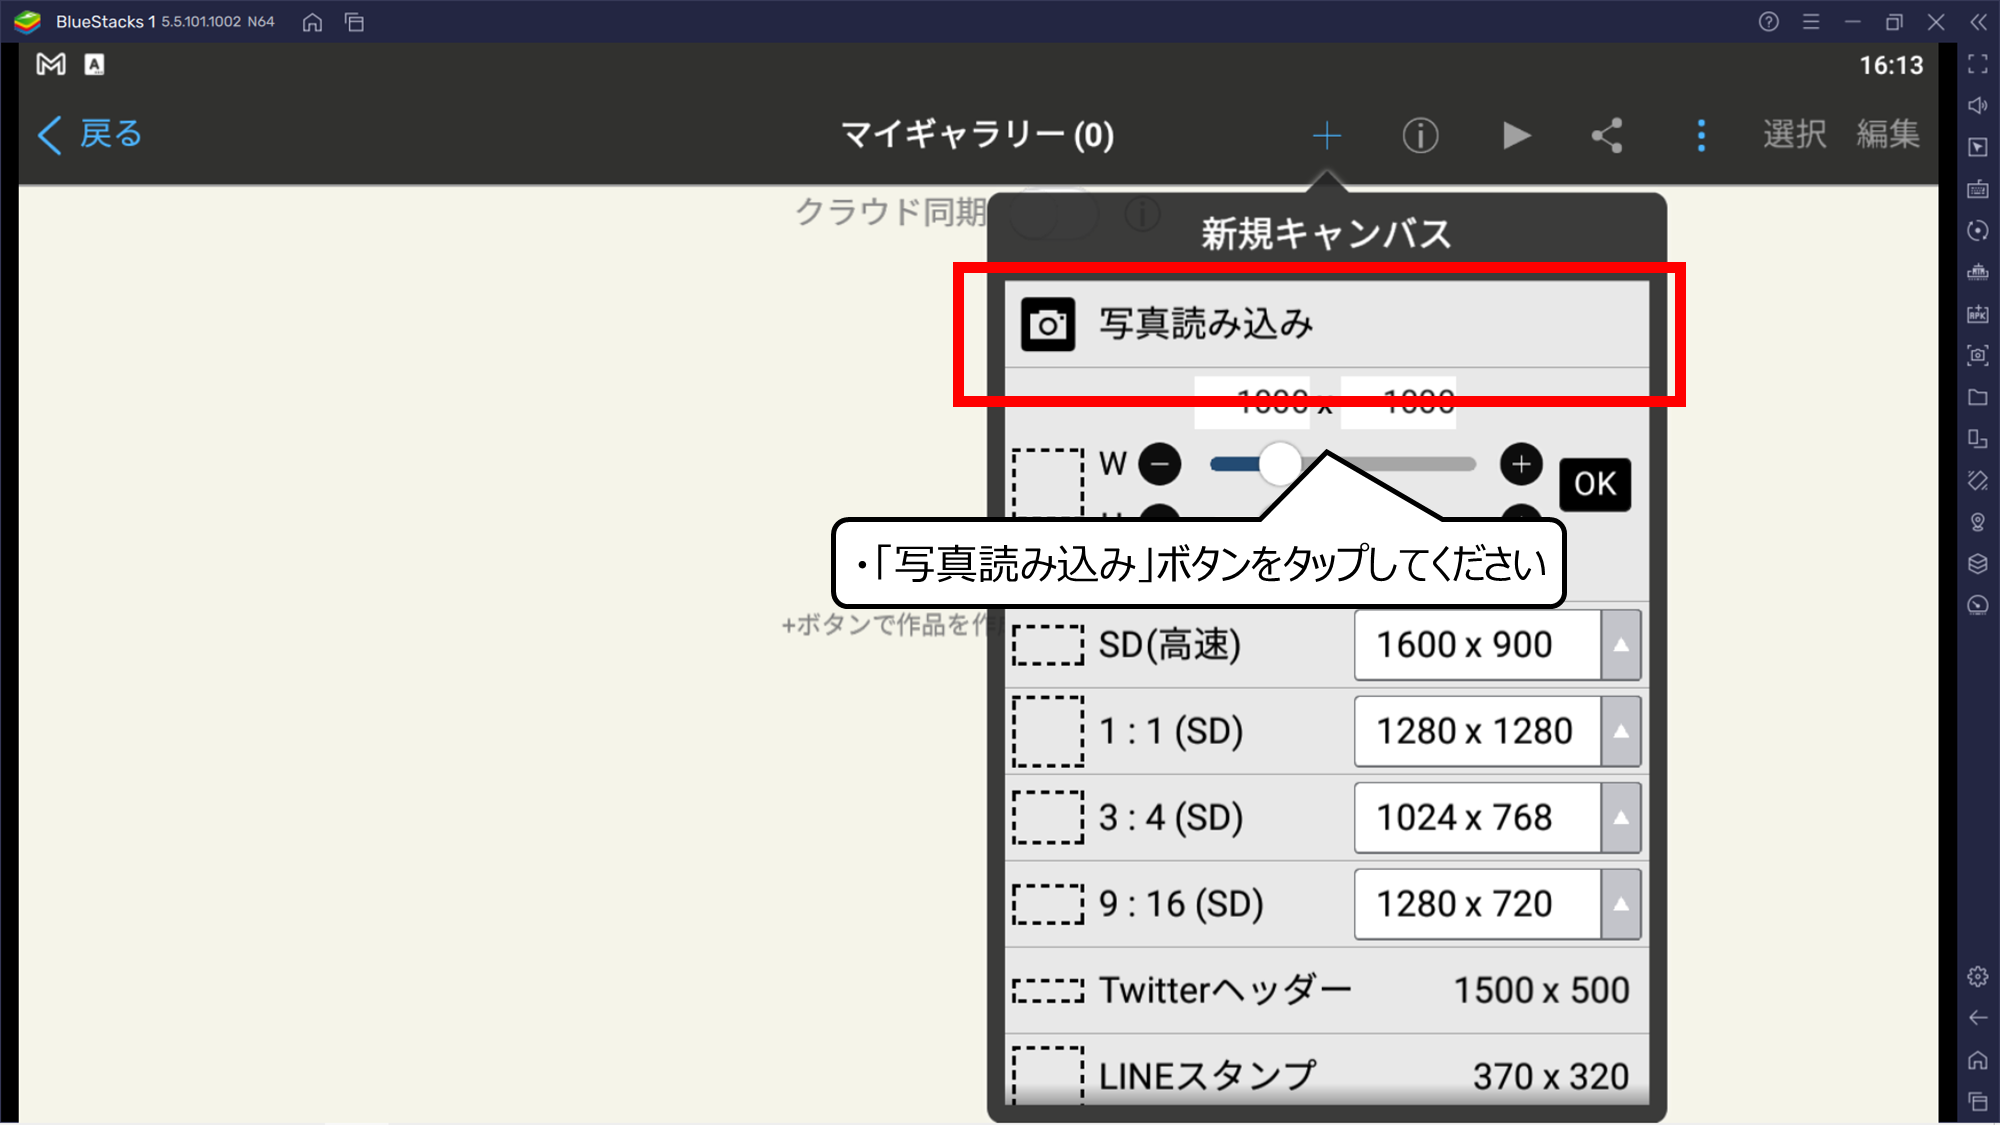
写真読み込みボタンをタップすると、ファイルを開く画面になります
・「写真読み込み」ボタンをタップしてください
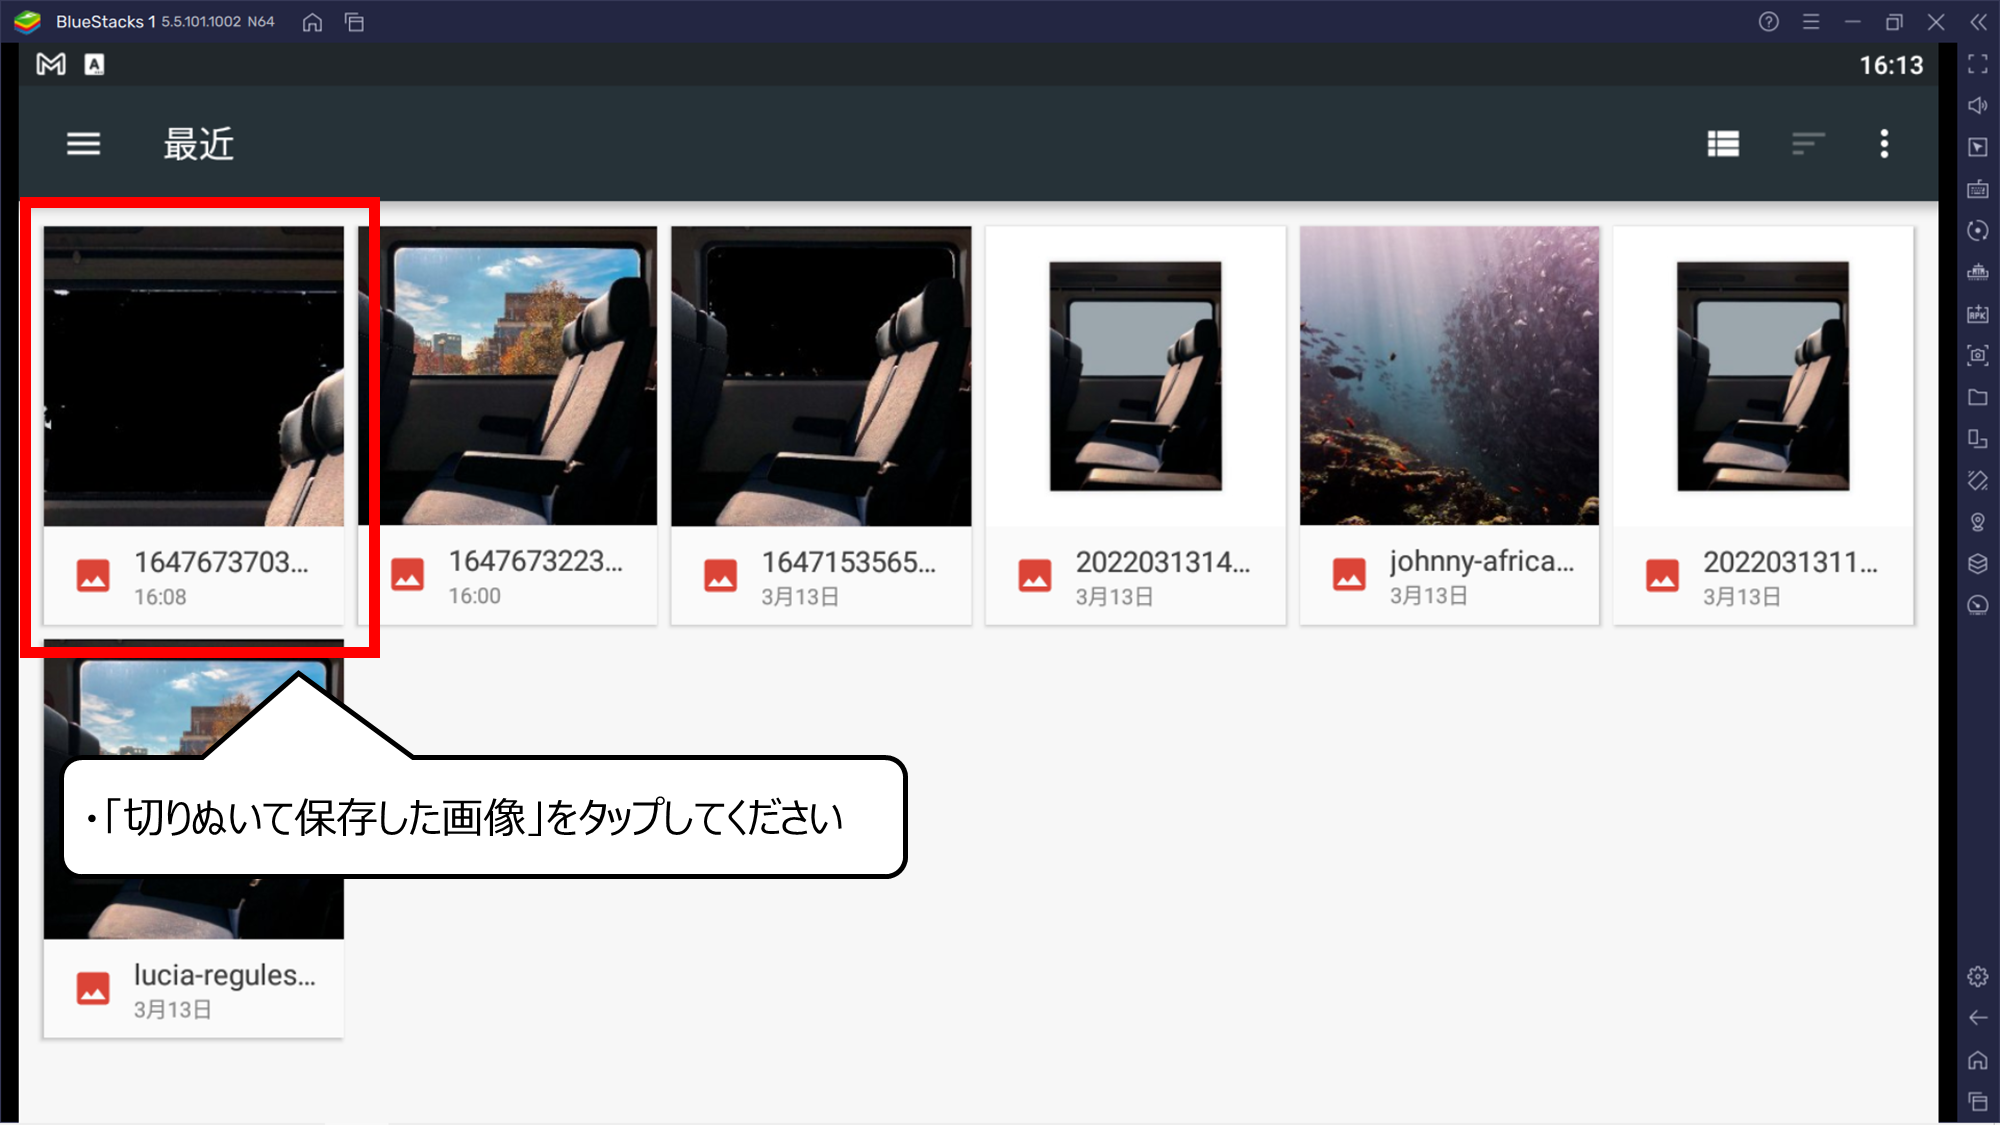
保存した画像のファイルをタップしてください
・「切りぬいて保存した画像」をタップしてください
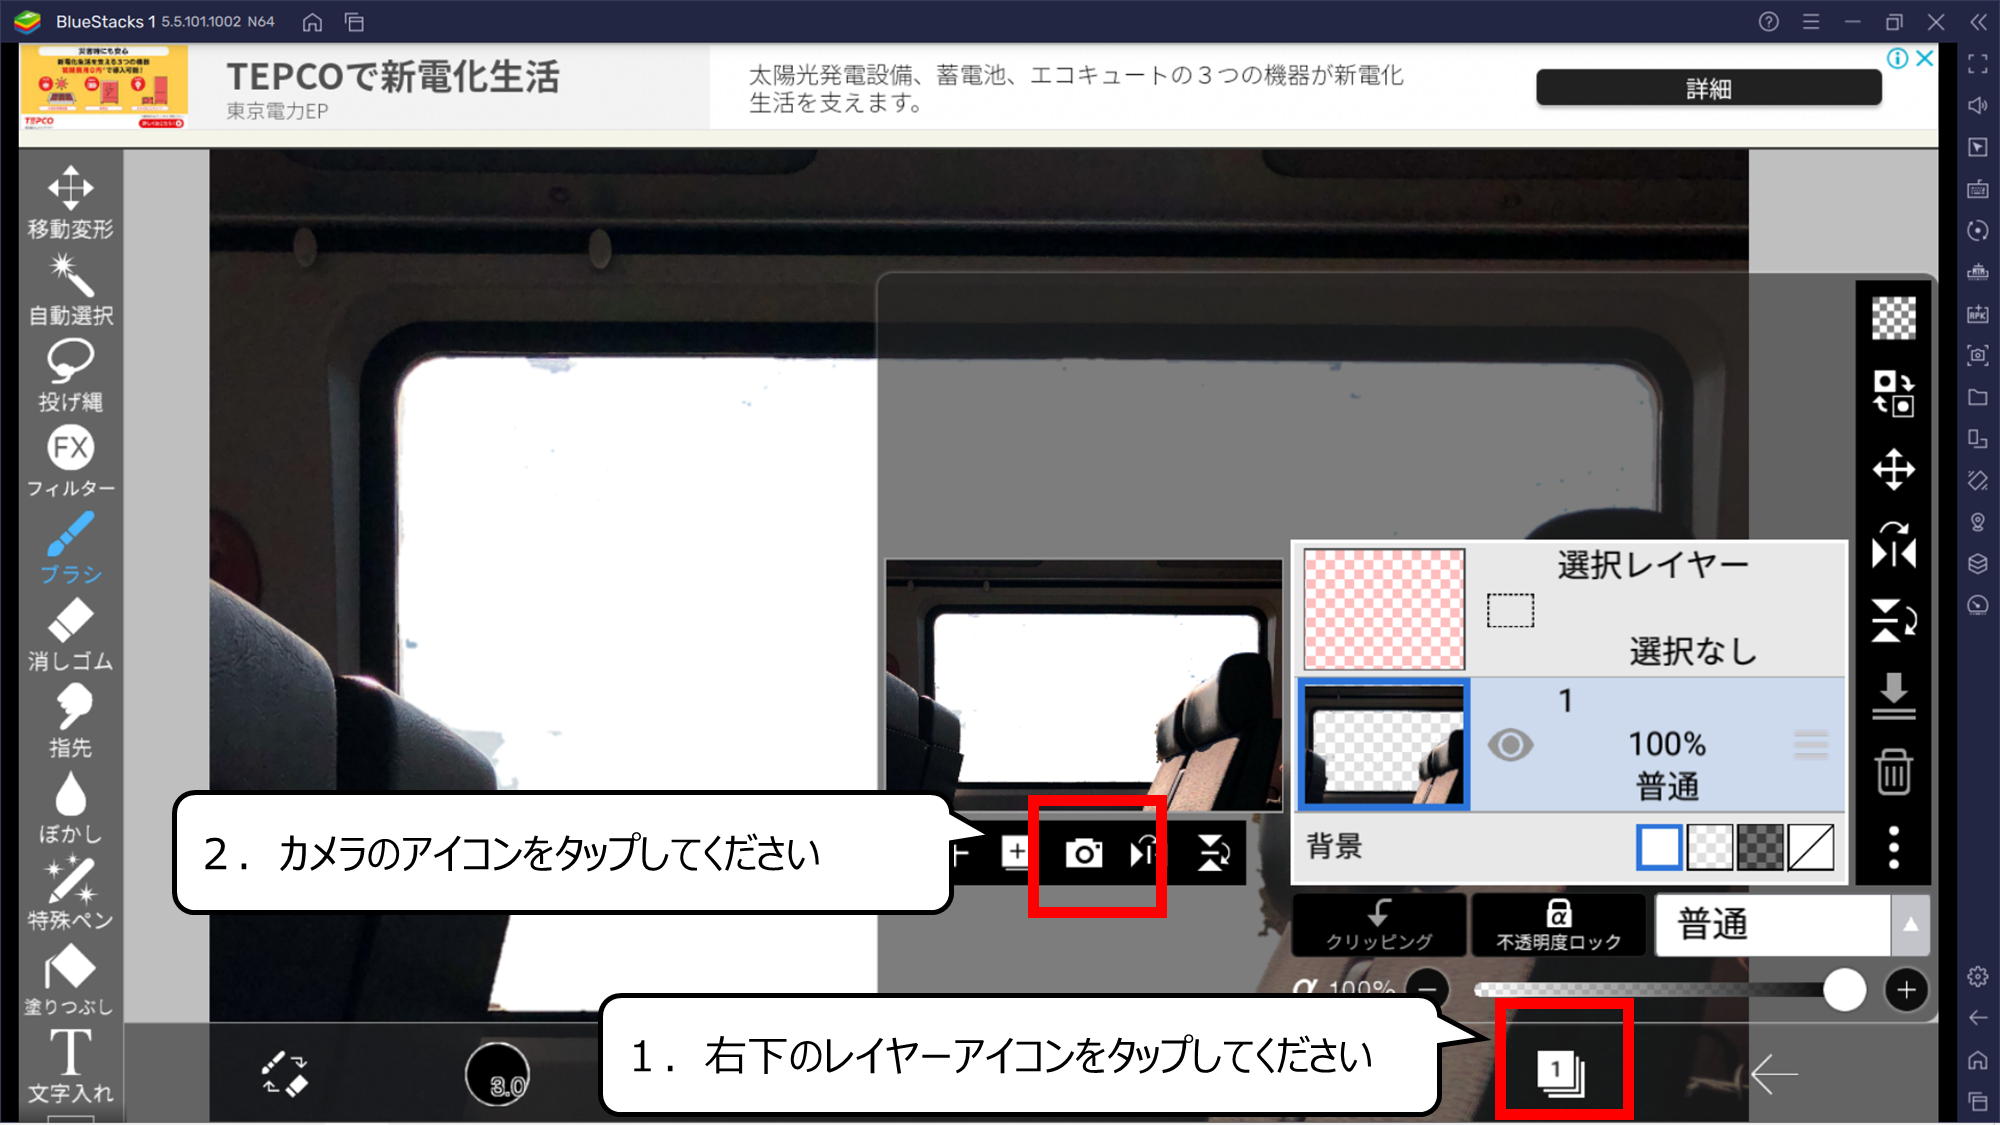
2枚目の画像を開く用意をします
1.右下のレイヤーアイコンをタップしてください
2.カメラのアイコンをタップしてください
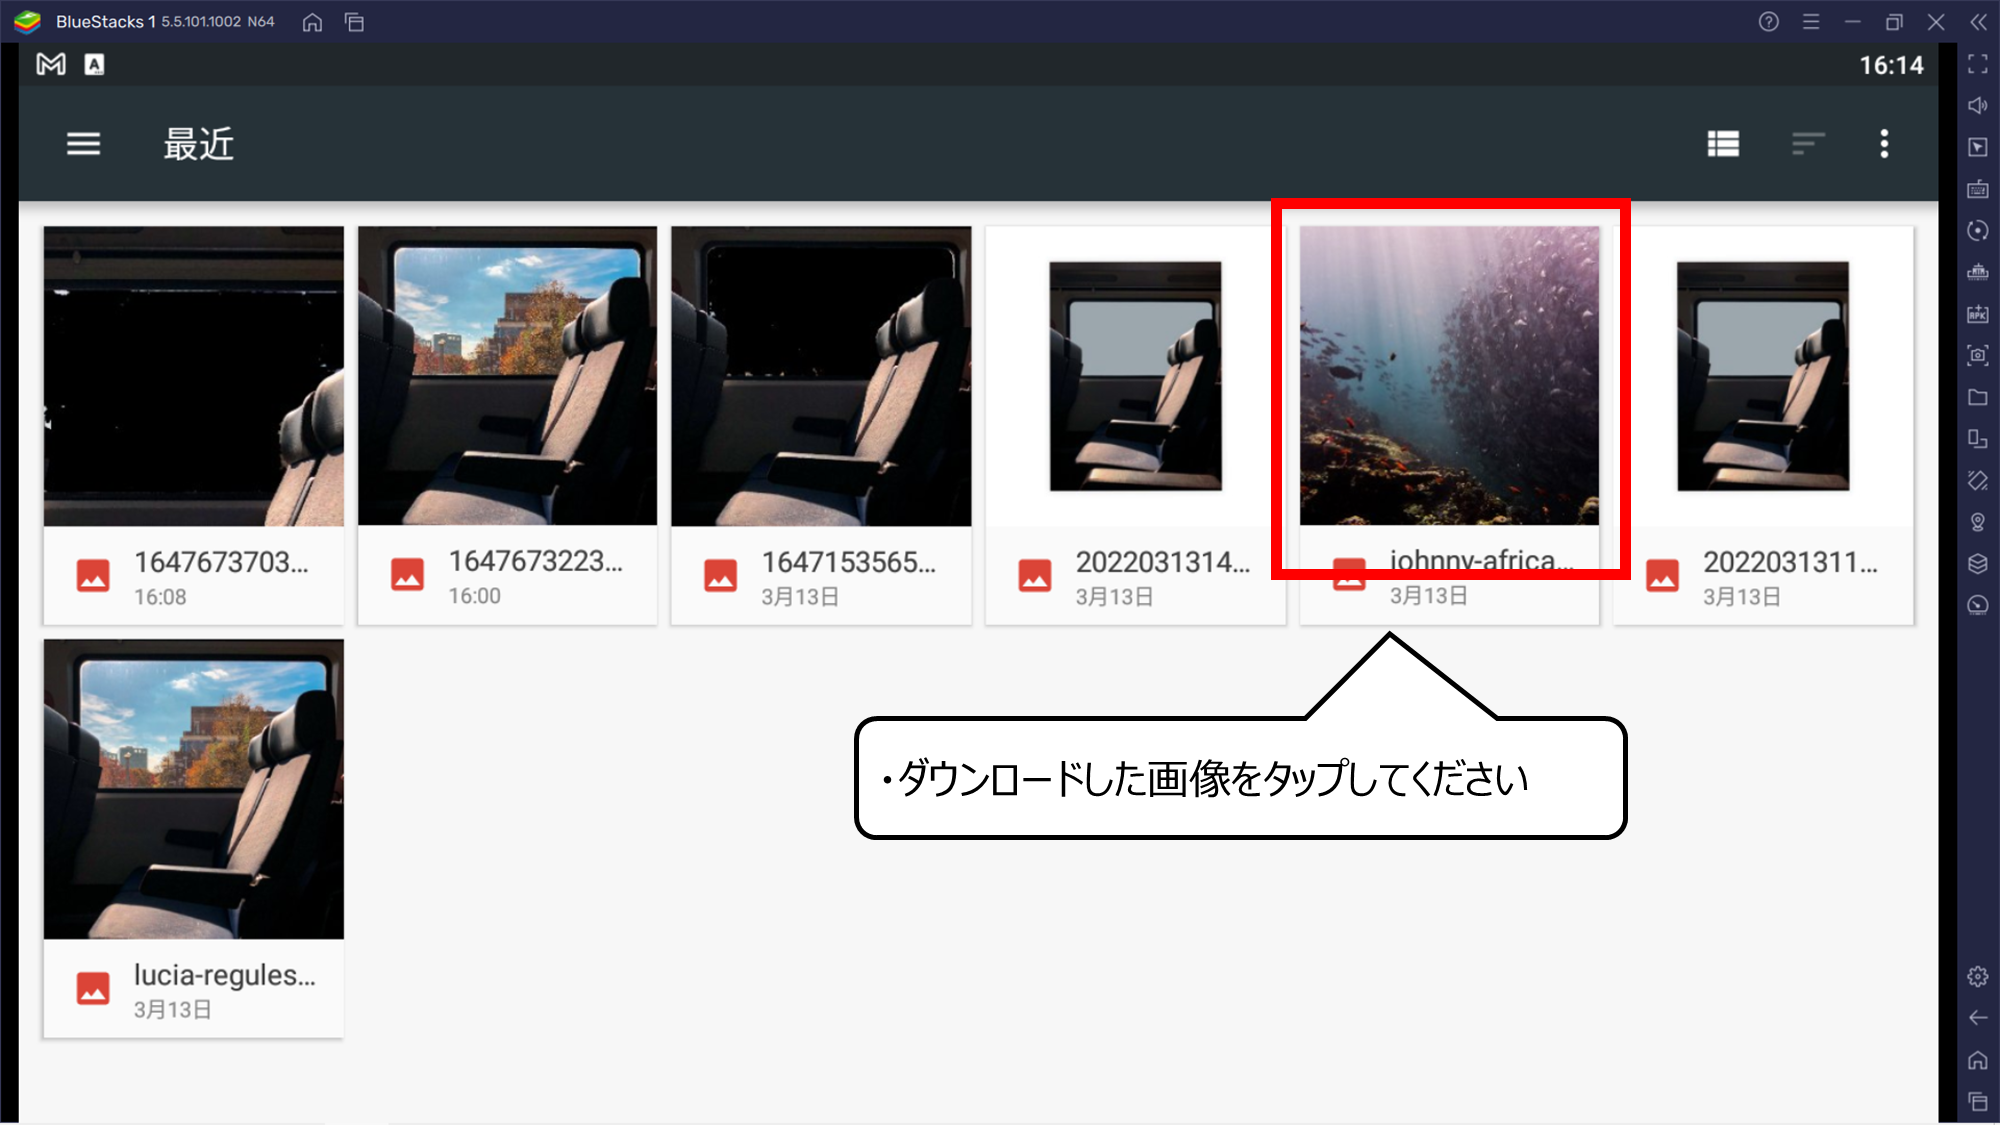
2枚目の写真をタップしてください
・ダウンロードした画像をタップしてください
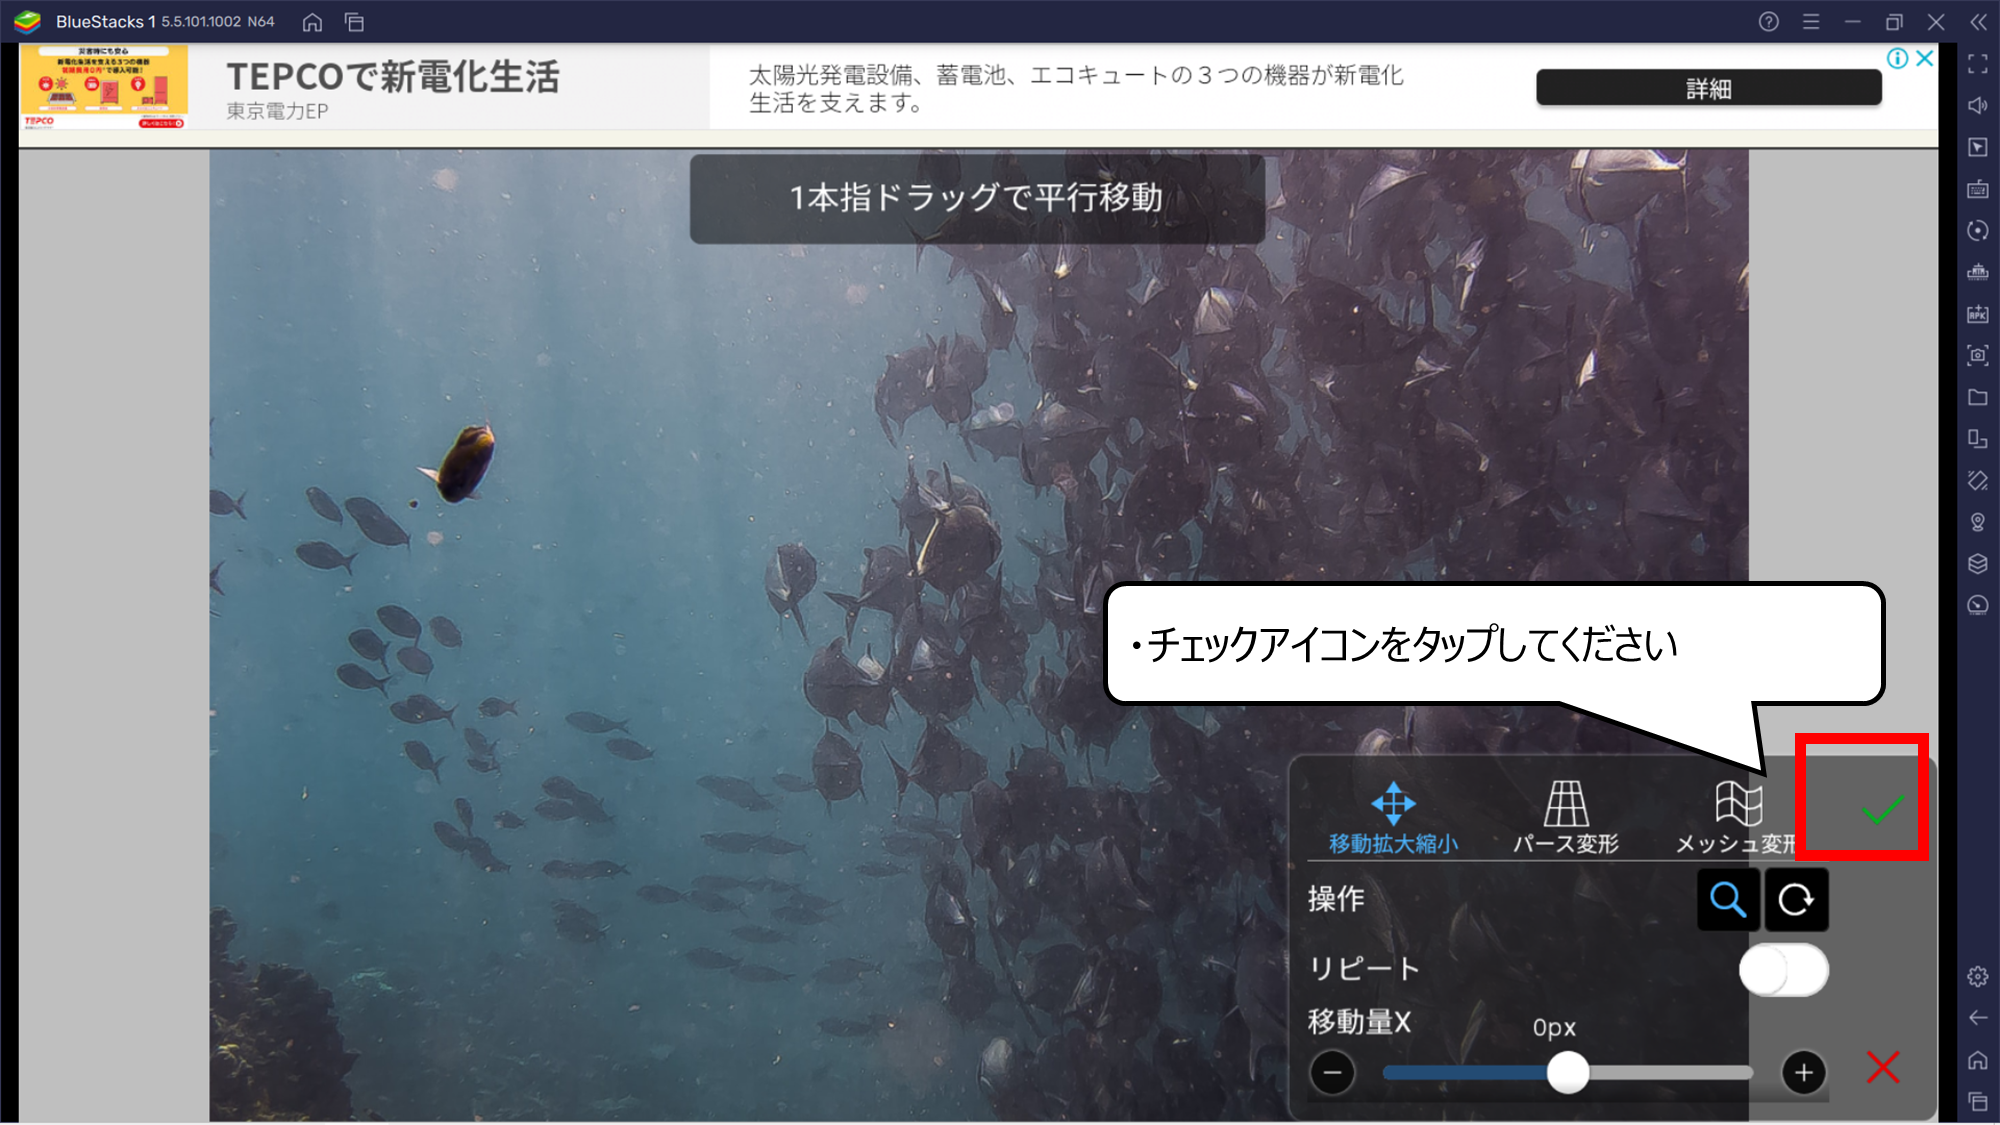
大きさは変えずに読みこみます
・チェックアイコンをタップしてください
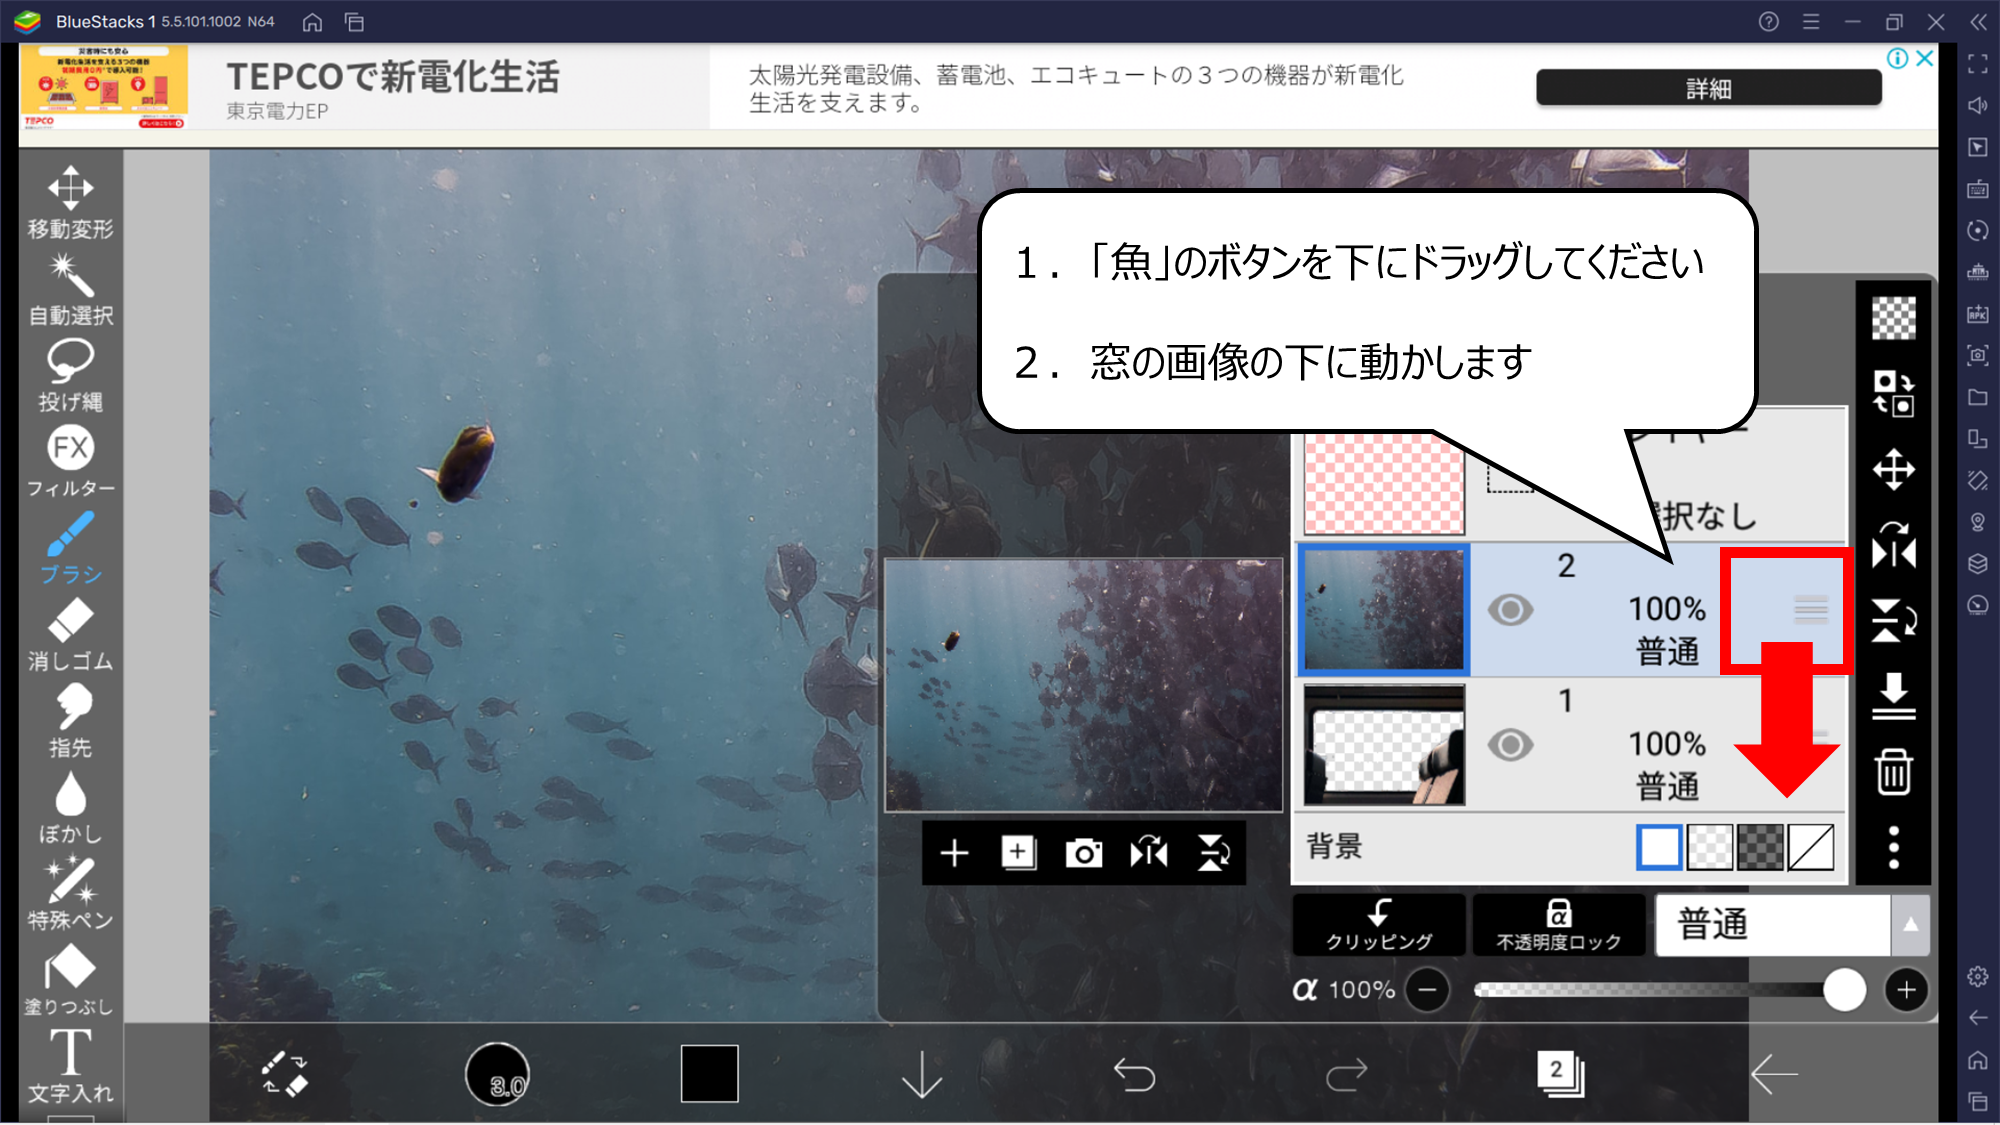
窓の中に使う魚の写真は、一番下に動かします
1.「魚」のボタンを下にドラッグしてください
2.窓の画像の下に動かします
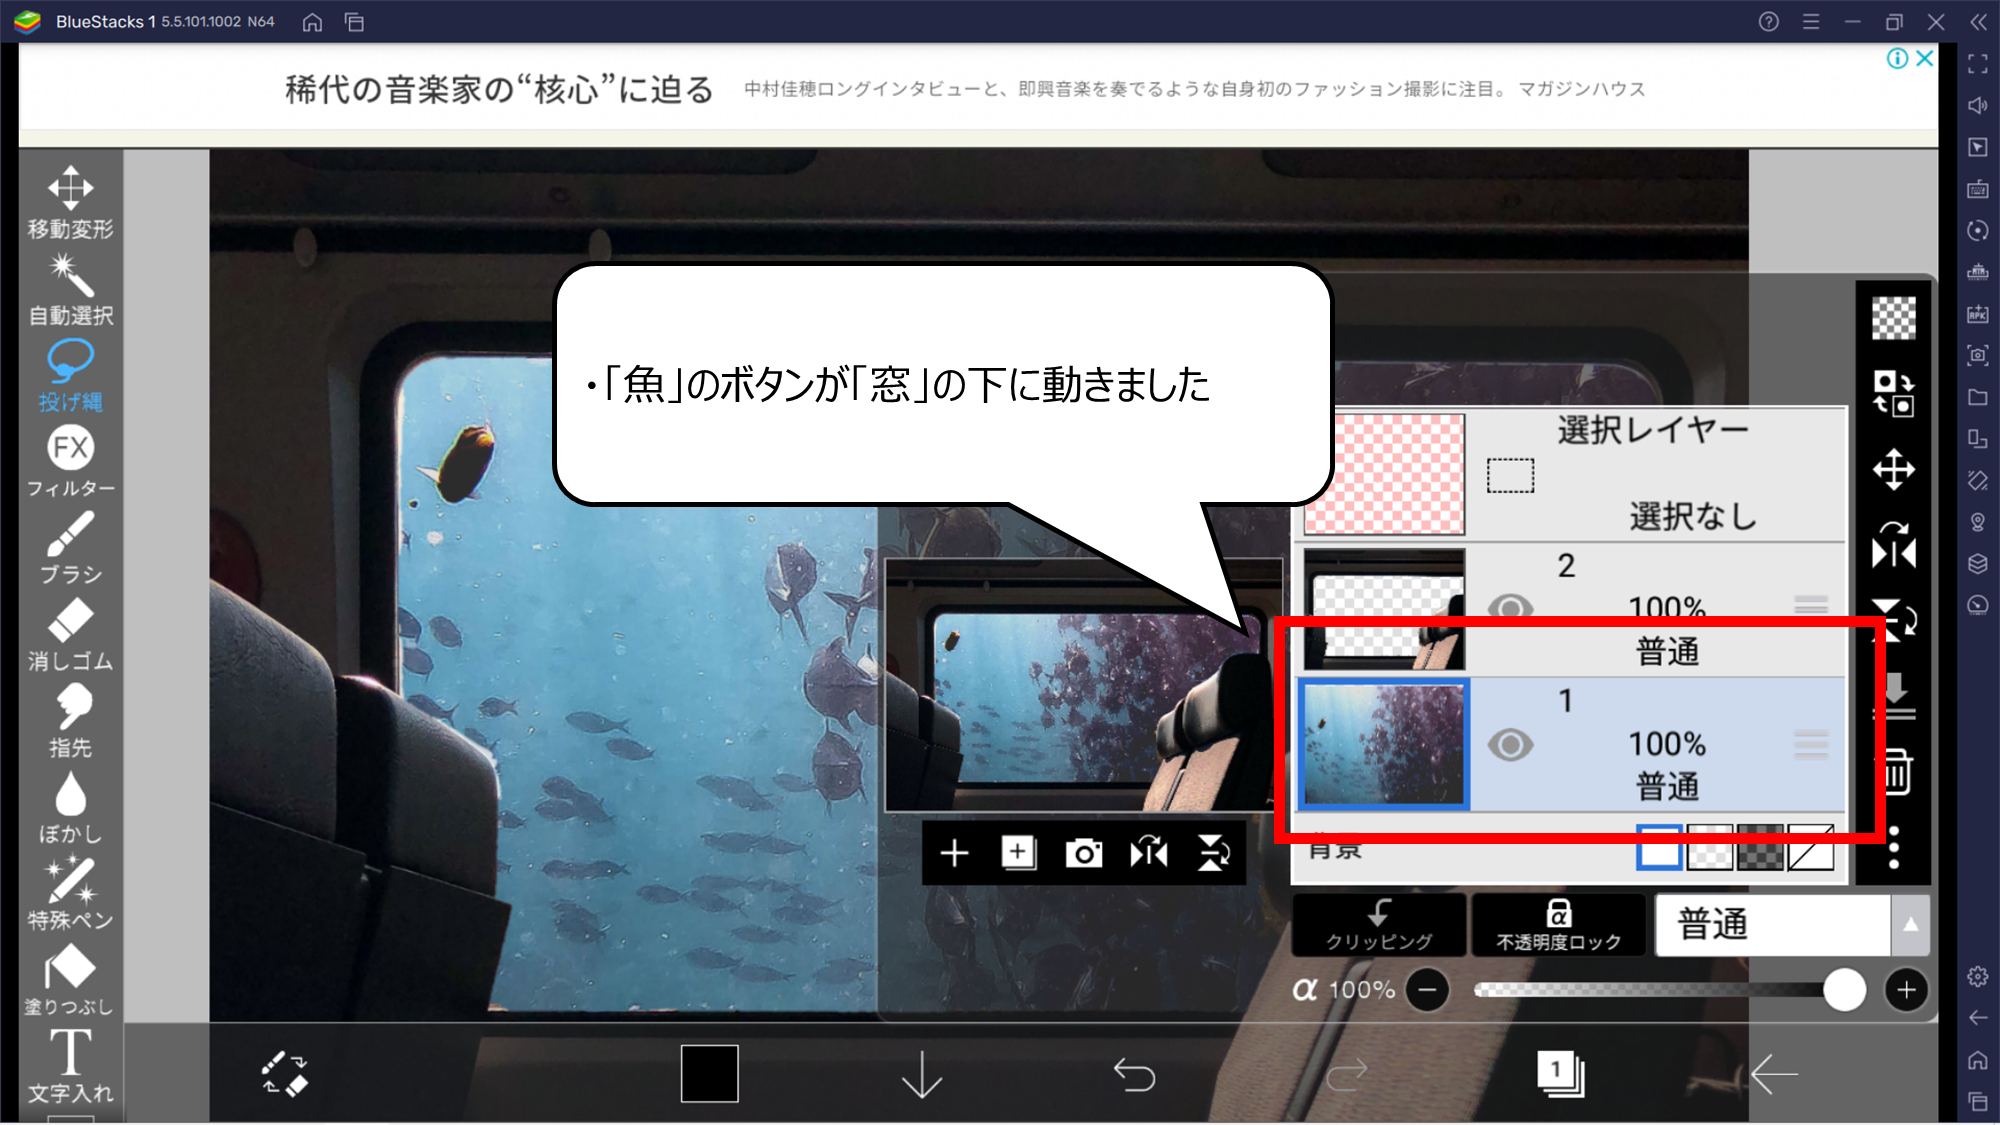
魚の写真を一番下に動かしました
・「魚」のボタンが「窓」の下に動きました
・フィルターを使って画像の明るさや色を変えよう

フィルターを使い、画像の明るさ、色を変えます
1.窓が魚の絵に変わりました
2.フィルターボタンをタップしてください

明るさを変えるパネルがあらわれました
1.「すべて」ボタンをタップしてください
2.「明るさ」ボタンをダブルタップしてください
3.明るさを変えるパネルがあらわれます
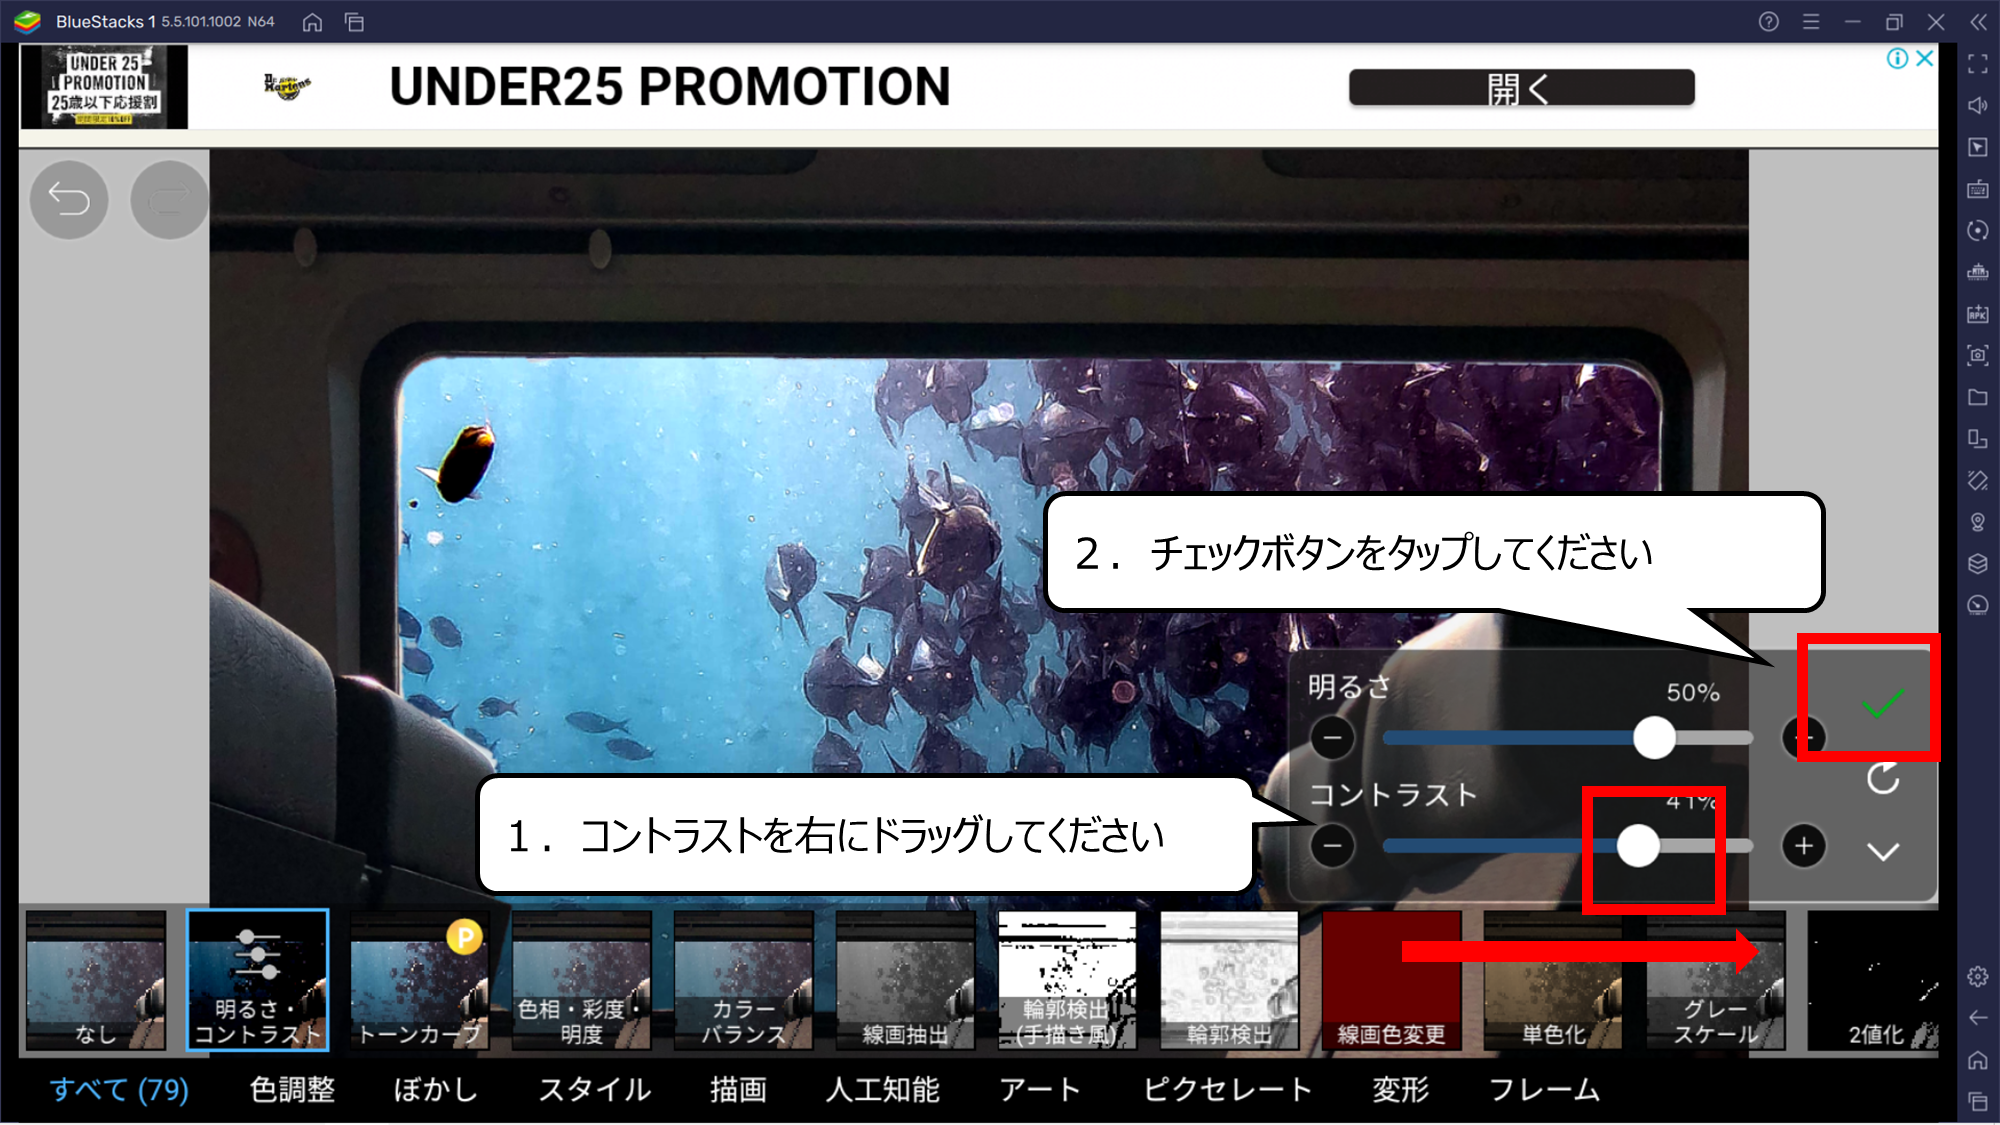
コントラストを動かすと、画像の色がハッキリします
1.コントラストを右にドラッグしてください
2.チェックボタンをタップしてください
・つくった画像を保存しよう
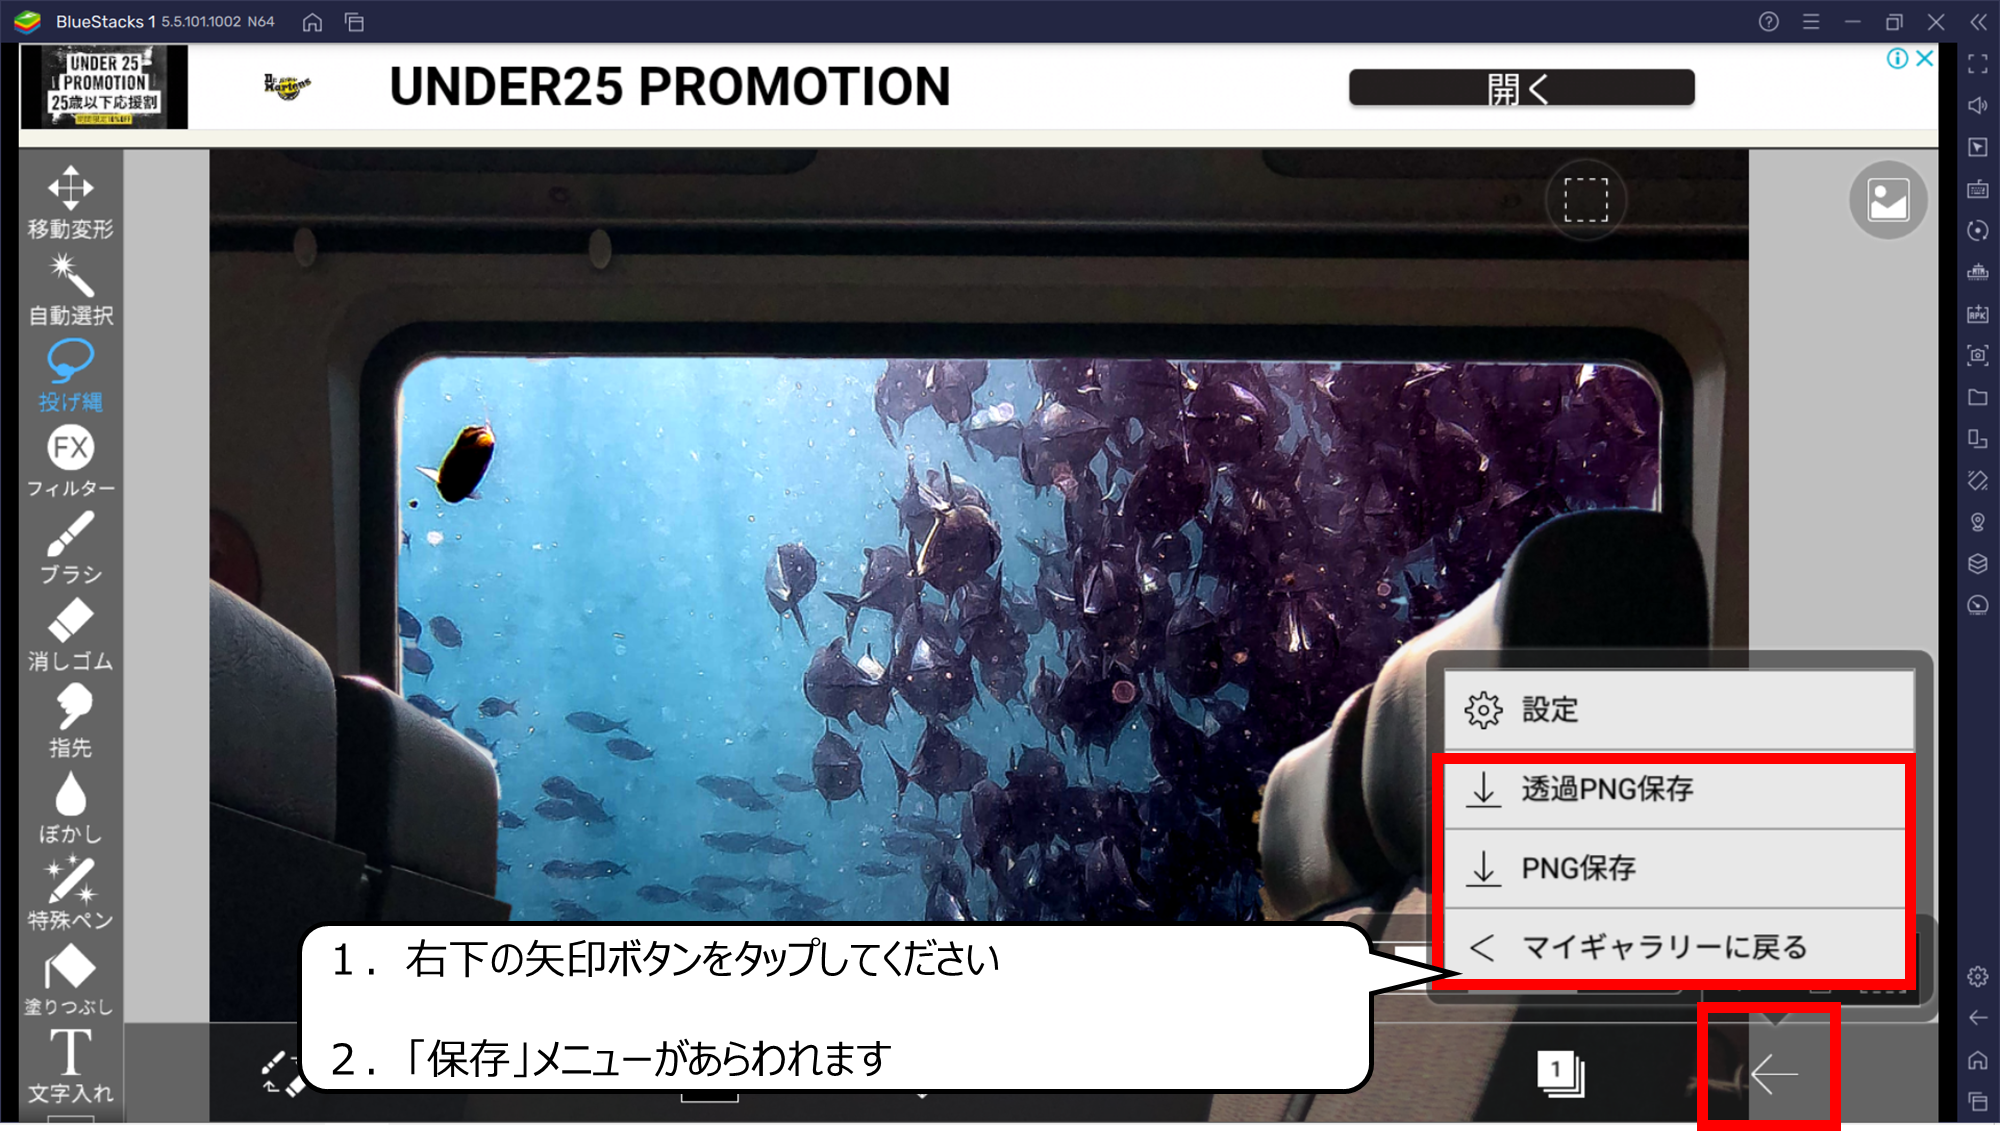
保存ボタンをタップするとイメージを保存できます
1.右下の矢印ボタンをタップしてください
2.「保存」メニューがあらわれます
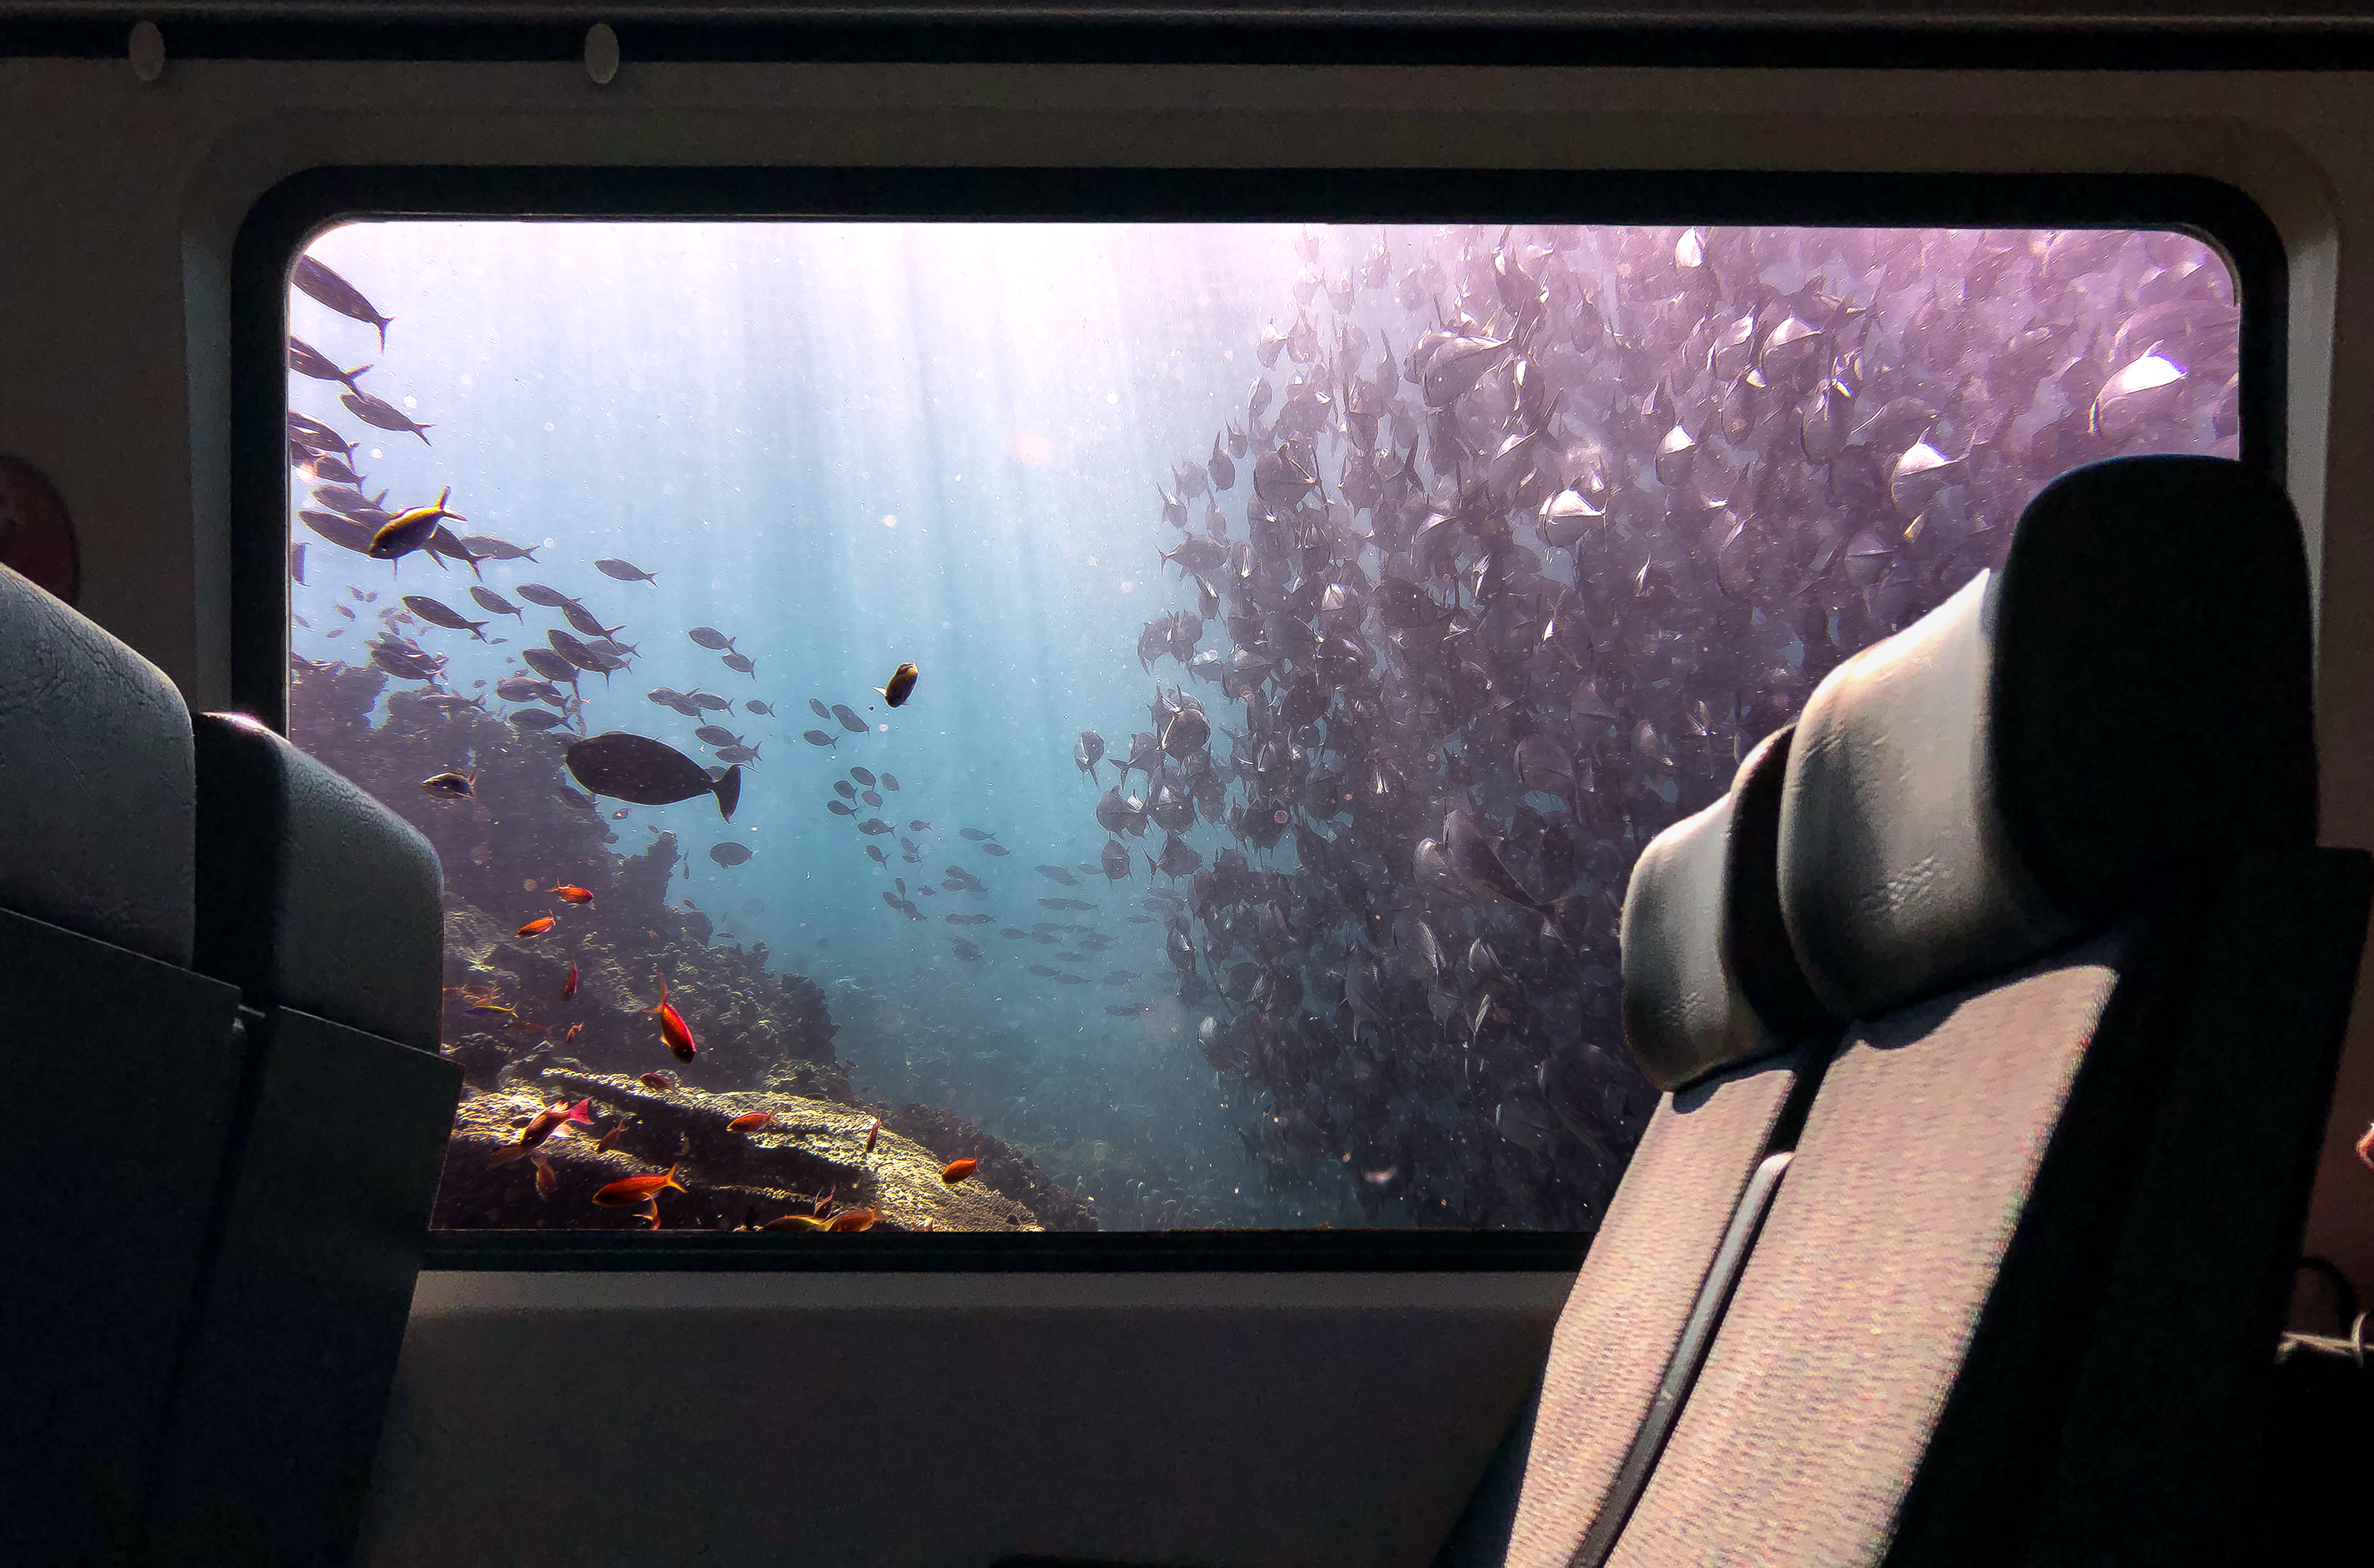
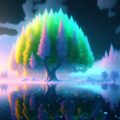
完成した画像です
下の画像はAIを使った画像です
フリー素材ですので、どうぞご使用ください

・まとめ
今回は、無料ソフト「アイビスペイントX」のつかい方と合成画像をつくるテクニックを紹介しました
Youtubeでは、さらにおもしろく絵のつくり方を紹介しています
また、他のページでもCG・映像のつくり方について紹介しています

コメント